


Asking for extra information during checkout
What are custom fields?
The VaocherApp checkout form is designed to ask only for the information that’s absolutely required to complete a gift voucher purchase. By default, it collects essential details such as the purchaser’s name and email address, along with the recipient’s name and email.
Depending on how your business operates, the checkout may also include optional details like a personalised message for the recipient or a postal address for physical delivery.
If you need to capture additional customer information during checkout, you can easily add custom checkout fields in VaocherApp. These custom fields allow you to tailor the gift voucher checkout experience while collecting the exact data your business needs. To do this, head to Custom Fields Settings in your VaocherApp dashboard.
How to create custom field
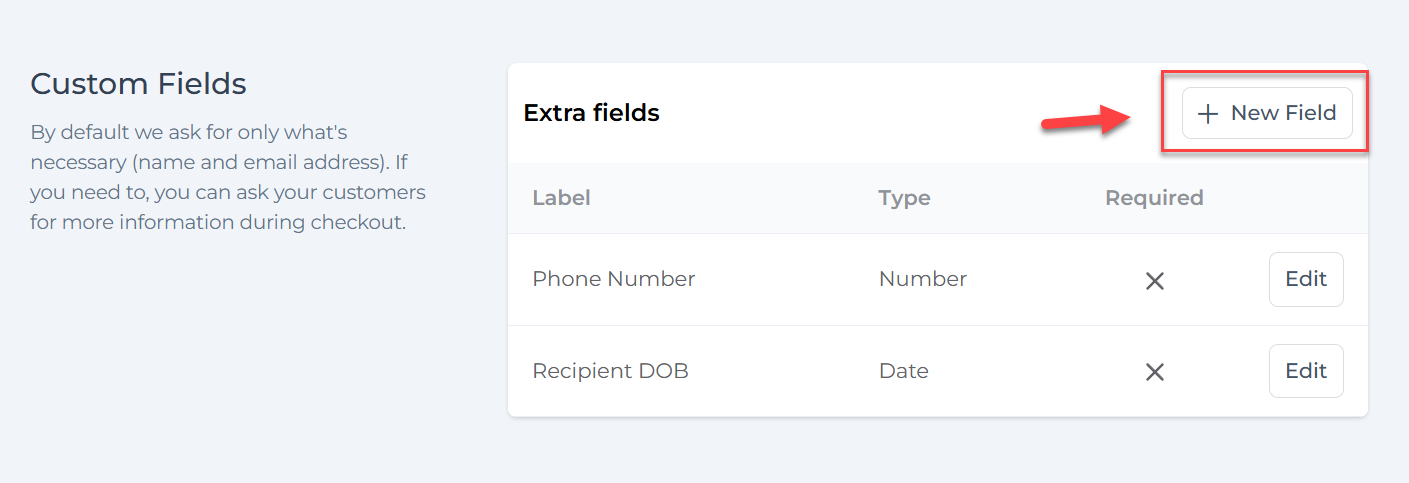
To create a new custom field for your checkout form, log in to your VaocherApp dashboard and navigate to Settings → Checkout. Scroll down to the Custom Fields section, then click the +New Field button.
You can also jump straight to the setup page by clicking here.

A common use case for custom fields is collecting a guest’s phone number during checkout. Follow the example below to create a custom field that captures the purchaser’s or recipient’s phone number as part of the gift voucher order process:

💡 When deciding how to label your extra fields, please be clear and specific about what information you are requesting. For example, “Phone number” can be ambiguous. The purchaser may not know whether you mean their phone number or the recipient’s. Clear labelling helps reduce confusion and improves checkout completion rates.
Once created, this is how the custom phone number field appears during checkout:

Custom field type
Choosing the correct custom field type helps you collect accurate information while keeping the checkout process smooth and user-friendly for your guests.
VaocherApp supports multiple types of custom fields, giving you flexibility to match different business needs and checkout scenarios.
There are 5 different types of custom fields:
-
Single-line text: used to capture short inputs, including alphabetical (a–z), numeric (0–9), special characters (e.g. @#$%^…), or even emojis (😍 🤗 🤠 👋 🎉).
-
Multi-line text: similar to single-line text, but allows line breaks. Ideal for longer notes or messages.
-
Number: restricts input to numbers only (0–9).
-
Checkbox: useful for confirmations or acknowledgements, such as agreeing to terms & conditions or confirming vaccination status.
-
Dropdown list: allows guests to select from predefined options you set.
-
Date: commonly used for birthdays, preferred dates, or future scheduling.


- Date & time: collects both date and time in one field, commonly used for appointments or bookings.
Here’s how these different custom field types look when displayed in the checkout form:

Visibility of the captured data
Any information collected through custom fields is automatically saved and linked to the gift voucher. By default, this data is visible when viewing the voucher details inside your VaocherApp dashboard:

Required custom fields
By default, all custom fields are optional. This means customers can complete the checkout without filling them in.
If a specific piece of information is essential, you can make a custom field compulsory by selecting Yes in the Is this required? section when creating or editing the field.
When a custom field is marked as required, guests must provide input before they can continue with checkout. If they leave it blank, an error message will appear:

⚠️ Note: Avoid overusing required custom fields. Asking for too much information can slow down the checkout process and cause customers to abandon their purchase, which may impact conversion rates and revenue.
Conditional custom fields
By default, custom fields appear on the checkout form for all items. However, VaocherApp allows you to show or hide custom fields based on which item a customer selects.
When creating or editing a custom field, use the When to ask for this section to control whether the field appears only for specific menu items.

Visibility of custom fields
Custom fields are visible in both the checkout form and dashboard by default. If you don’t want a specific field to appear during checkout, you can hide it by selecting Hidden on checkout form.

When enabled, the custom field will not appear on the checkout form, regardless of any display conditions.
For example: Your staff issue gift vouchers directly from the VaocherApp dashboard. For reporting purposes, you want to track who issued each voucher and when. You can create two custom fields, one for staff name and one for date & time, and mark both as hidden so they are not shown to customers during checkout.