


Enabling Email Notifications in VaocherApp
Email notifications keep you and your team updated on important activities within your VaocherApp account. By turning on these alerts, you can stay on top of new orders, voucher redemptions, stock changes, and other critical events, ensuring timely responses and smooth operations.
This step-by-step guide will help you enable and manage email notifications efficiently.
Why Turn On Email Notifications?
Email notifications let you monitor gift card sales and voucher actions without constantly checking the dashboard. They provide instant updates about:
- New orders placed by customers (both online and offline payments)
- When a voucher is redeemed
- Copies of order receipts sent to customers
- Failed email deliveries
- Notifications when stock items run out
Activating notifications makes sure you never miss vital events that could impact your business and customers.
How to Enable Email Notifications
Step 1: Log In to Your VaocherApp Account
- Open your browser and visit the VaocherApp Dashboard.
- Enter your username and password to sign in.
Step 2: Access Email Notification Settings
- From the dashboard main menu, click Settings.
- Choose Notifications from the options.
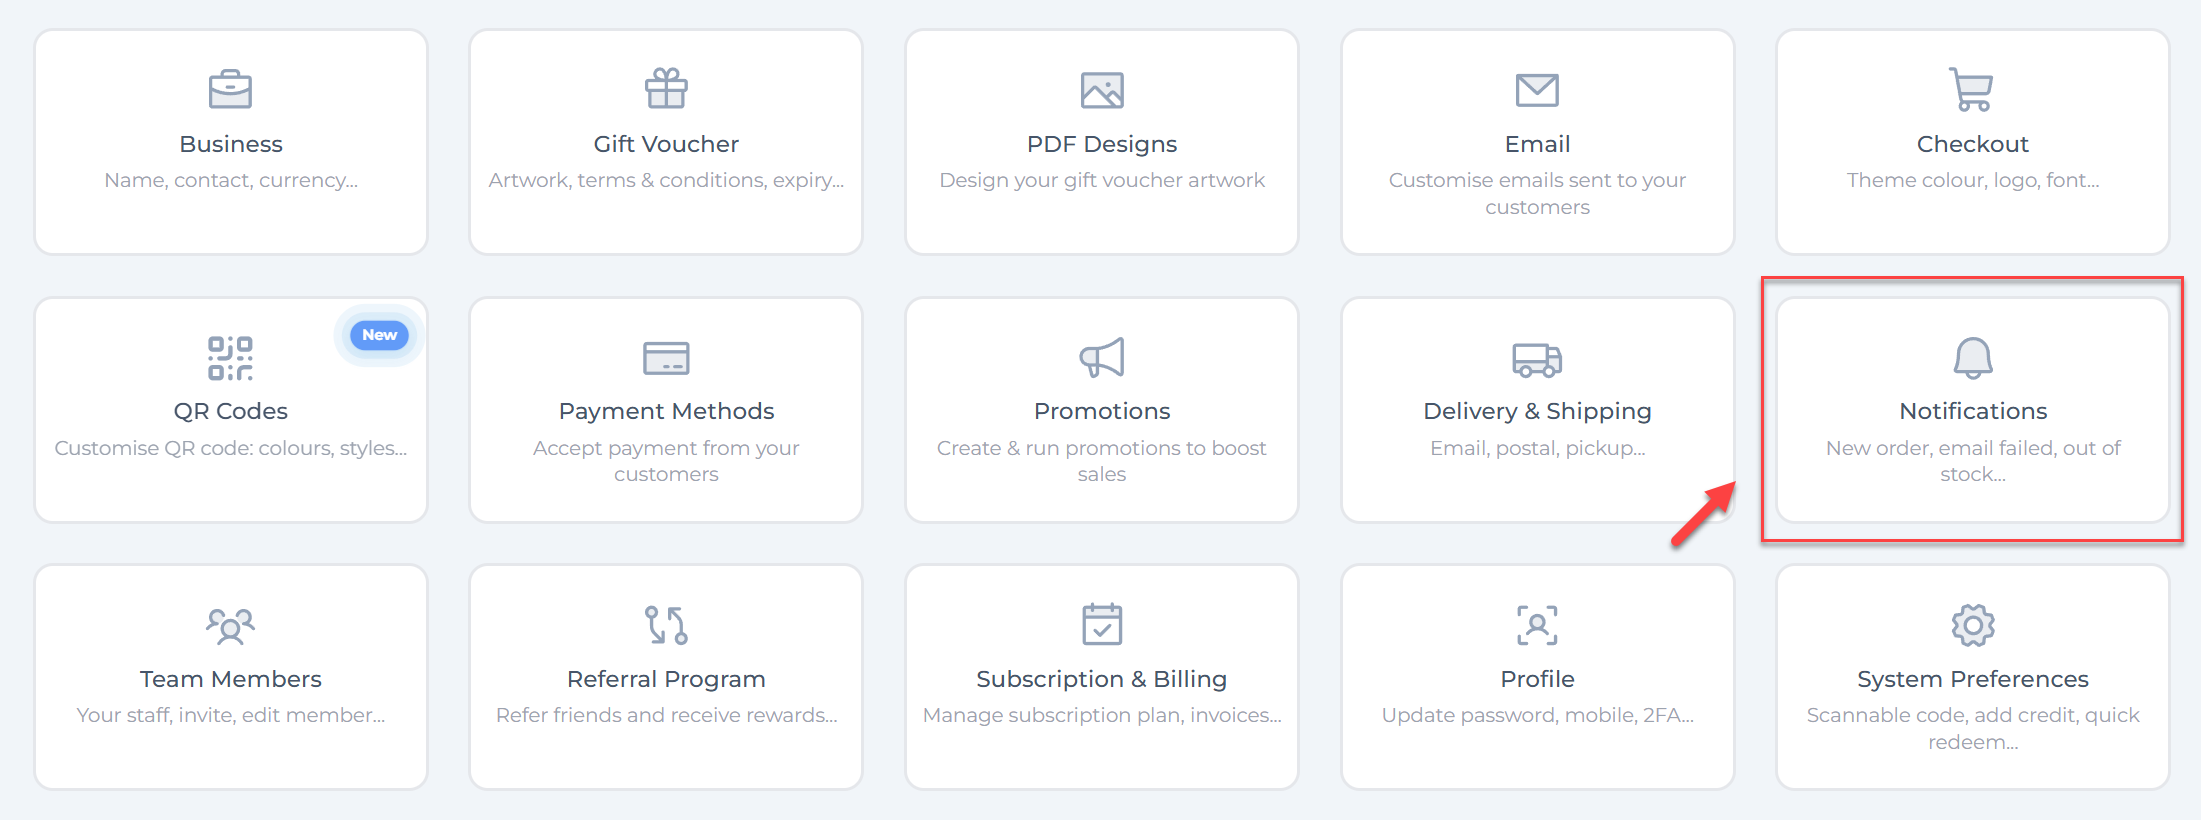
Step 3: Explore Notification Types
On the Email Notifications page, you’ll find different types of notifications you can activate:
- New Pending Order Get an email notification when an offline payment order is placed by customers.
- New Order Get an email notification when a new order is placed by customers.
- Copy of Receipt Get a copy of the receipt when a new order is placed by customers.
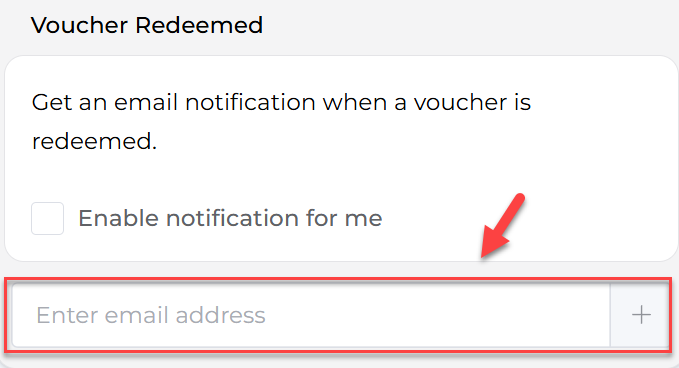
- Voucher Redeemed Get an email notification when a voucher is redeemed.
- Email Delivery Failed Get an email notification when a new order fails to be delivered.
- Item Out of Stock Get an email notification when an item goes out of stock.
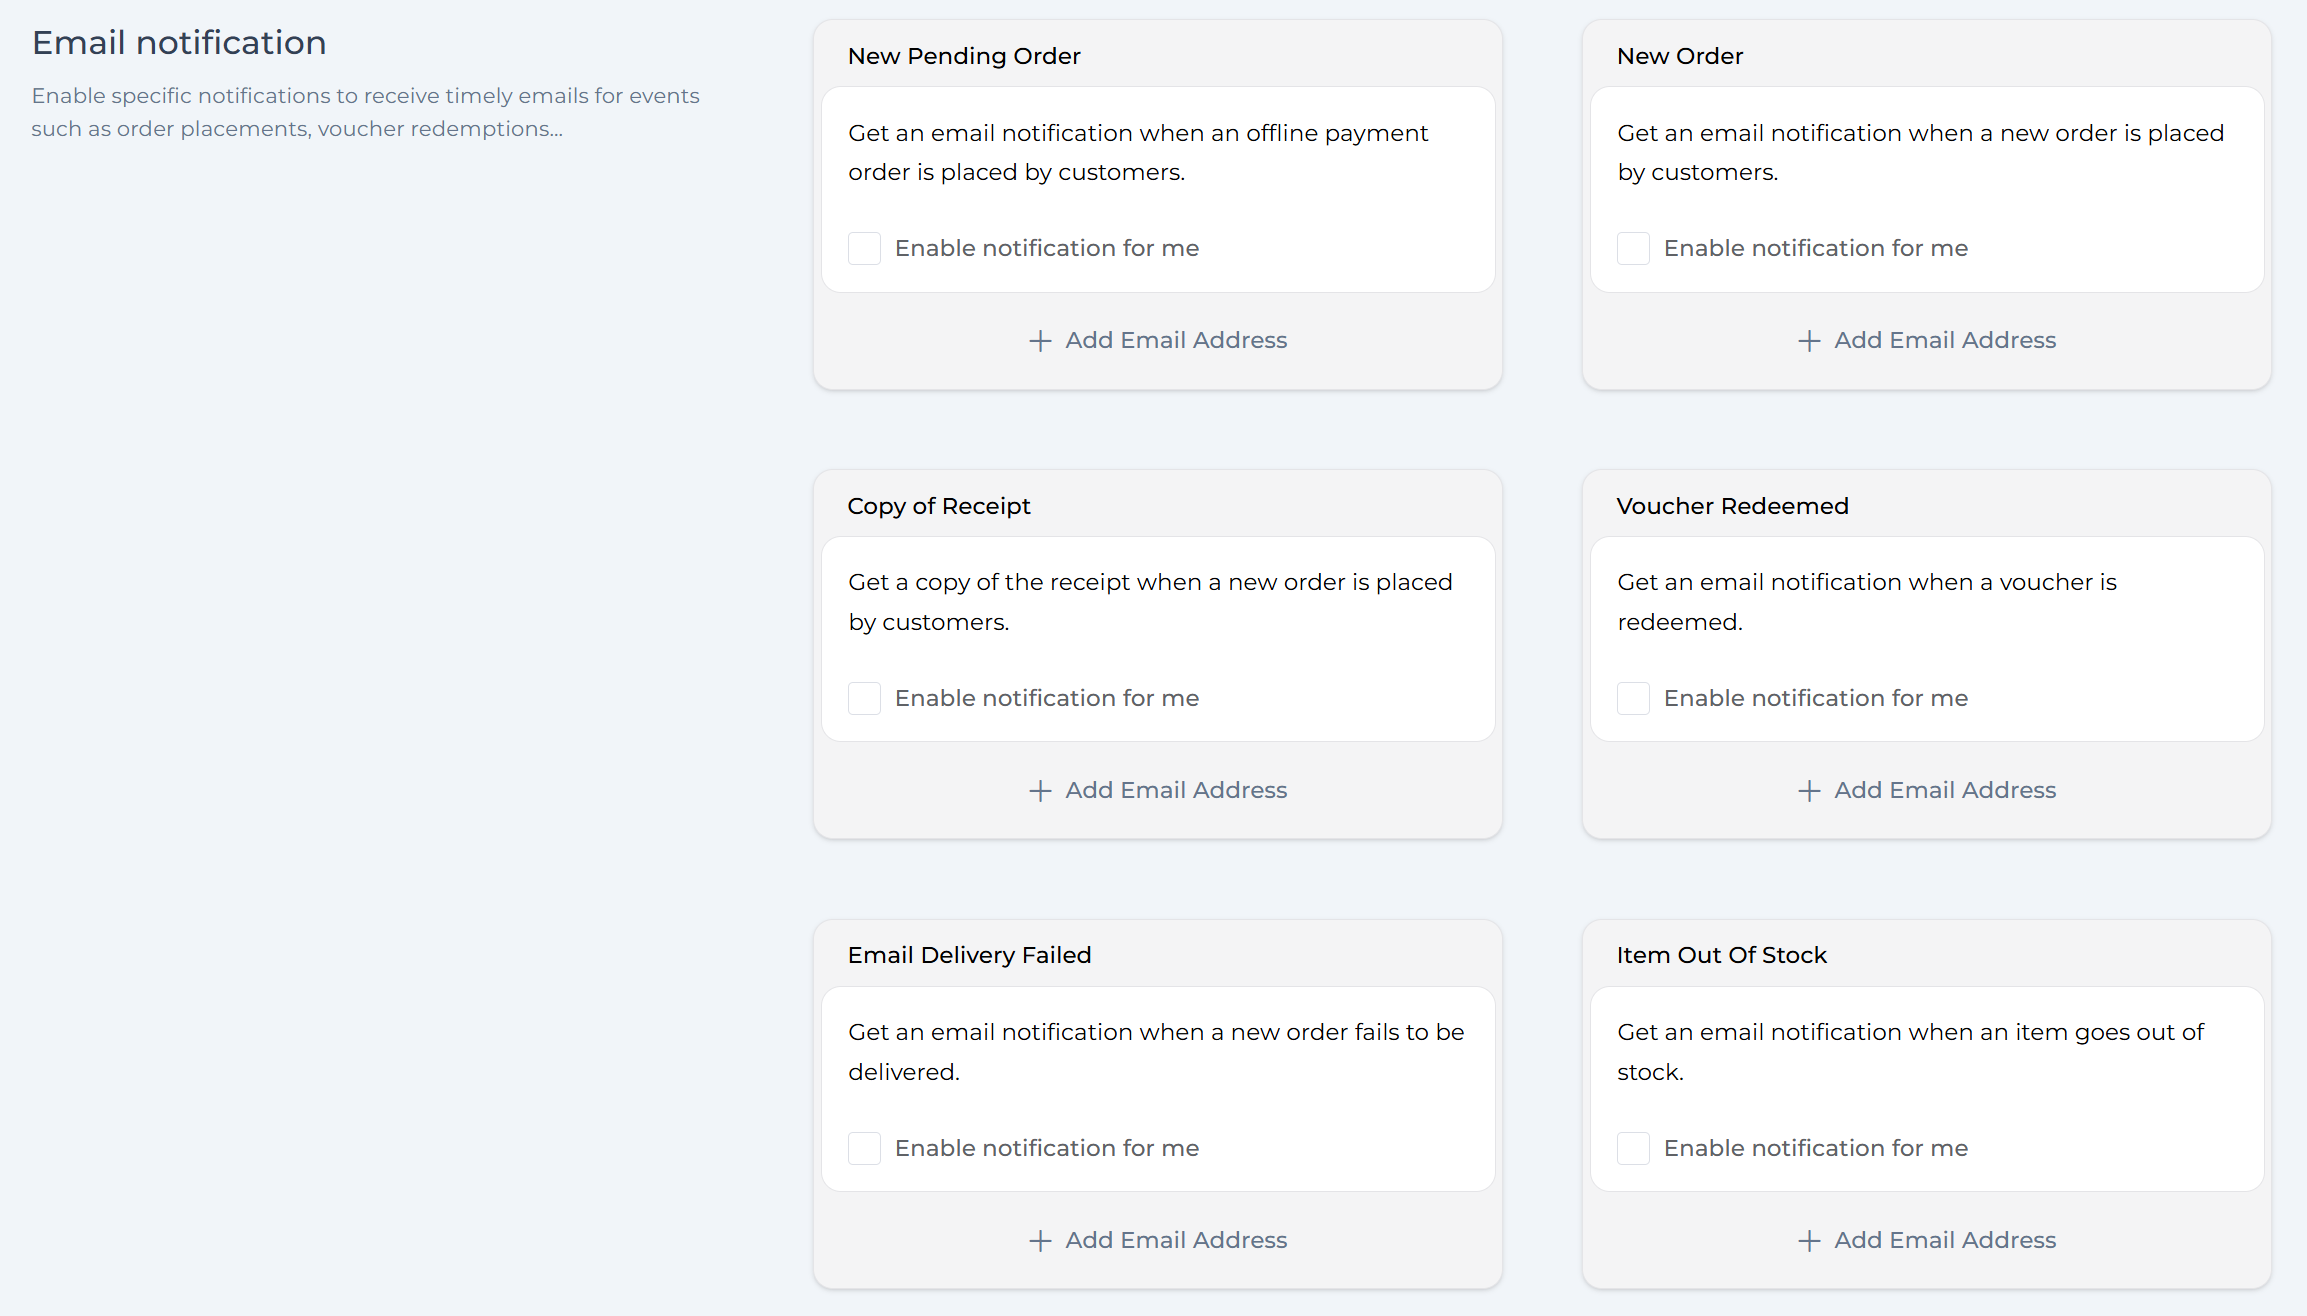
Step 4: Enable Notifications for Yourself
- Check the box labeled Enable notification for me next to each alert type you wish to receive.
- Notifications will be sent to the email registered with your user account.
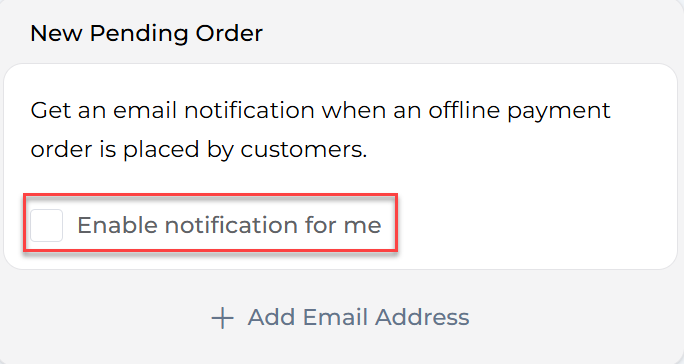
Step 5: Add Other Recipients (Optional)
- To notify additional team members, click + Add Email Address under the relevant notification type.
- Enter the email address of the team member.
- Repeat to add as many recipients as needed, ensuring everyone necessary stays informed.
Tips for Managing Email Notifications
- Activate only what’s essential: Avoid cluttering inboxes by enabling notifications relevant to your team’s actions.
- Keep recipient emails current: Regularly check and update who gets each notification to maintain workflow efficiency.
- Use voucher redemption alerts to monitor usage trends and successful promotions.
- Combine notifications with reporting tools to get a full picture of voucher sales and redemptions.