


How to Set Up and Manage Voucher Postage: Step-by-Step Guide for Mailing Gift Vouchers
VaocherApp allows you to offer your customers the choice to have their purchased gift vouchers physically mailed to their or their recipient’s mailbox. This is perfect for customers who want to give a tangible gift or prefer to present a physical voucher in person.
This article explains the end-to-end process of handling voucher postage so you can efficiently manage, print, post, and notify your customers with confidence.
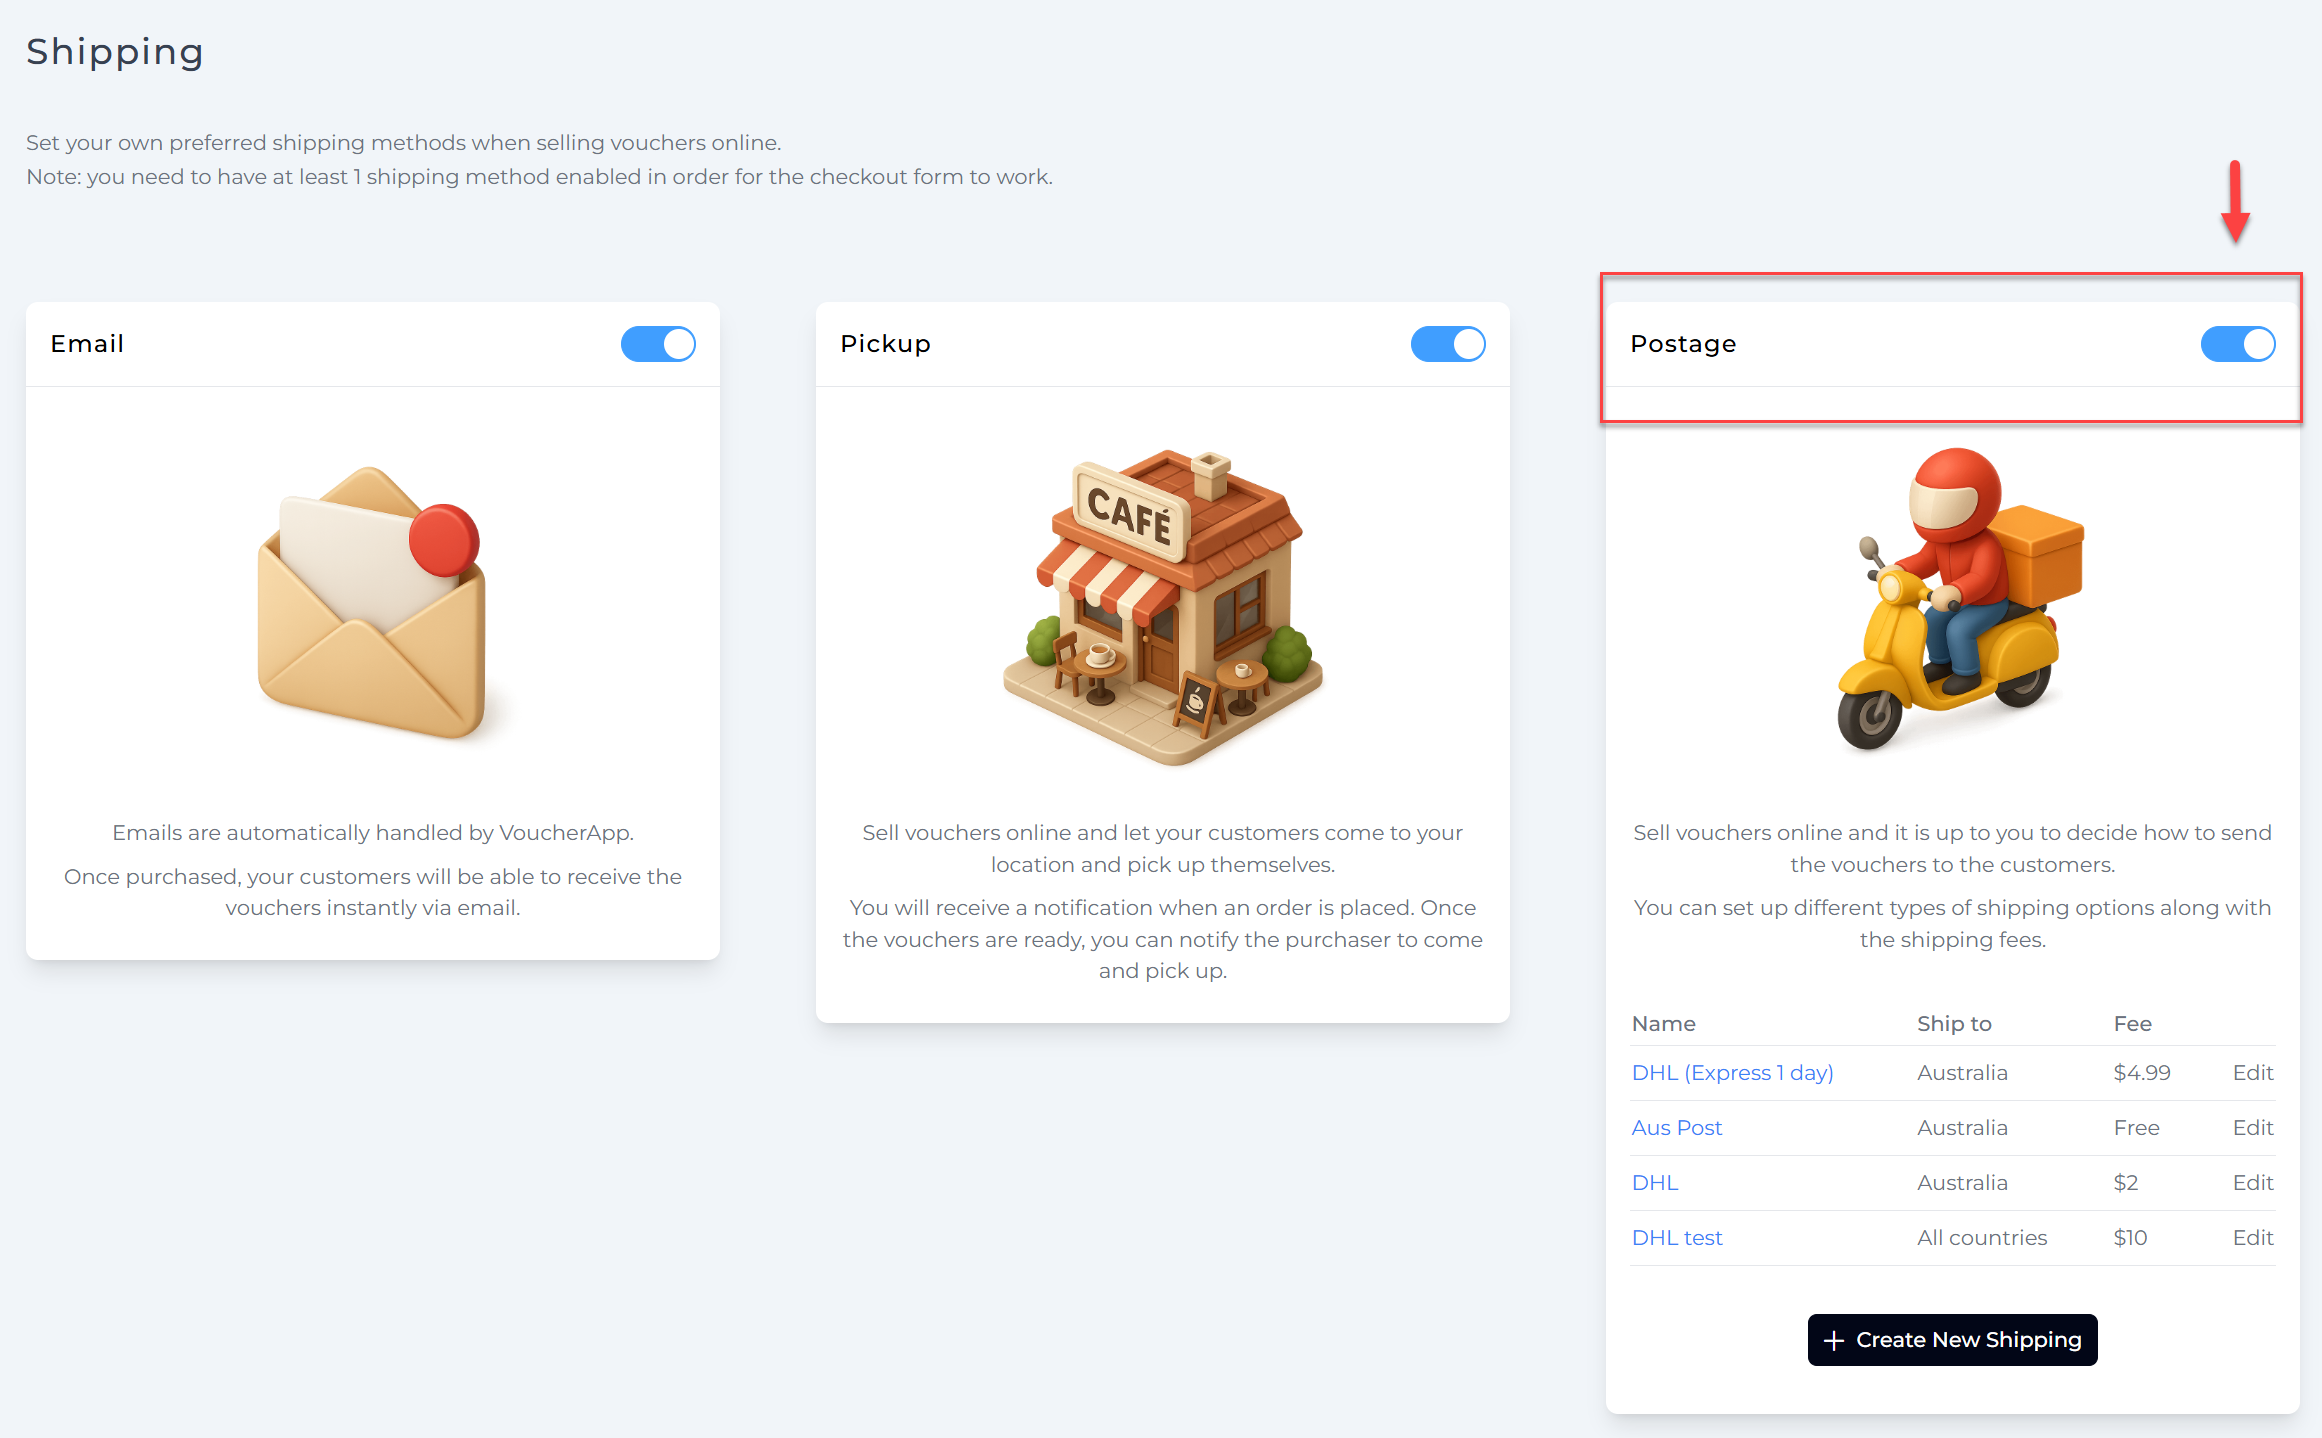
1. Enable Postage as a Delivery Option
To allow customers to select postage at checkout:
- Go to Settings > Shipping in your VaocherApp dashboard.
- Enable Postage as a delivery method.
This makes Postage appear as a delivery choice for customers during checkout.
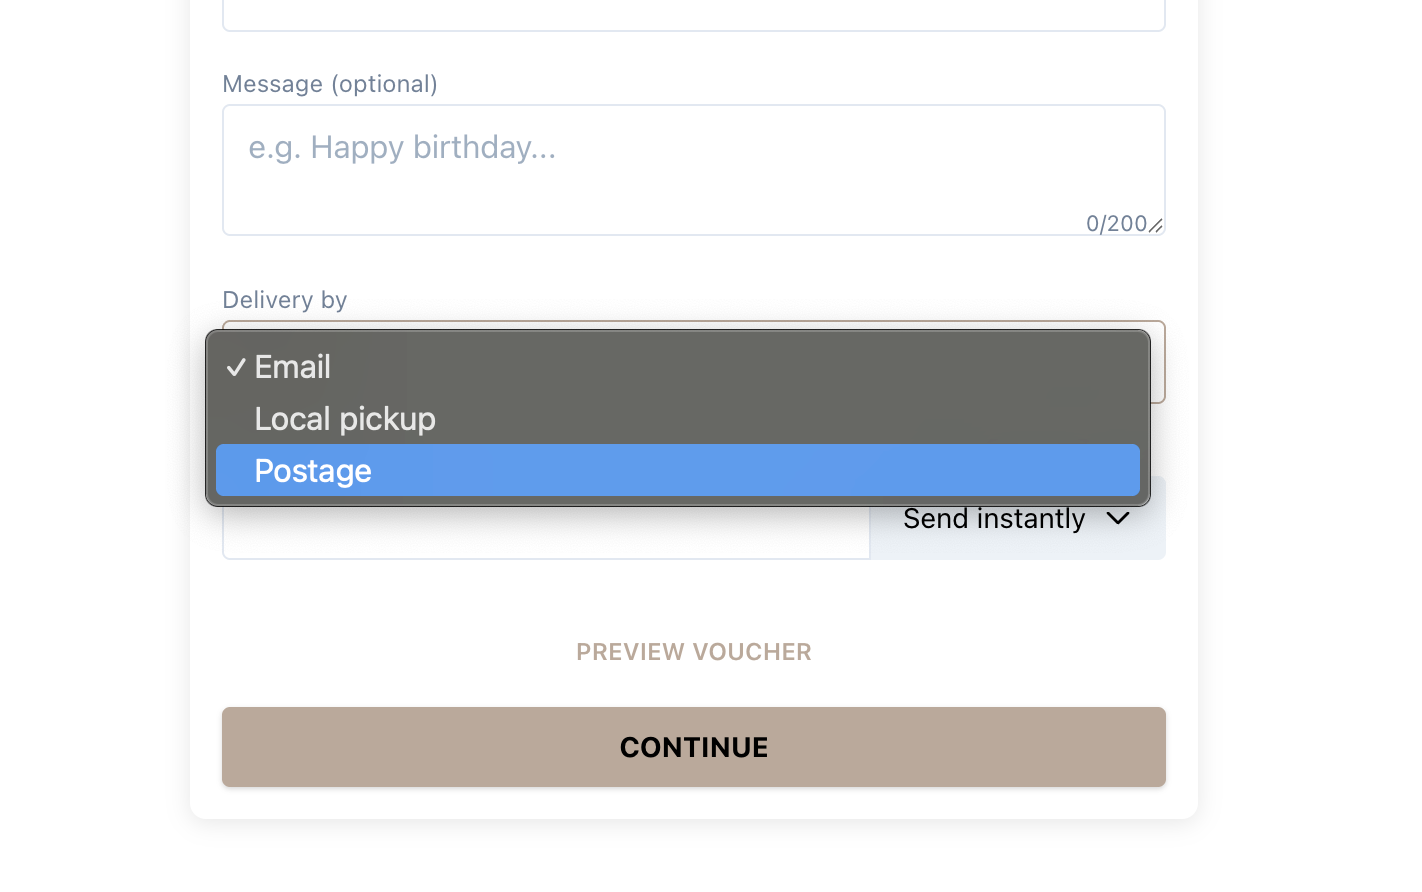
2. Customers Choose Postage at Checkout
When placing an order, customers will see Email, Local Pickup, or Postage as delivery choices. They can choose Postage to have the voucher mailed directly to the nominated address.
3. Receive Notification for Orders Needing Processing
Once a customer places an order with the Postage option, a notification appears in your Orders dashboard highlighting vouchers that require manual processing and posting.

Click View Orders to see details.
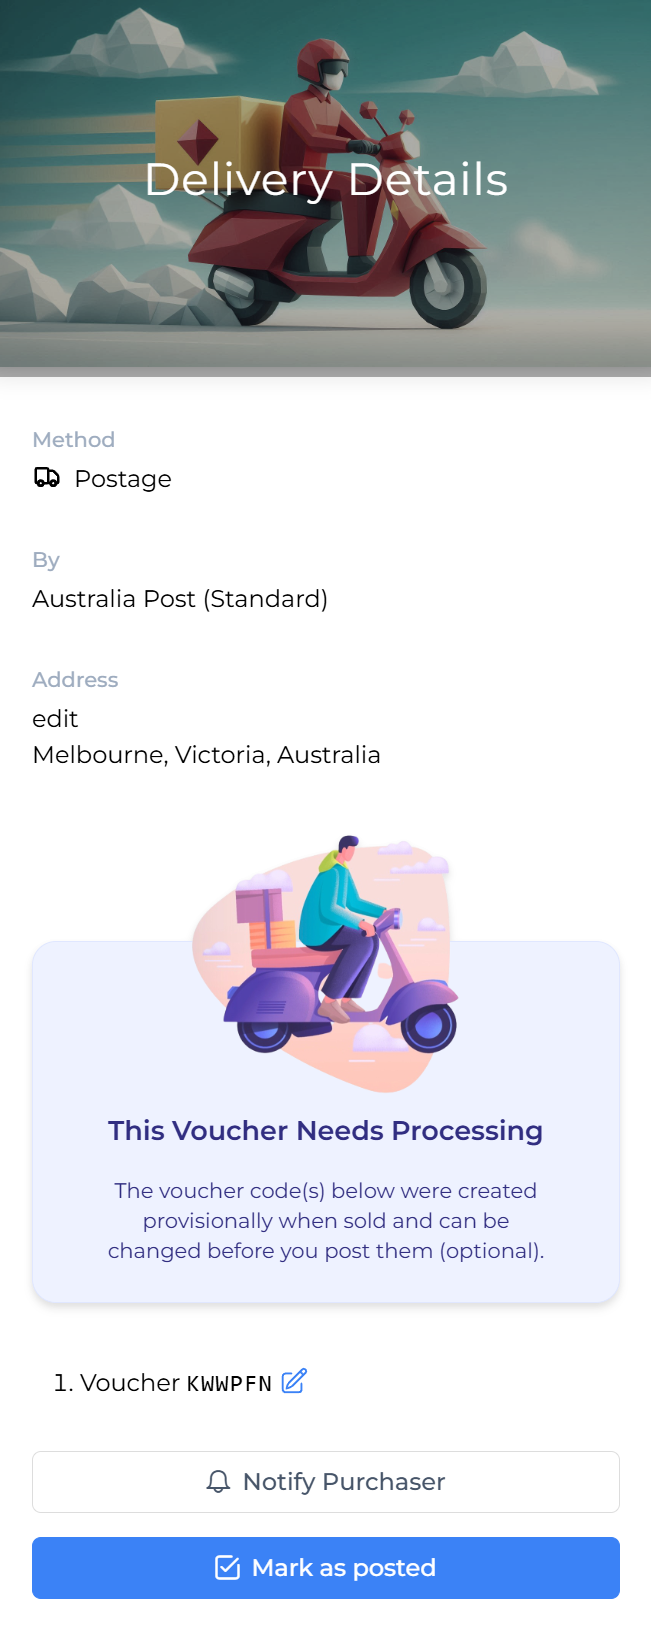
4. View Order Delivery Details
Within the order details, you will see:
- Delivery method: Postage
- Delivery provider if applicable (e.g., Australia Post)
- Recipient’s postal address
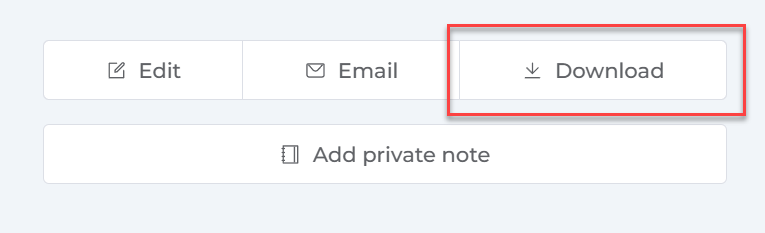
5. Download & Print the Voucher
Download the voucher PDF from the order details and print it using your preferred printer.
- Use high-quality paper for a professional finish.
- Check the voucher design and terms before printing.
6. Prepare the Voucher for Mailing
- Fold or place the voucher in an envelope.
- Add any additional gift cards, messages, or inserts if desired.
- Seal the envelope carefully.
7. Post the Voucher
- Take the prepared envelope to your local post office or mail slot.
- Choose the postage option based on your provider’s services.
- Keep a record of postage if tracking is available.
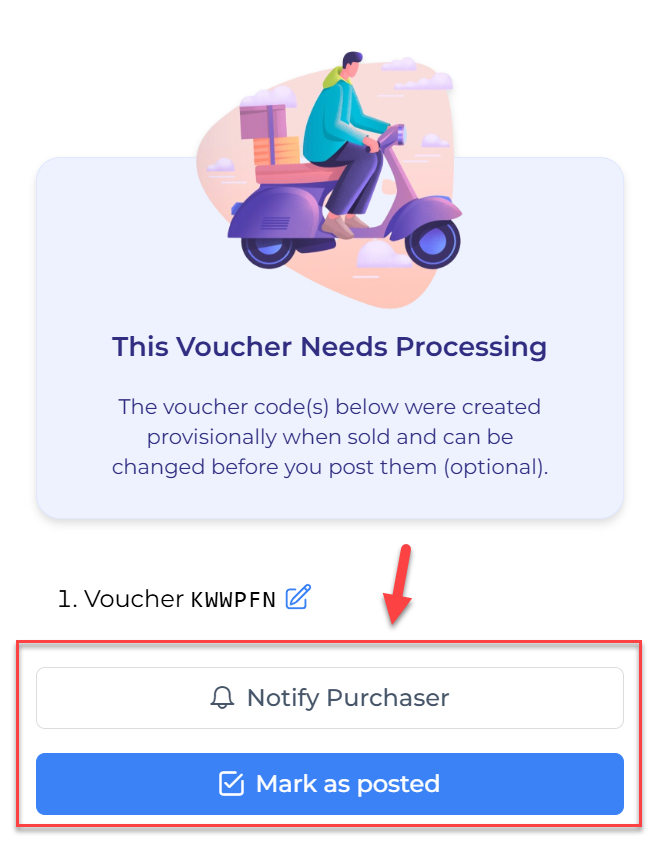
8. Mark the Voucher as Posted & Notify Purchaser
Back in VaocherApp:
- In the order Delivery Details, click Mark as posted to confirm the voucher has been mailed.
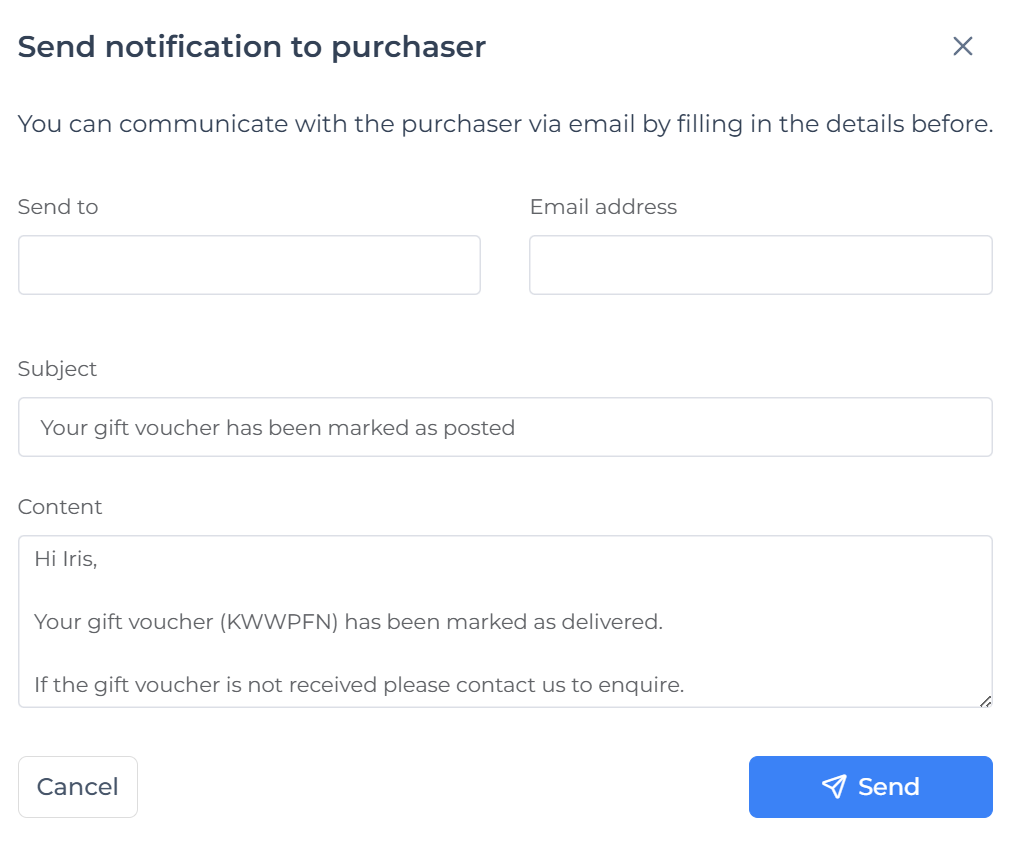
- Click Notify Purchaser to send an email informing the buyer that their voucher is on its way.
Summary
| Step | Description |
|---|---|
| 1. Enable Postage | Add postage as a delivery option in your shipping settings |
| 2. Customer Chooses Postage | Customers select postage during checkout |
| 3. Order Notification | Receive alerts for orders requiring postage processing |
| 4. View Delivery Details | Access recipient’s address and postage method |
| 5. Download & Print | Download and print voucher PDFs |
| 6. Prepare & Envelope | Place voucher in an envelope ready for mailing |
| 7. Post Voucher | Send voucher via mail |
| 8. Mark Posted & Notify | Update order status and notify purchaser |