


How to Create and Run a Promotion in VaocherApp: A Step-by-Step Guide
Running promotions is a fantastic way to attract more customers and boost sales for your business. With VaocherApp, creating and managing promotions is easy, even if you’re not a tech expert! This detailed guide will walk you through every step to set up a promotion from scratch.
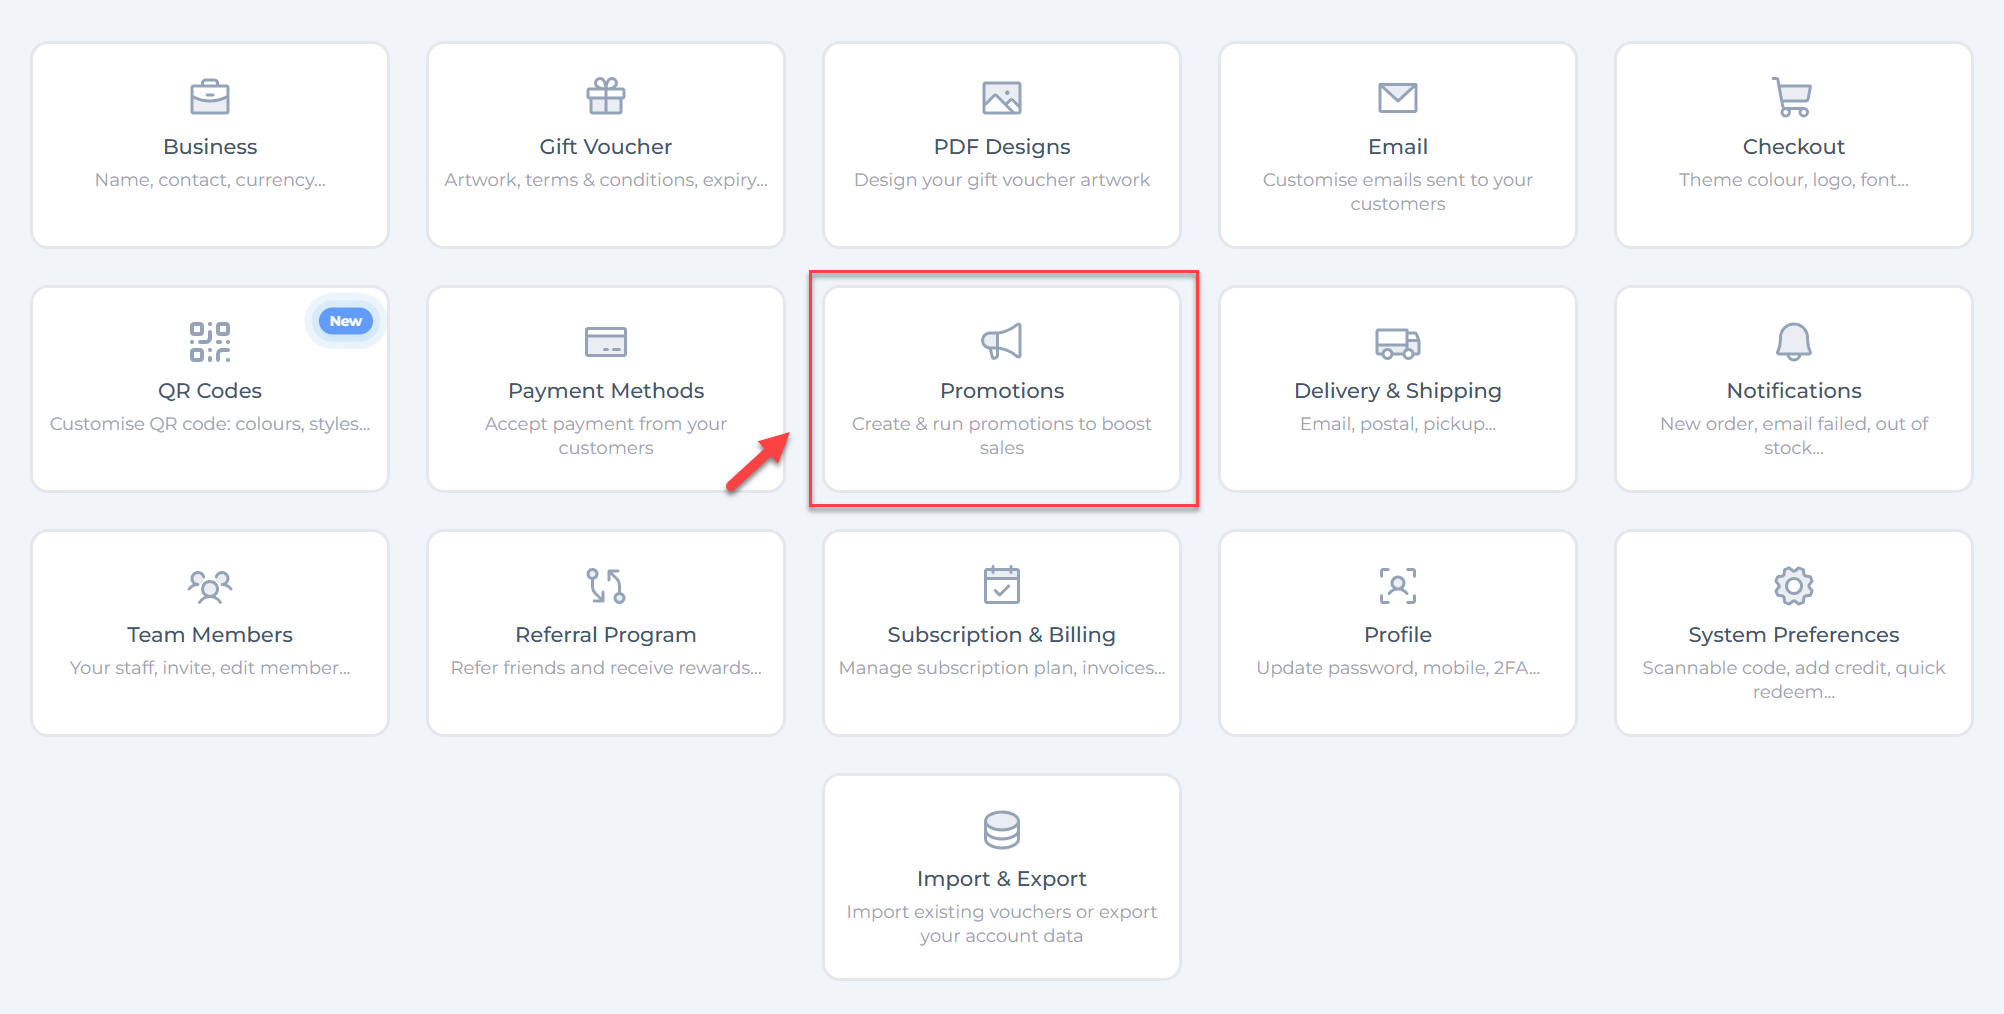
Step 1: Access the Promotions Section
- Log in to your VaocherApp account.
- On your dashboard, look for the Settings section.
- Click on Promotions to open the promotions management page.
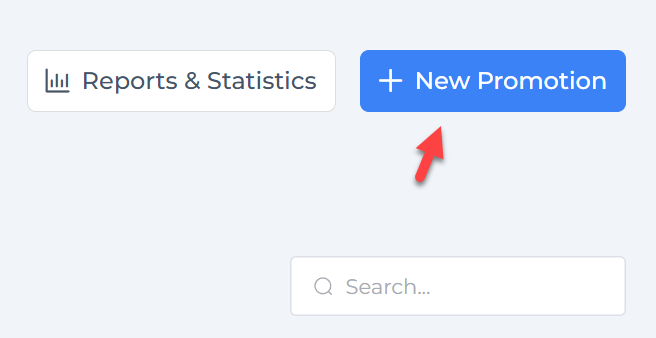
Step 2: Start Creating a New Promotion
- On the promotions page, click the blue “+ New Promotion” button to begin creating a new promotion.
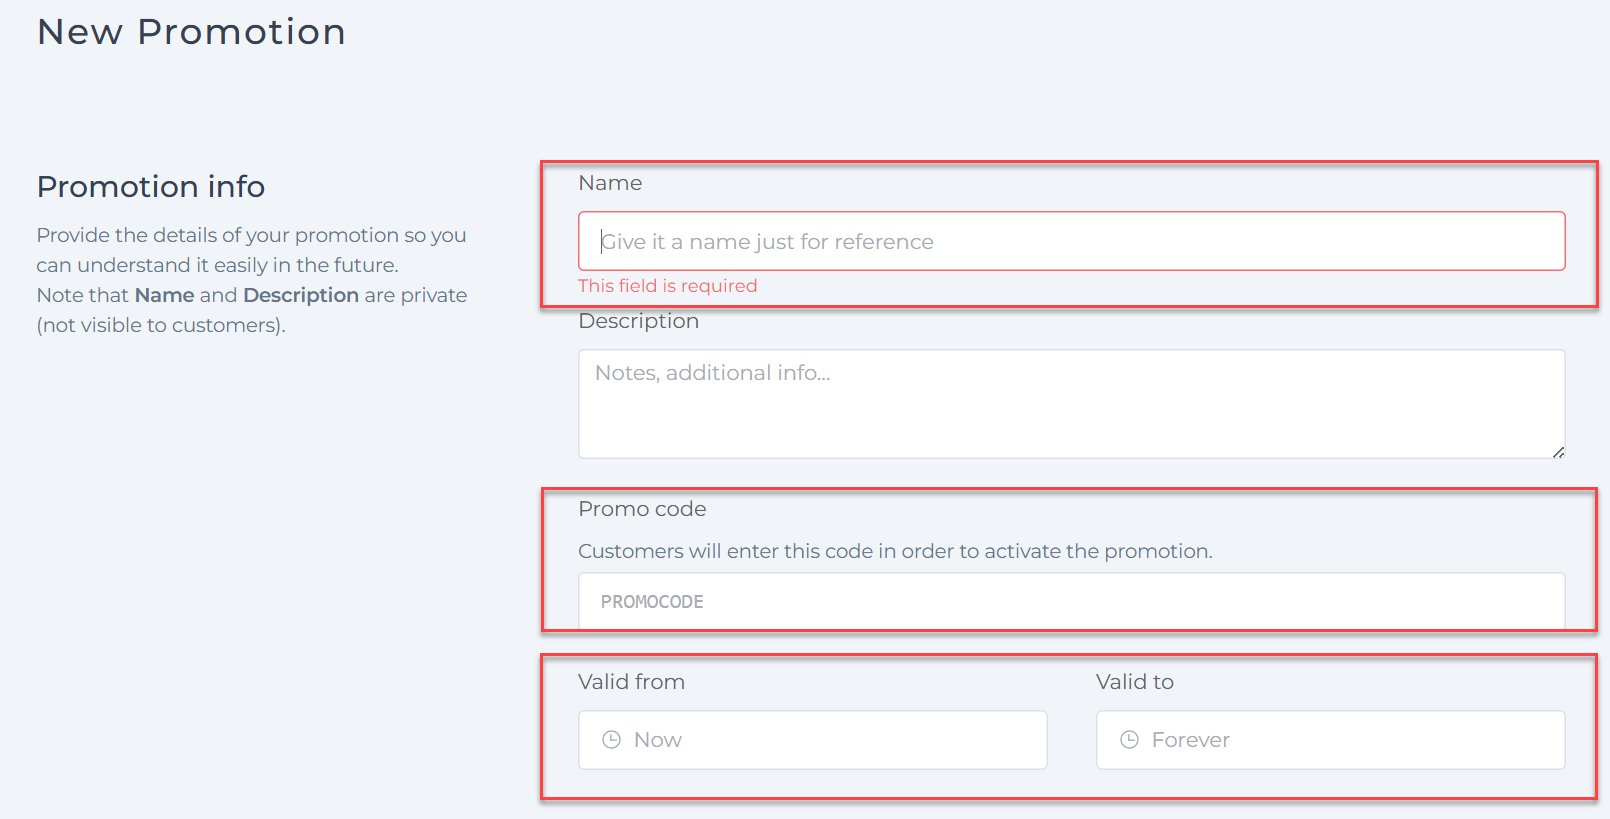
Step 3: Fill Out Promotion Information
You need to fill in some basic details about your promotion:
- Name: Give your promotion a simple, easy-to-remember name for your own reference (e.g., “Winter Sale 2024”).
- Description (optional): Add any additional notes about this promotion that will help you remember its purpose later.
- Promo Code: Enter the code your customers will type when they want to use the promotion (e.g., “WINTER20”).
- Valid From / To: Set the start and end date/time for when the promotion is active. You can choose “Now” to start immediately or set a future date, and similarly set an expiry date or leave it as “Forever” if you want the promotion to run indefinitely.
Step 4: Set the Triggering Conditions
Now that you have entered your basic promotion details, it’s time to decide when your promotion should be applied based on customer actions. This means setting the “triggering conditions”, rules that determine when a customer qualifies for the promotion.
How to start setting a trigger condition:
- Click the button that says “When customers enter the code”. This tells the system you want the promotion to activate when a customer uses a promo code.
- A dropdown field will appear labeled “Select trigger condition” where you can choose from several options.
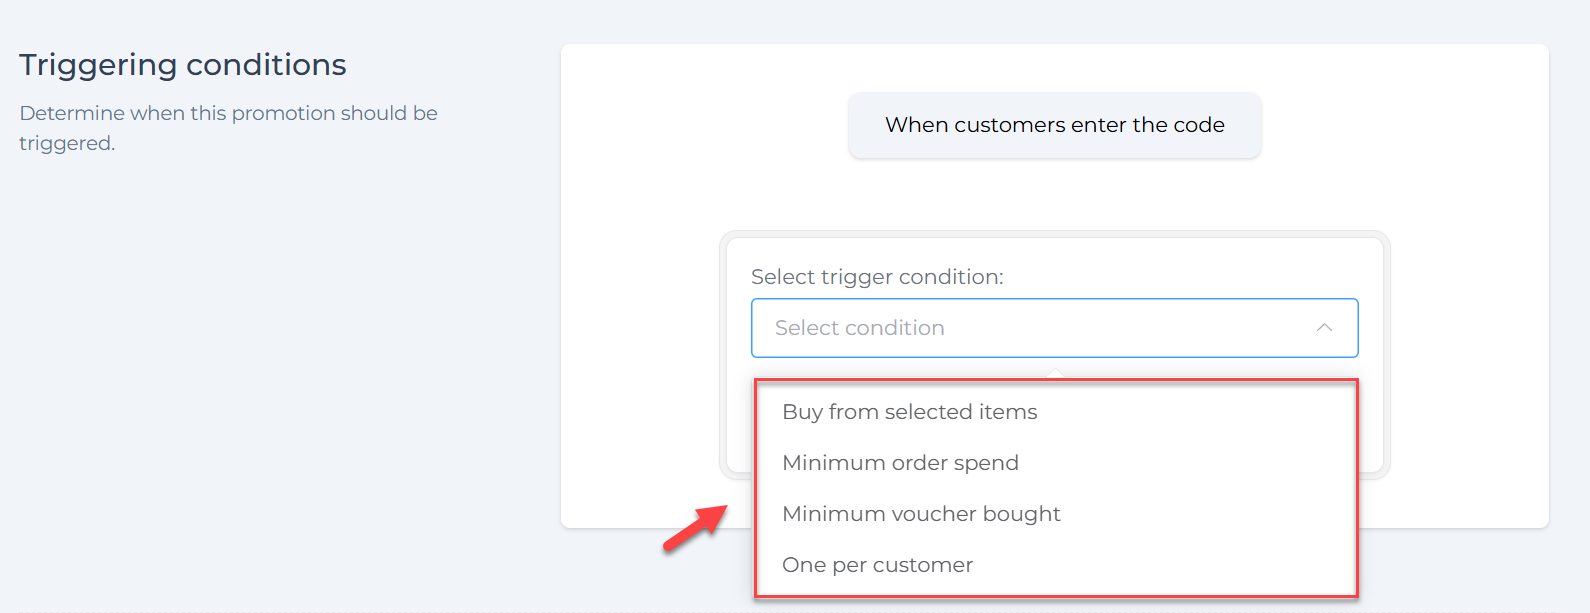
Here are your choices and what they mean:
1. Buy from Selected Items
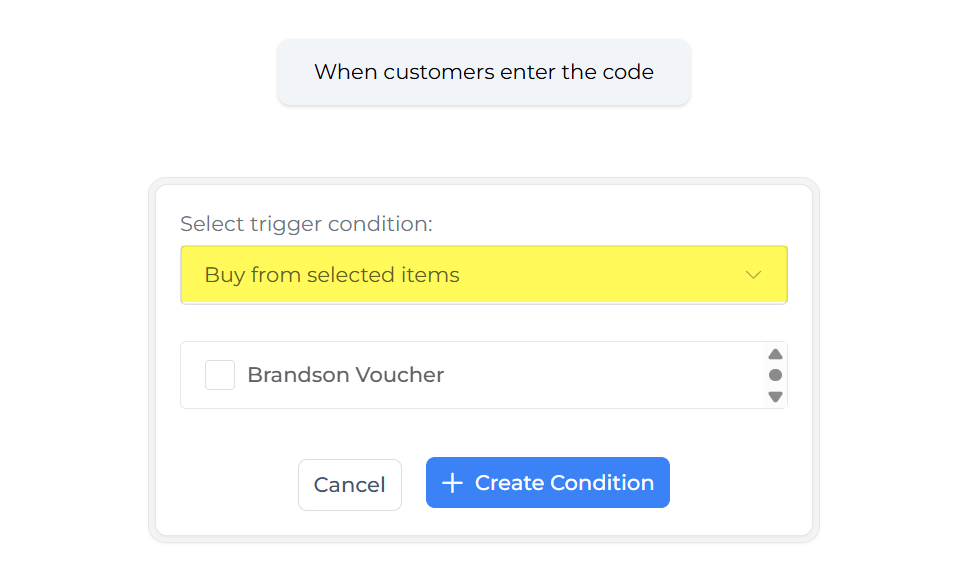
This condition means the promotion will only apply if the customer buys certain gift vouchers that you select. For example, you might want to reward customers who buy a “Brandson Voucher” only.
How to set it:
- Select “Buy from selected items” from the dropdown menu.
- A list of your menu items or vouchers will appear.
- Tick the box next to the item(s) that should trigger the promotion.
- Click “+ Create Condition” to save it.
2. Minimum Order Spend
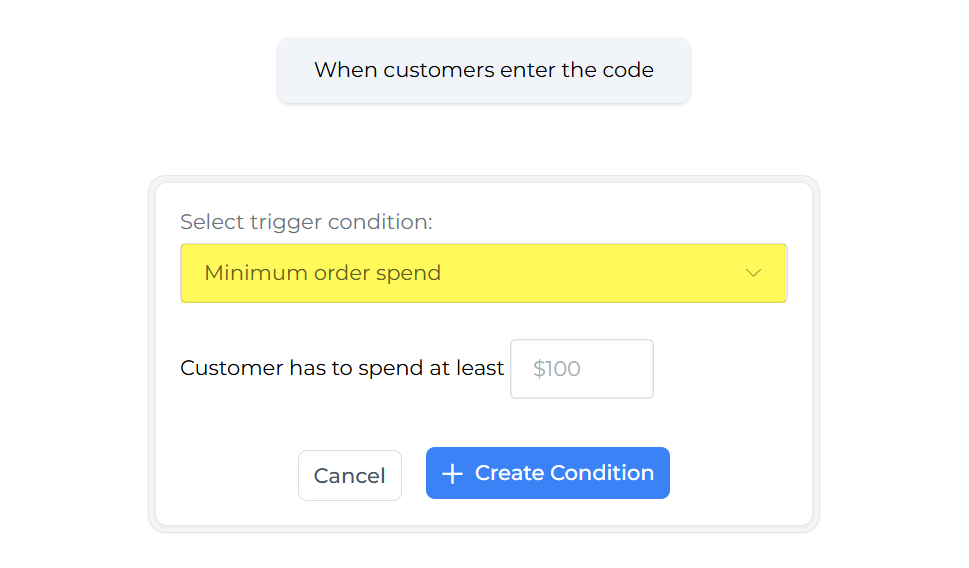
Choose this if you want the promotion to activate only when the customer’s order total reaches a set minimum amount. For example, if you set $100, the promotion will apply only if the customer spends $100, or more in one order.
How to set it:
- Select “Minimum order spend” from the dropdown.
- Enter the minimum dollar amount in the box (e.g., $100).
- Click “+ Create Condition” to save.
3. Minimum Voucher Bought
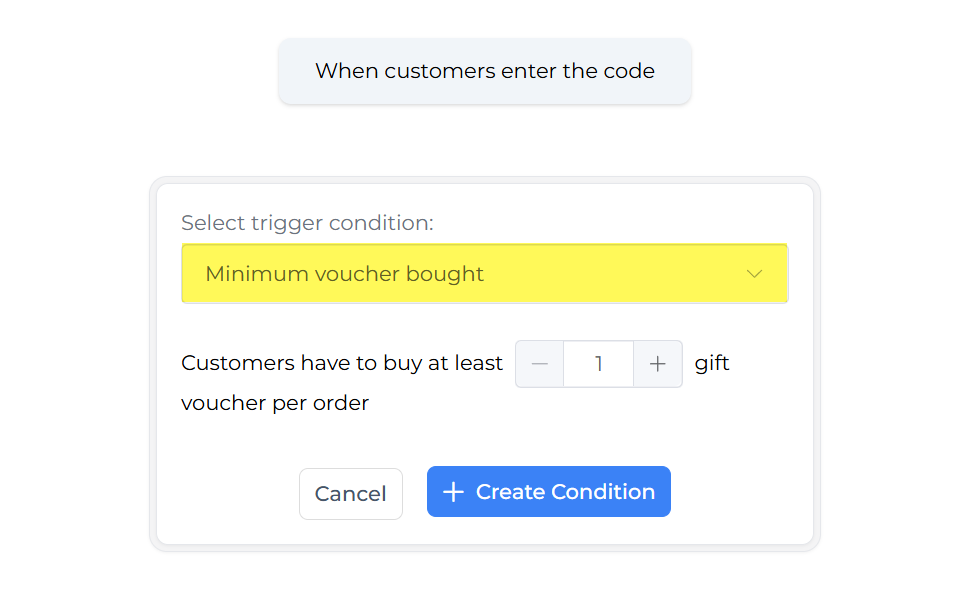
This option triggers the promotion when a customer buys a minimum number of vouchers in one order. For example, you could require that a customer buys at least 3 vouchers for the promotion to start.
How to set it:
- Select “Minimum voucher bought” .
- Enter the minimum quantity of vouchers the customer must buy.
- Click “+ Create Condition” .
4. One Per Customer
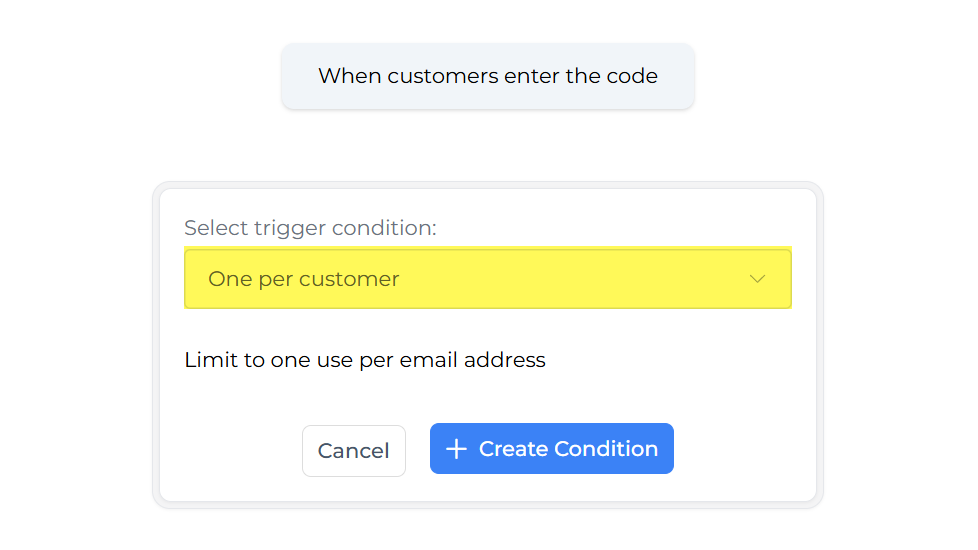
Use this to limit the promotion to one use per customer email address. This is useful if you want to prevent customers from taking advantage of the promotion multiple times.
How to set it:
- Select “One per customer” .
- The system will then restrict the promo code so each email address can only use it once.
- Click “+ Create Condition” to finalize.
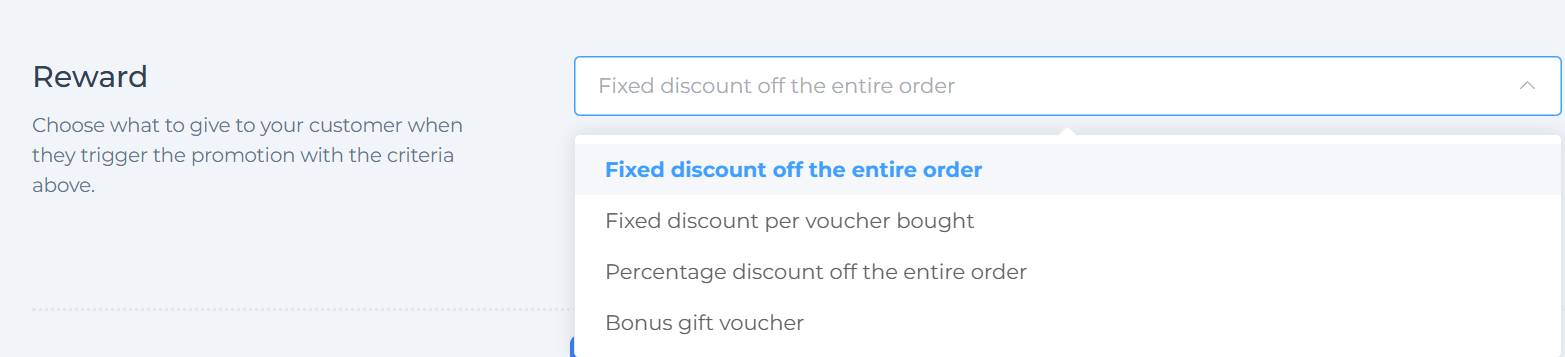
Step 5: Choose the Type of Reward
Decide how you want to reward the customer when the promotion is triggered. Click the dropdown and pick one of these:
| Reward Type | What It Does |
|---|---|
| Fixed discount off the entire order | Subtracts a set amount (e.g., $10 off total order) |
| Fixed discount per voucher bought | Discount applies for each voucher purchased |
| Percentage discount off the entire order | Deducts a percentage (e.g., 20% off total order) |
| Bonus gift voucher | Gives an extra gift voucher as a bonus |
When you choose a reward type, fill in the additional details:
- For discounts, enter the discount amount (in AUD for fixed amount, or % for percentage).
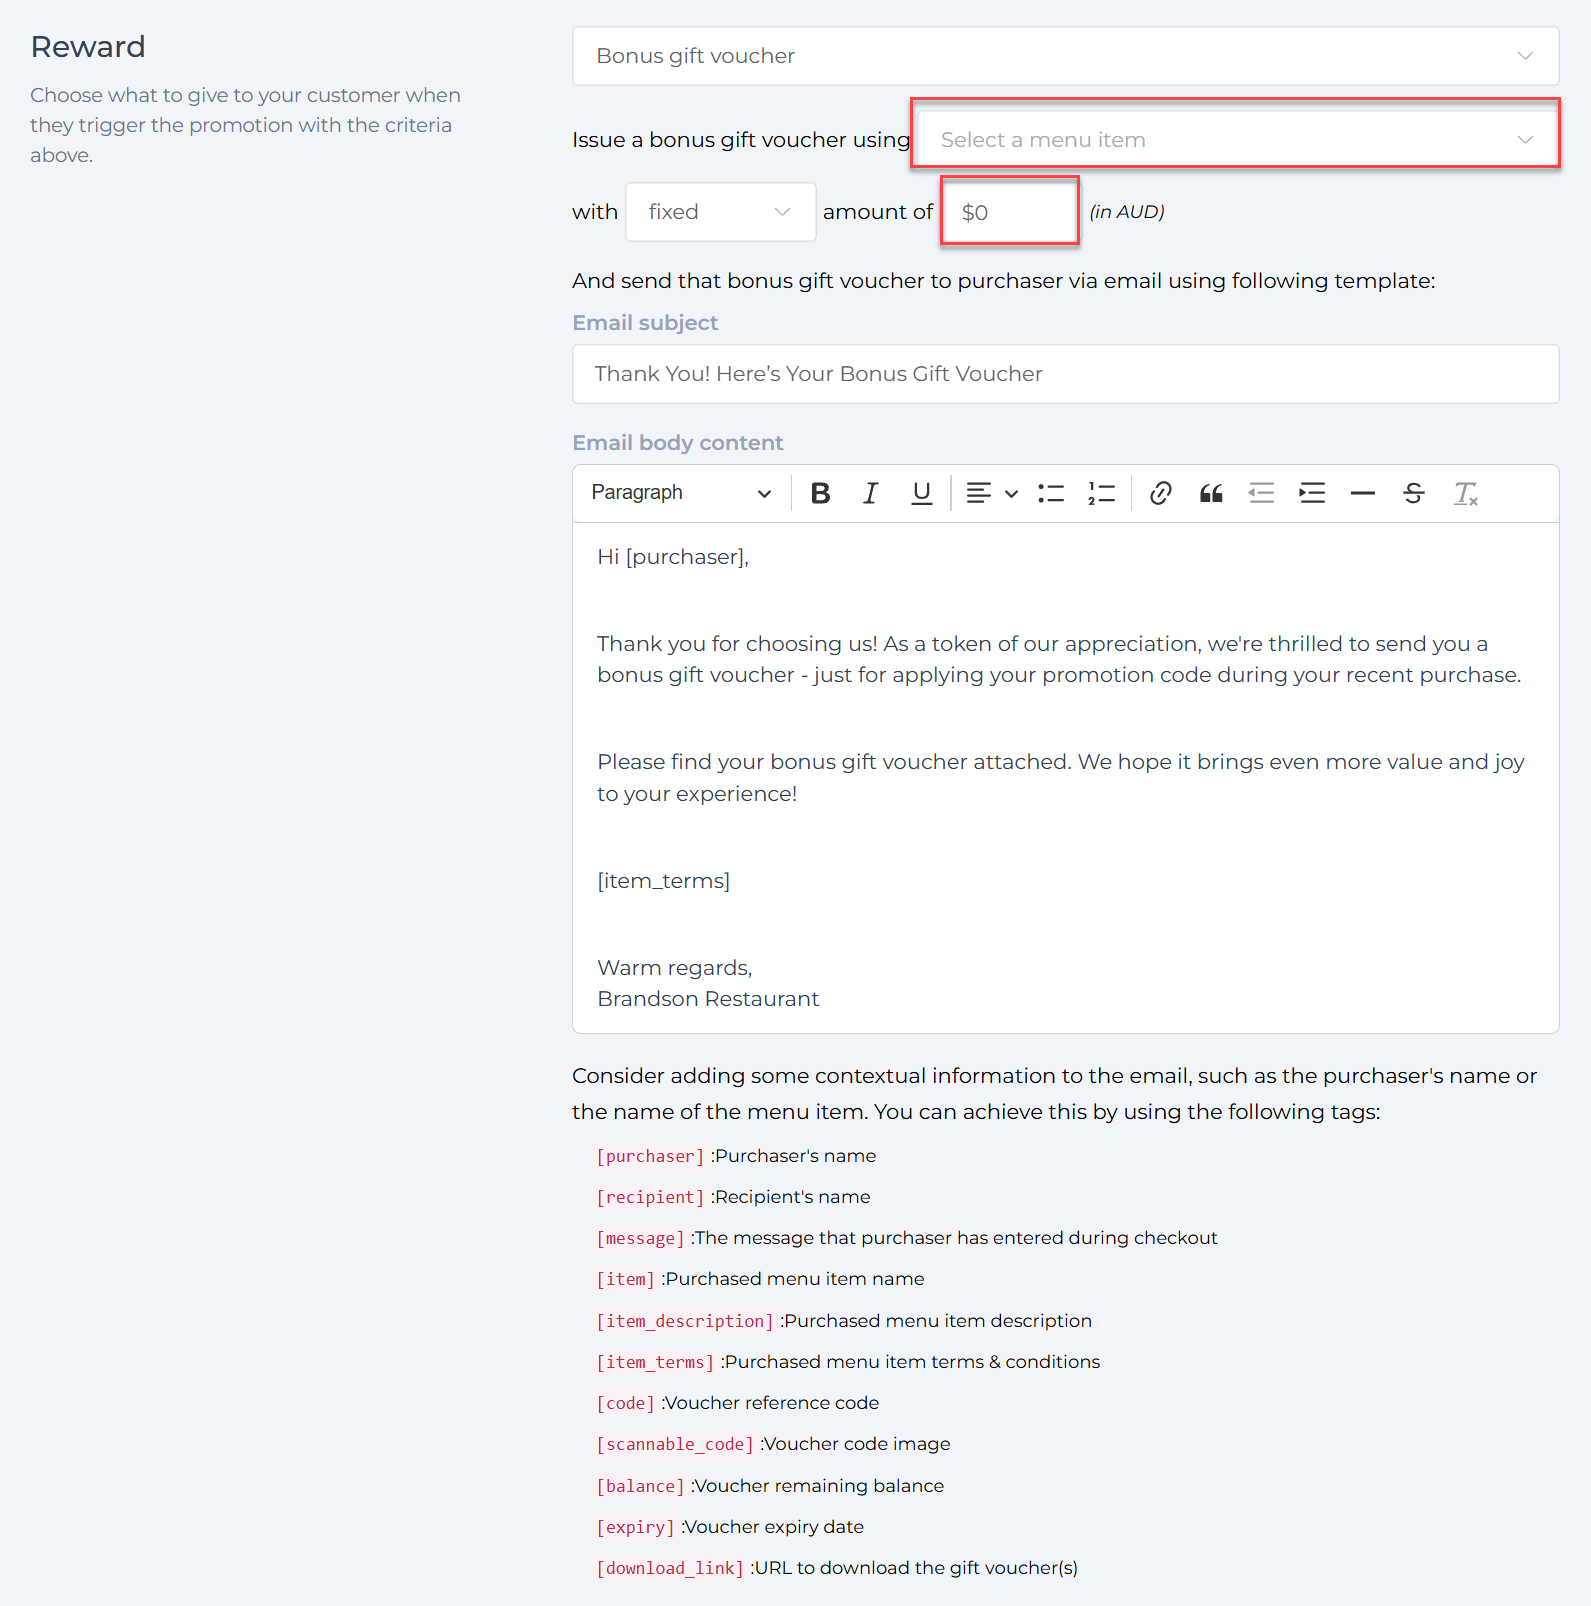
- For bonus gift vouchers, select which gift voucher you’d like to give, and set its value.
Step 6: Customize the Bonus Gift Voucher Email (Optional)
If you choose Bonus gift voucher as your reward, you can customize the email sent to your customers:
- Edit the Email Subject to something like “Thank You! Here’s Your Bonus Gift Voucher.”
- Customize the Email Body Content to add a personal touch.
- Use tags to automatically include things like the purchaser’s name, voucher code, expiry date, and more.
Here is a list of available tags you can use inside the email:
| Tag | What it Displays |
|---|---|
[purchaser] |
Purchaser’s name |
[recipient] |
Recipient’s name |
[message] |
Message from purchaser during checkout |
[item] |
Purchased menu item name |
[item_description] |
Purchased menu item description |
[item_terms] |
Menu item terms & conditions |
[code] |
Voucher reference code |
[scannable_code] |
Voucher code image |
[balance] |
Voucher remaining balance |
[expiry] |
Voucher expiry date |
[download_link] |
URL to download the gift voucher |
Step 7: Save and Activate Your Promotion
Once you’ve filled all the fields:
- Review all information entered.
- Click Save Changes to start running your promotion.
Your promotion is now live and will apply automatically when customers use the promo code and meet the triggering conditions.
How It Looks in the Checkout: Applying a Promotion Code
When your promotion is live, customers can enter the promo code at checkout to receive their discount or bonus voucher.
- During checkout, your customer will see a button saying “Have a promotion code?” under the order summary.
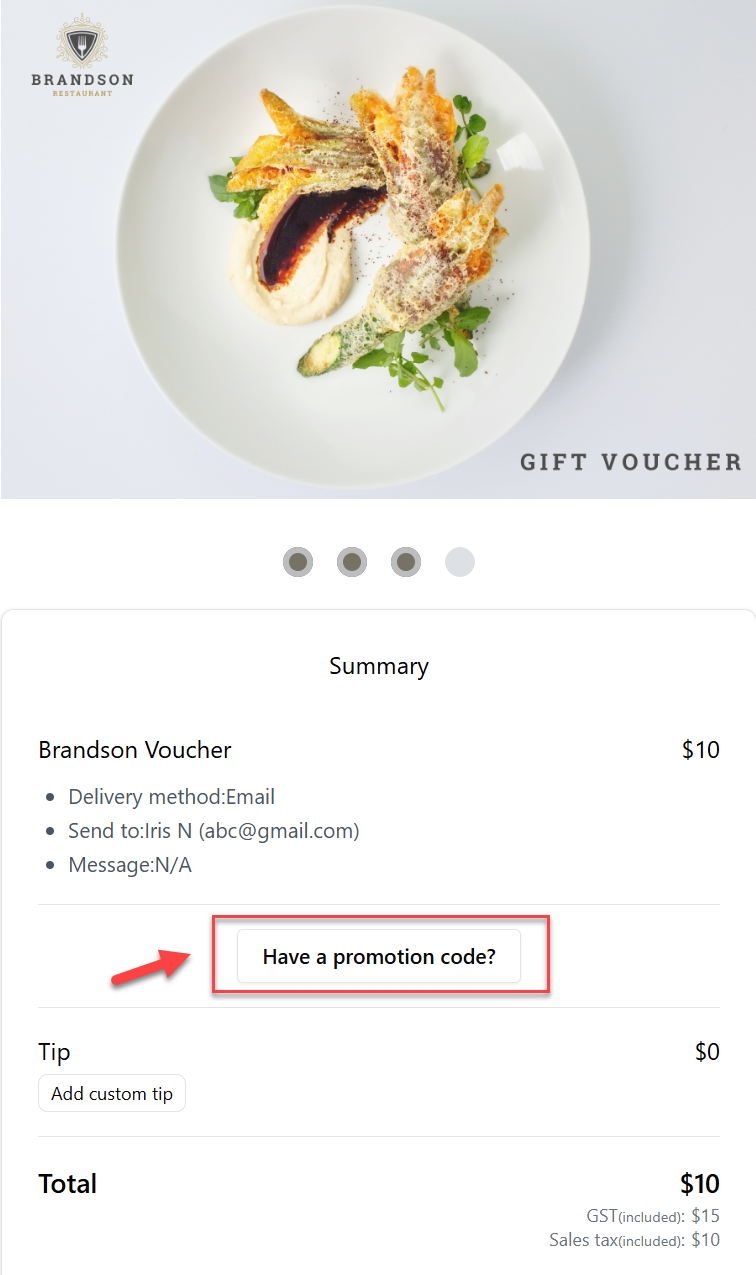
-
When clicked, a text box will appear where the customer can type the promotion code.
-
After typing the code, they click the Apply button to activate the promotion.
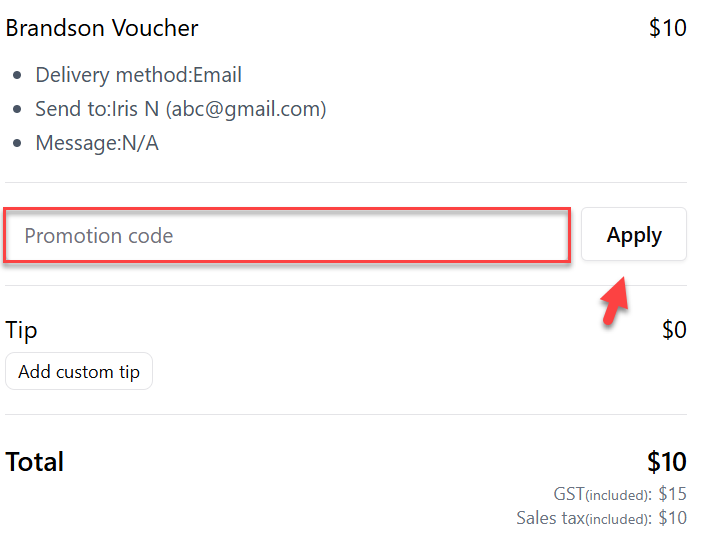
- If the promo code is valid and conditions met, the order total will update to reflect the discount or bonus voucher.
Tips for Running Successful Promotions
- Keep promo codes simple so customers can remember and type them easily.
- Set clear terms in the description or email content so customers know how to use the promotion.
- Use “Valid To” dates to limit promotions to special events or seasons.
- Monitor Reports & Statistics from the Promotions page to see how your promotions are performing.