


How to Import and Use Pre-Generated Voucher Codes in VaocherApp
Managing your gift voucher codes efficiently is essential for smooth sales and a great customer experience. VaocherApp lets you import and use pre-generated voucher codes, which simplifies issuing vouchers and gives you better control over distribution. This detailed guide will walk you through setting up and using pre-generated codes step-by-step in your VaocherApp dashboard.
Step 1: Access Your VaocherApp Dashboard
- Log in to your VaocherApp account at vaocher.app/dashboard.
- From the main dashboard, click Settings on the left menu.
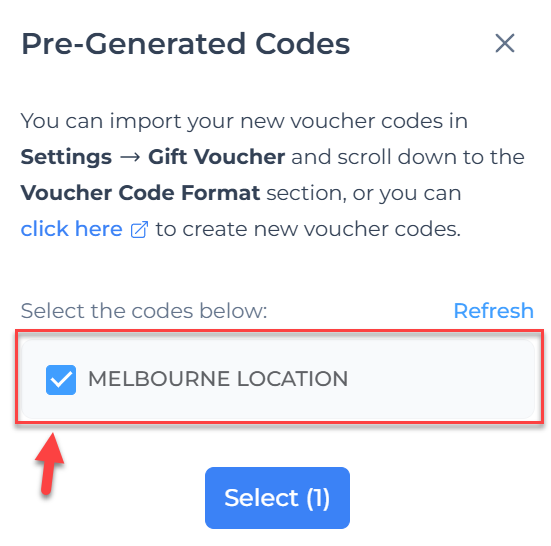
- Select Gift Voucher to open the voucher settings page.
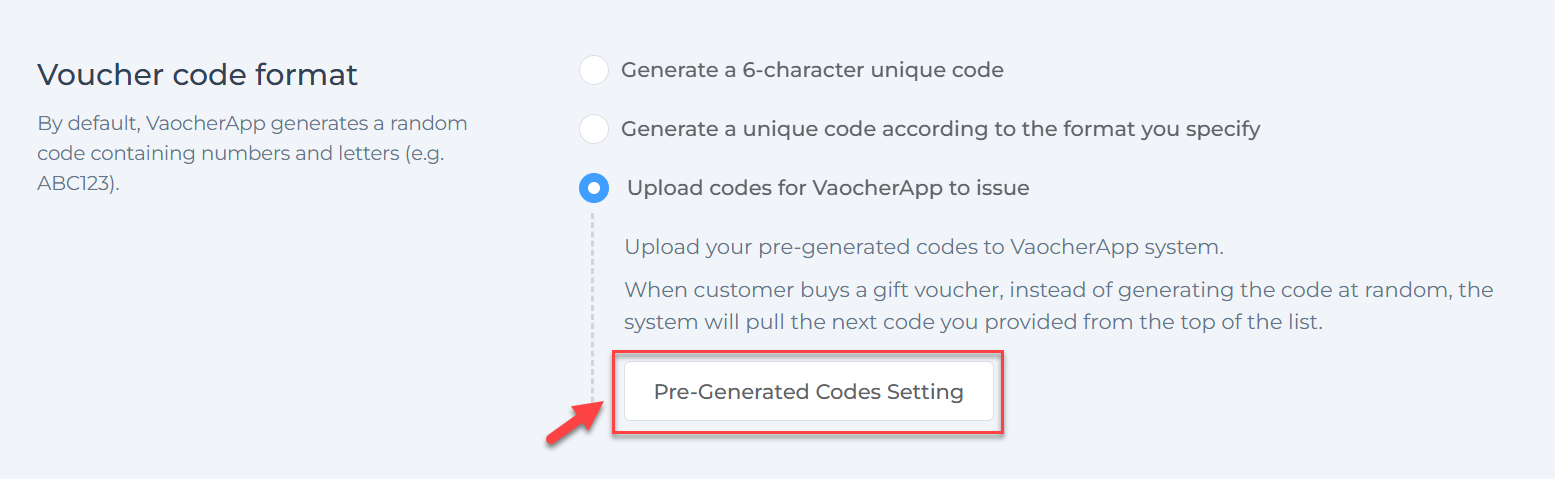
- Scroll down to the section titled Voucher code format.
- Choose Upload codes for VaocherApp to issue.
- Then click the Pre-generated codes setting button to open your code management area.
Step 2: Import Your Pre-Generated Voucher Codes
- On the Pre-generated codes setting page, click Import new codes.

- Enter a clear, descriptive name for your code bank. This helps keep multiple imports organized.
- Copy your pre-generated voucher codes (one code per line) from your file or source.
- Paste the codes into the large Codes textbox.
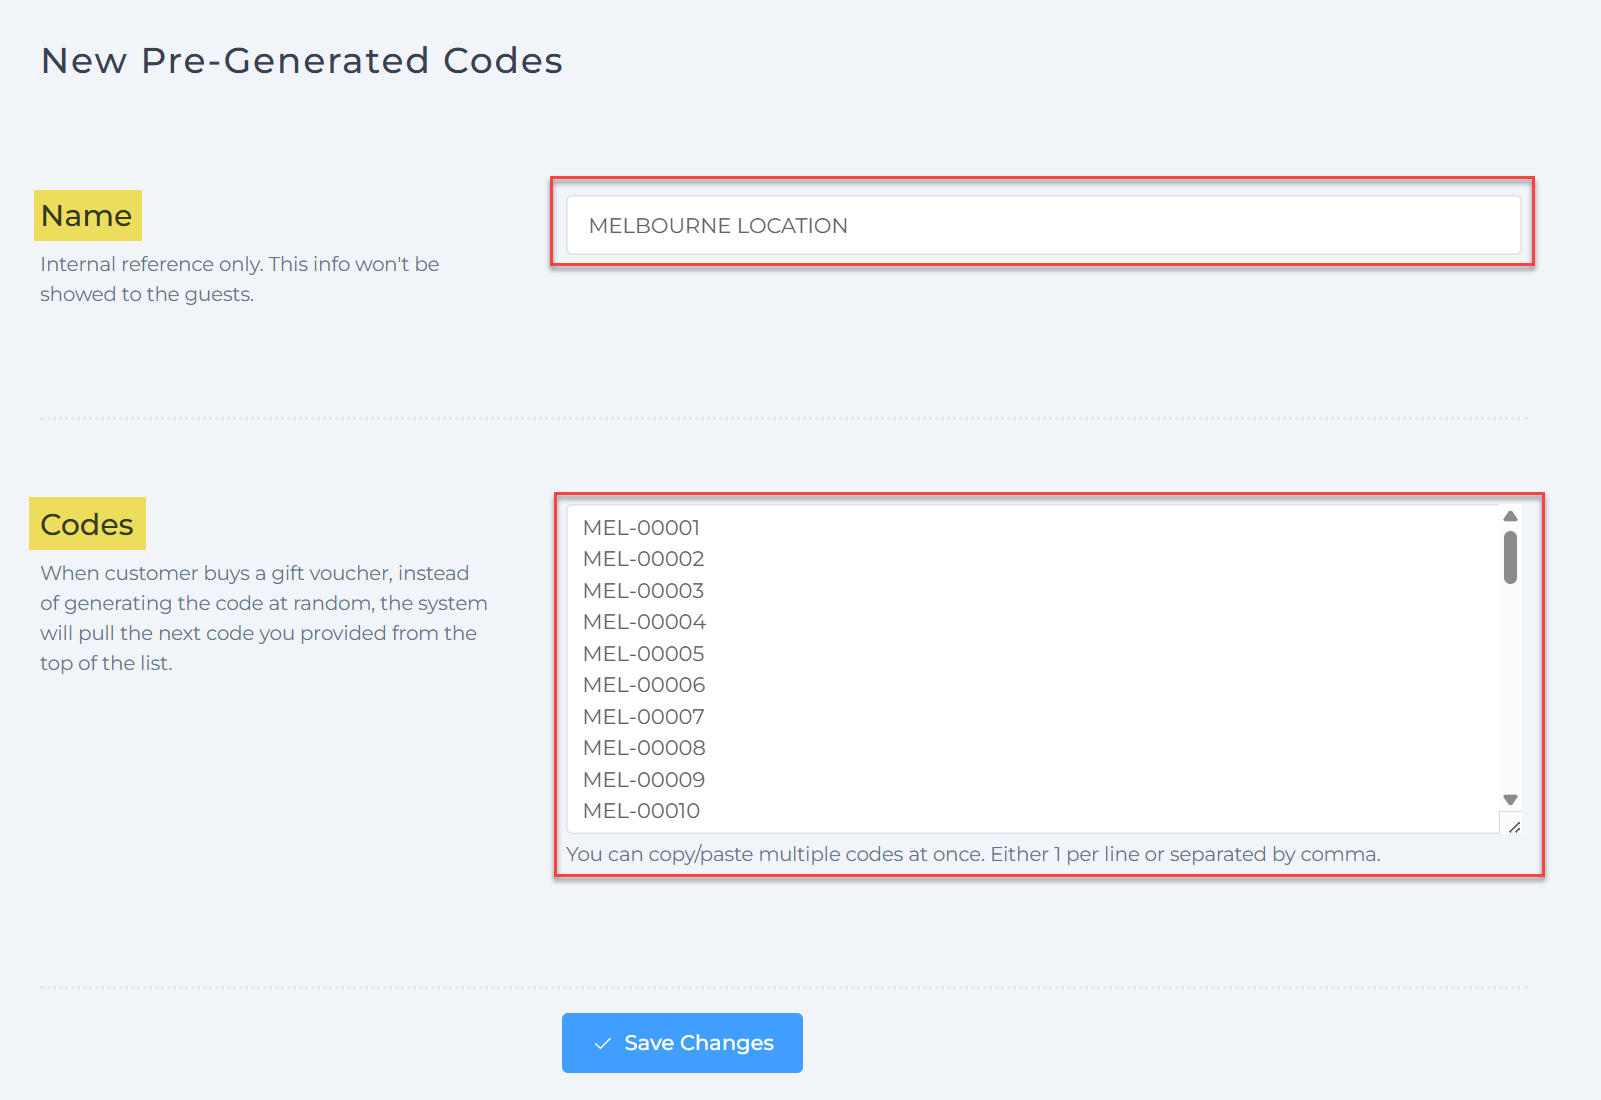
- Double-check for accuracy and then click Save or Import to upload the codes.
Tip: Naming your code banks meaningfully enables assigning different sets to specific voucher items or campaigns.
Step 3: Assign Pre-Generated Codes to Voucher Items
- In the dashboard left menu, go to Items and select an existing item or click Create New Item.
- Fill in the item details such as name, description, and price.
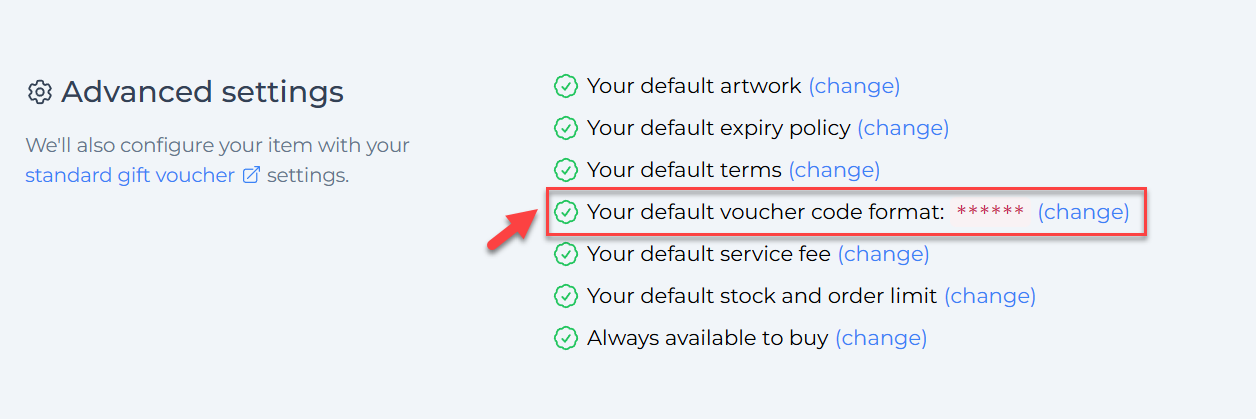
- Scroll to the Advanced settings section at the bottom.
- Click Change next to Your default voucher code format.
- Select Pull a code from list of pre-generated codes.
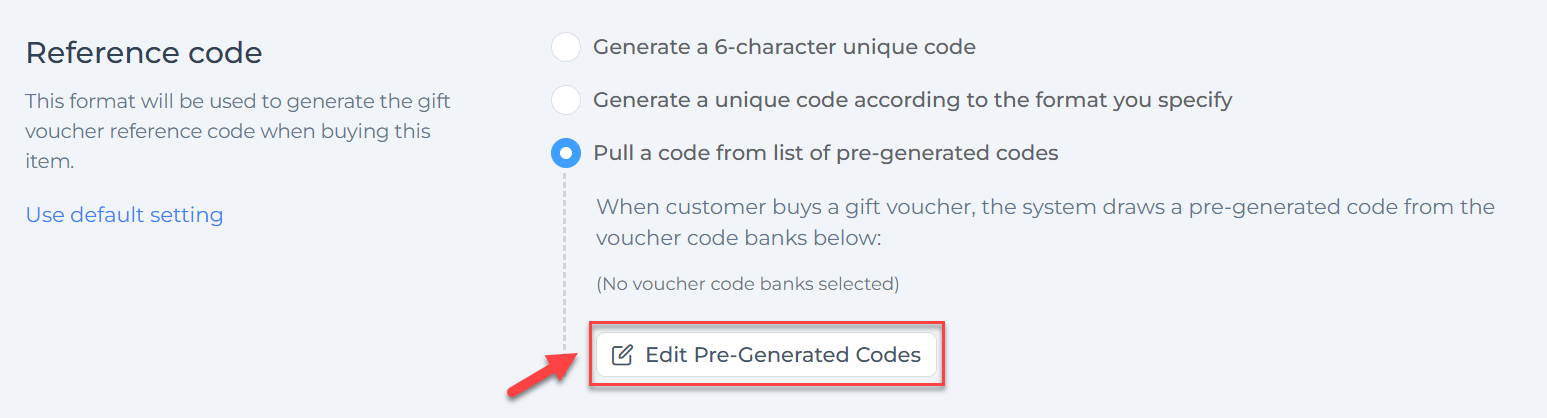
- Click Edit pre-generated codes to assign one or more code banks you imported earlier to this item.
- Save the item.
Note: Now, when a customer purchases this item, VaocherApp will automatically issue a unique voucher code pulled from the assigned pre-generated code banks.
Step 4: Test Your Pre-Generated Codes Setup
Before going live, test to make sure everything functions correctly:
- Use your own checkout page or a test order form to try purchasing a voucher.
- After purchase, confirm the voucher code issued is from your pre-generated list.
- Return to the Pre-generated codes setting page to check the updated list of available codes.
- Confirm that used codes are marked as redeemed or inactive and cannot be reissued.


Frequently Asked Questions
-
Can I upload multiple code banks? Yes! You can import several code sets and assign different sets to different voucher items for greater control.
-
What if I run out of codes in a bank? Once all codes in a bank are used, no more vouchers for that bank will be issued until you import additional codes.
-
Can I edit codes once imported? Individual codes cannot be edited after import, but you can import new sets and assign or reassign them as needed.