


How to Edit and Customize Your PDF Voucher Design in VaocherApp
With VaocherApp, you have full control over your PDF voucher design. Whether you want to remove elements such as the balance, add your logo, change fonts, or start from scratch with a fully custom design, this guide will walk you through editing your PDF voucher using the editor found at PDF Designs.
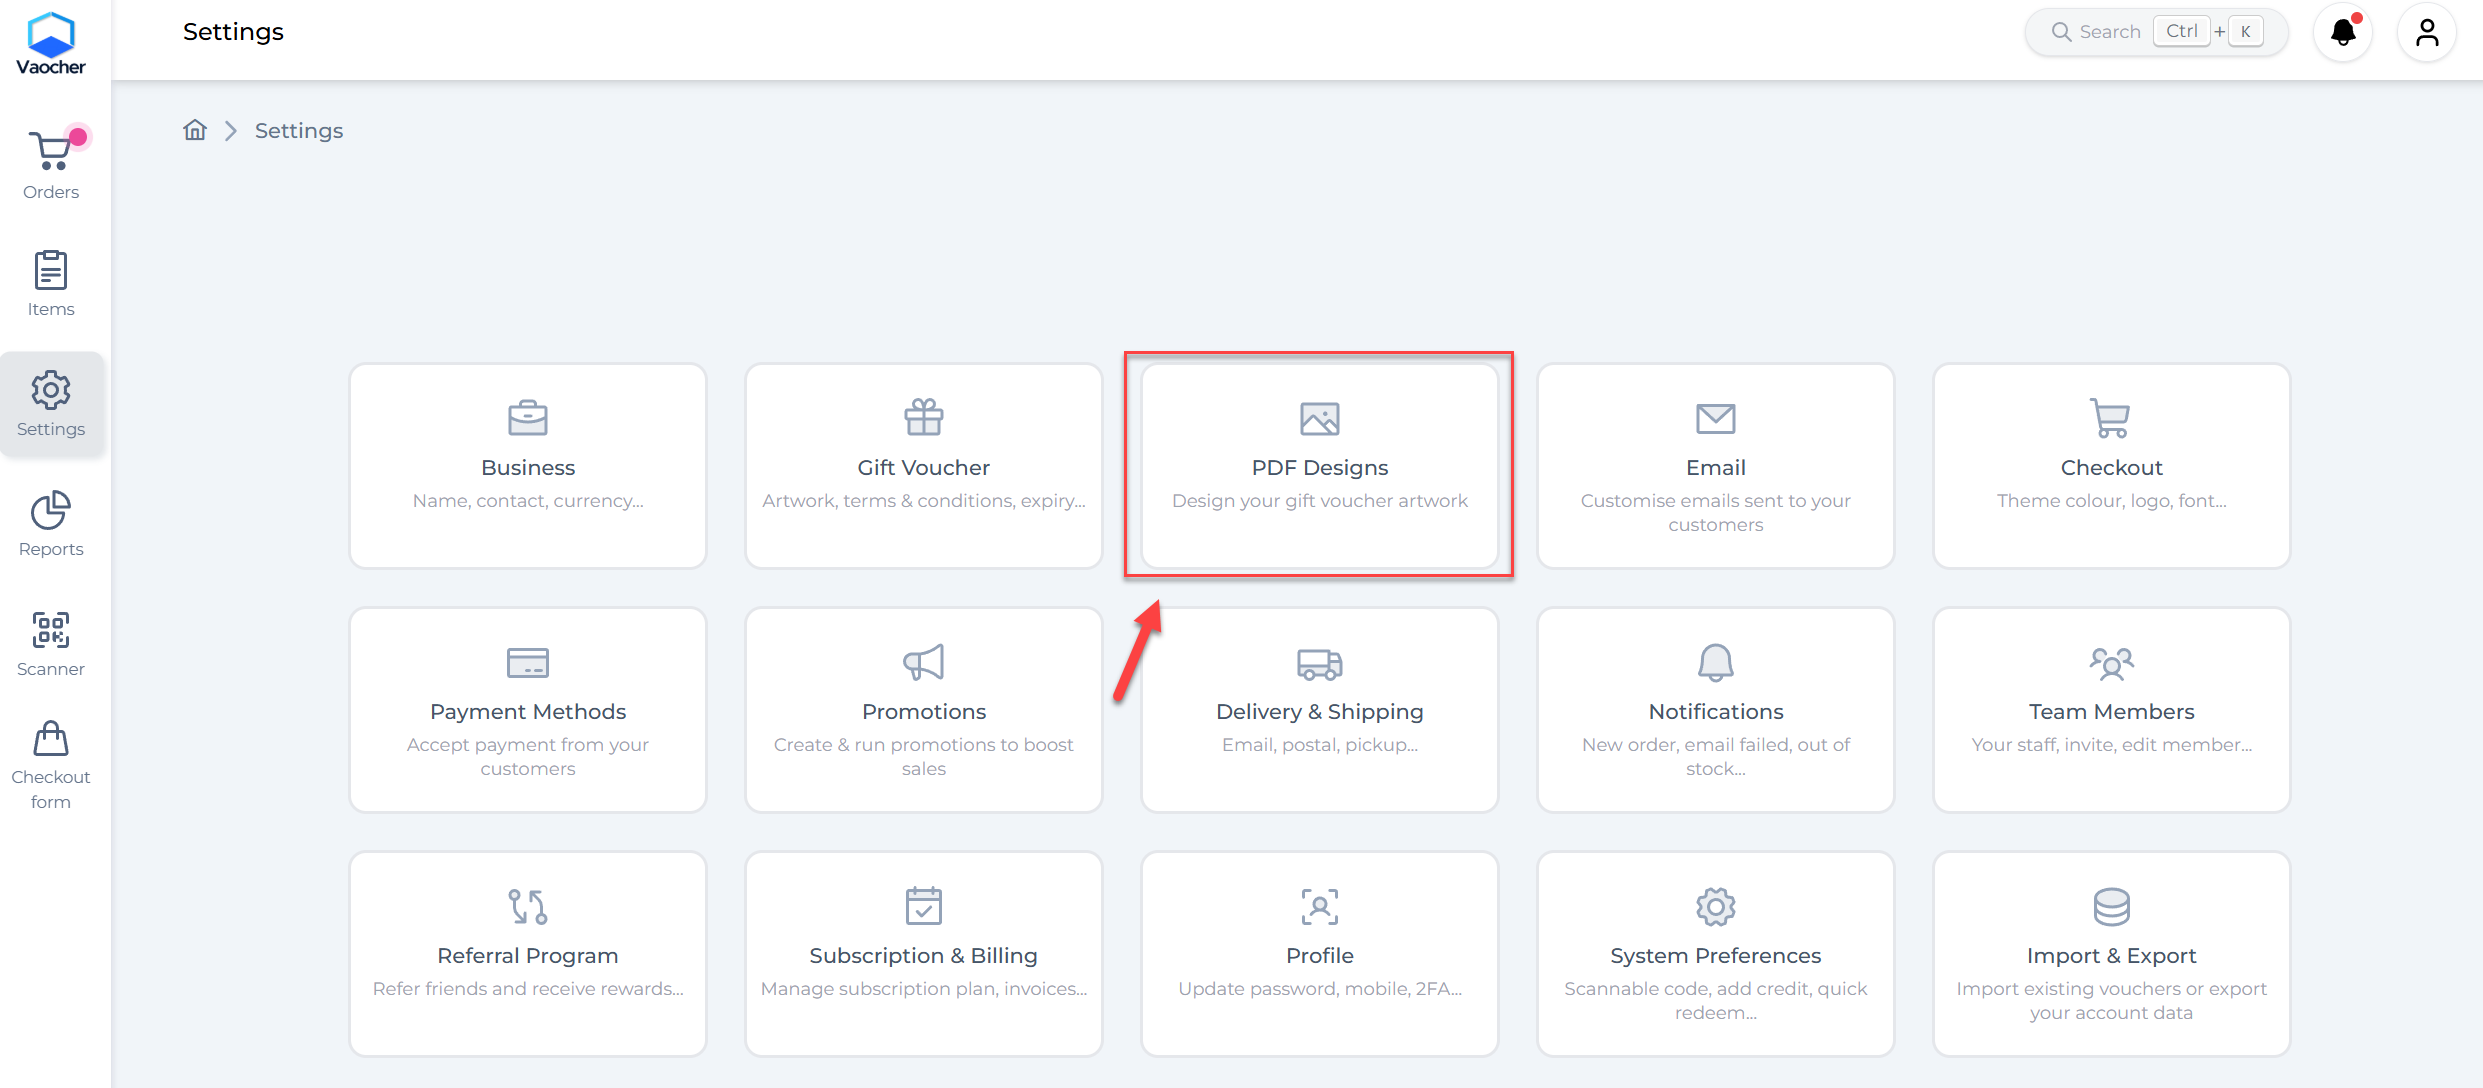
Step 1: Access the PDF Design Editor
- Log in to your VaocherApp account.
- Navigate directly to PDF Designs, or:
- From your dashboard, select Settings in the left menu.
- Then click PDF Designs.
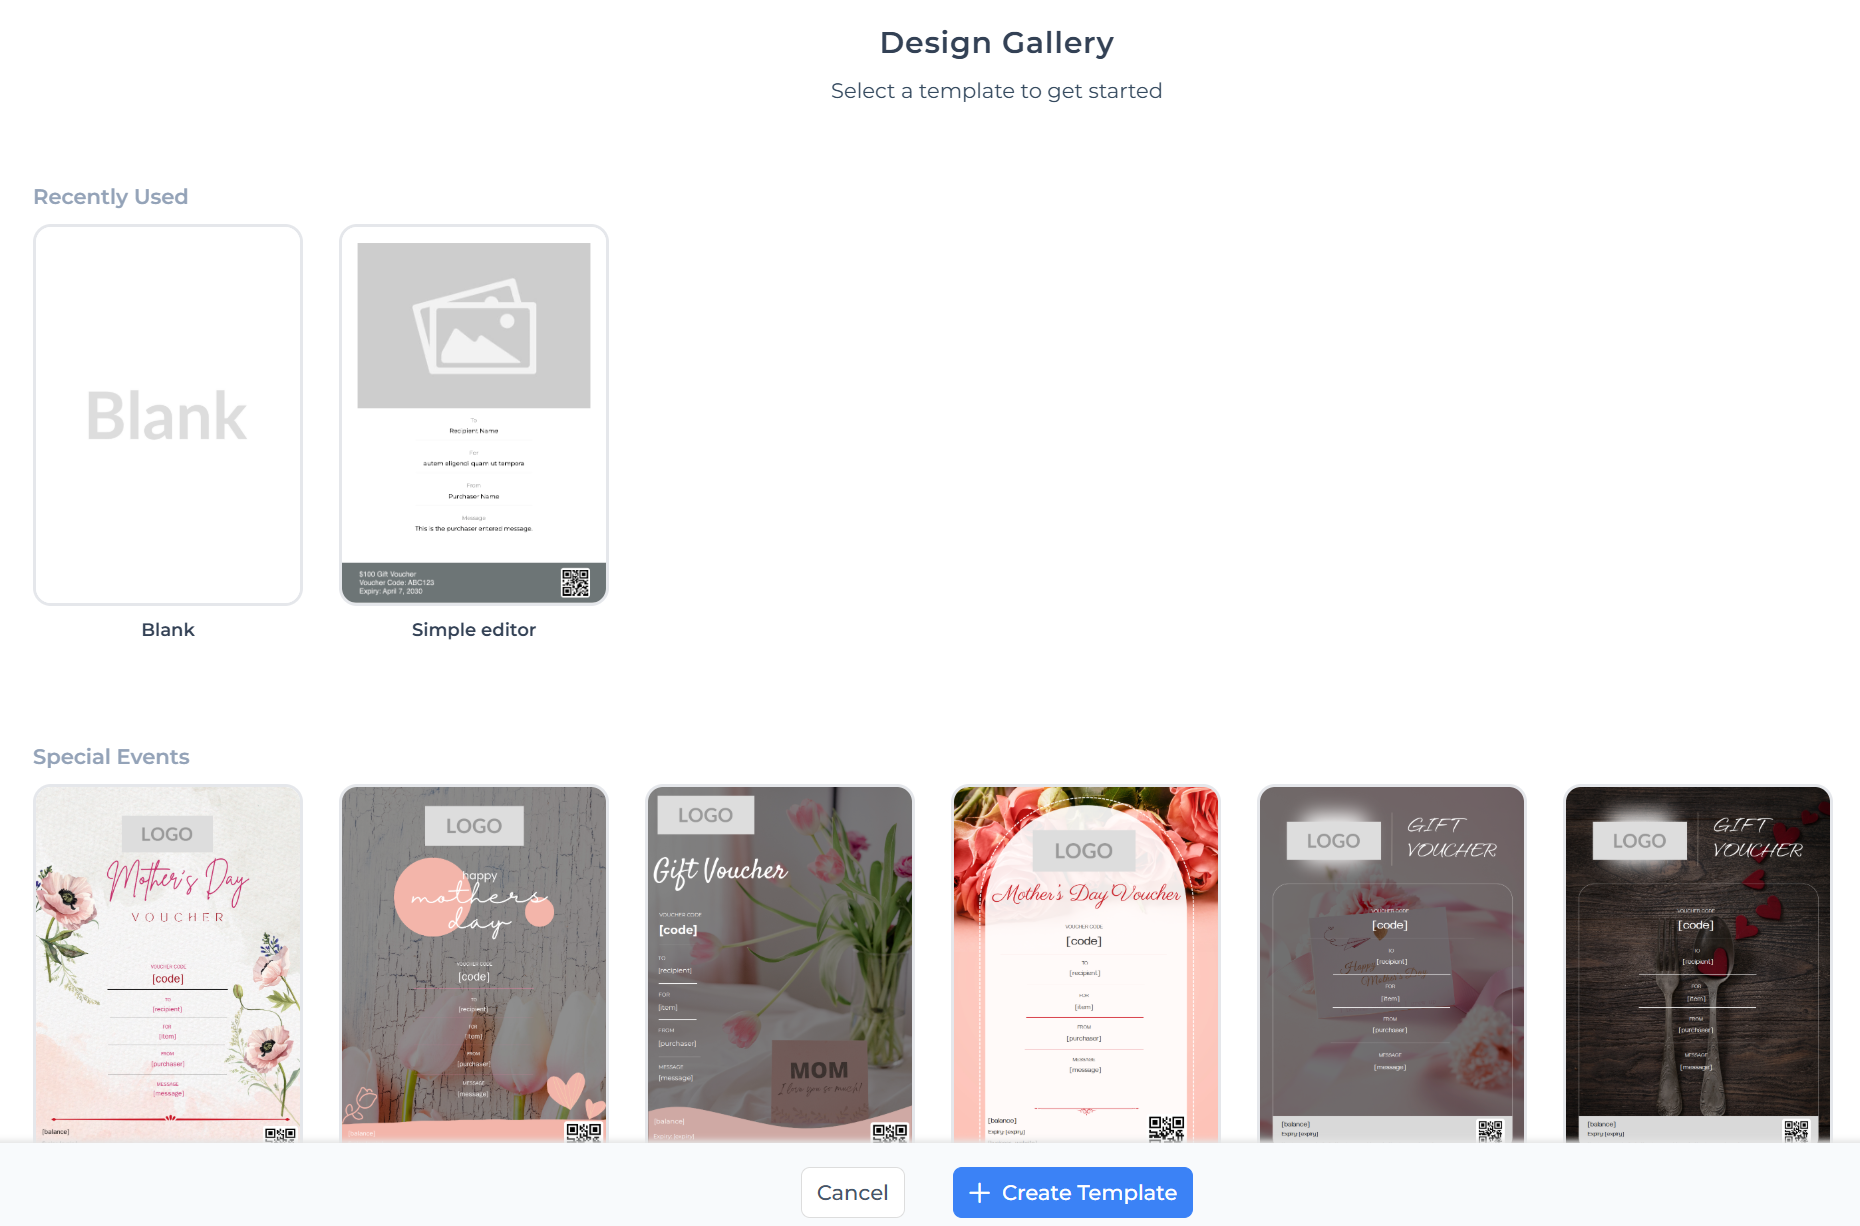
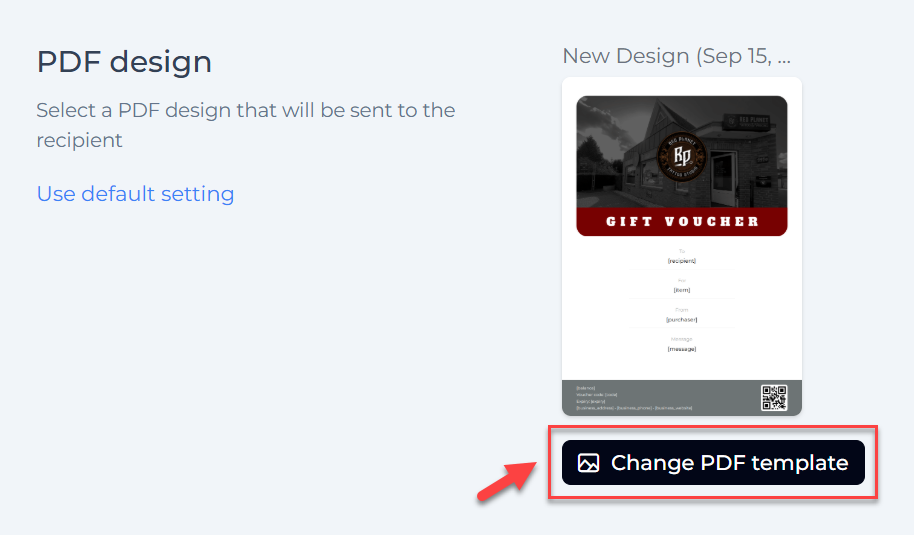
Step 2: Select or Create a Voucher Template
- You’ll see a list of your existing PDF voucher templates.
- To update an existing template, click Edit beside it.
- To create a new one, click Create New Template.
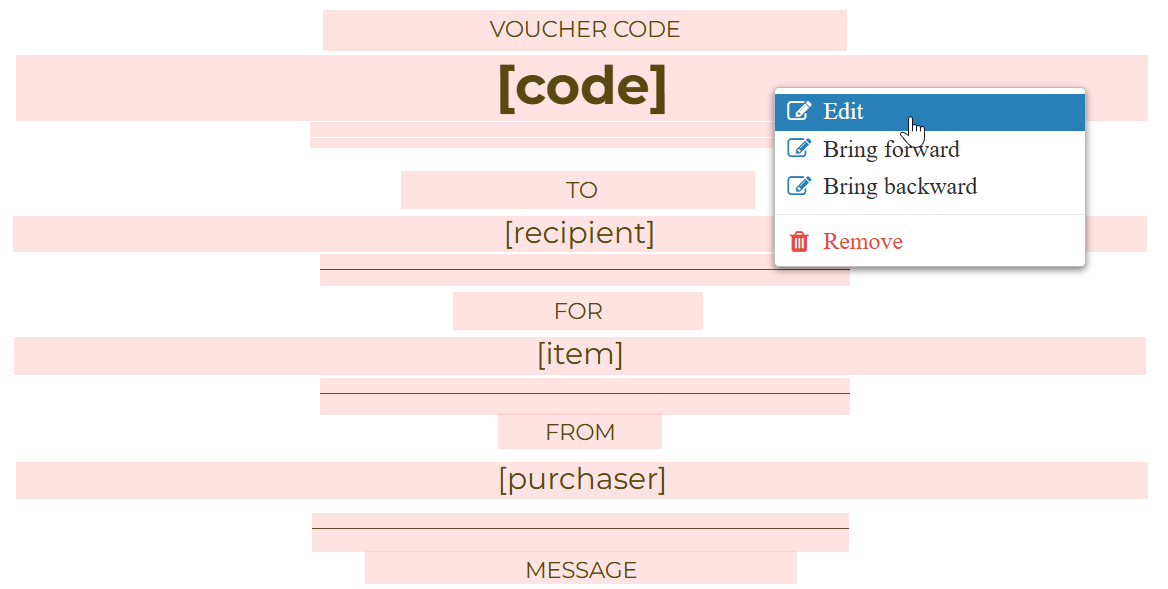
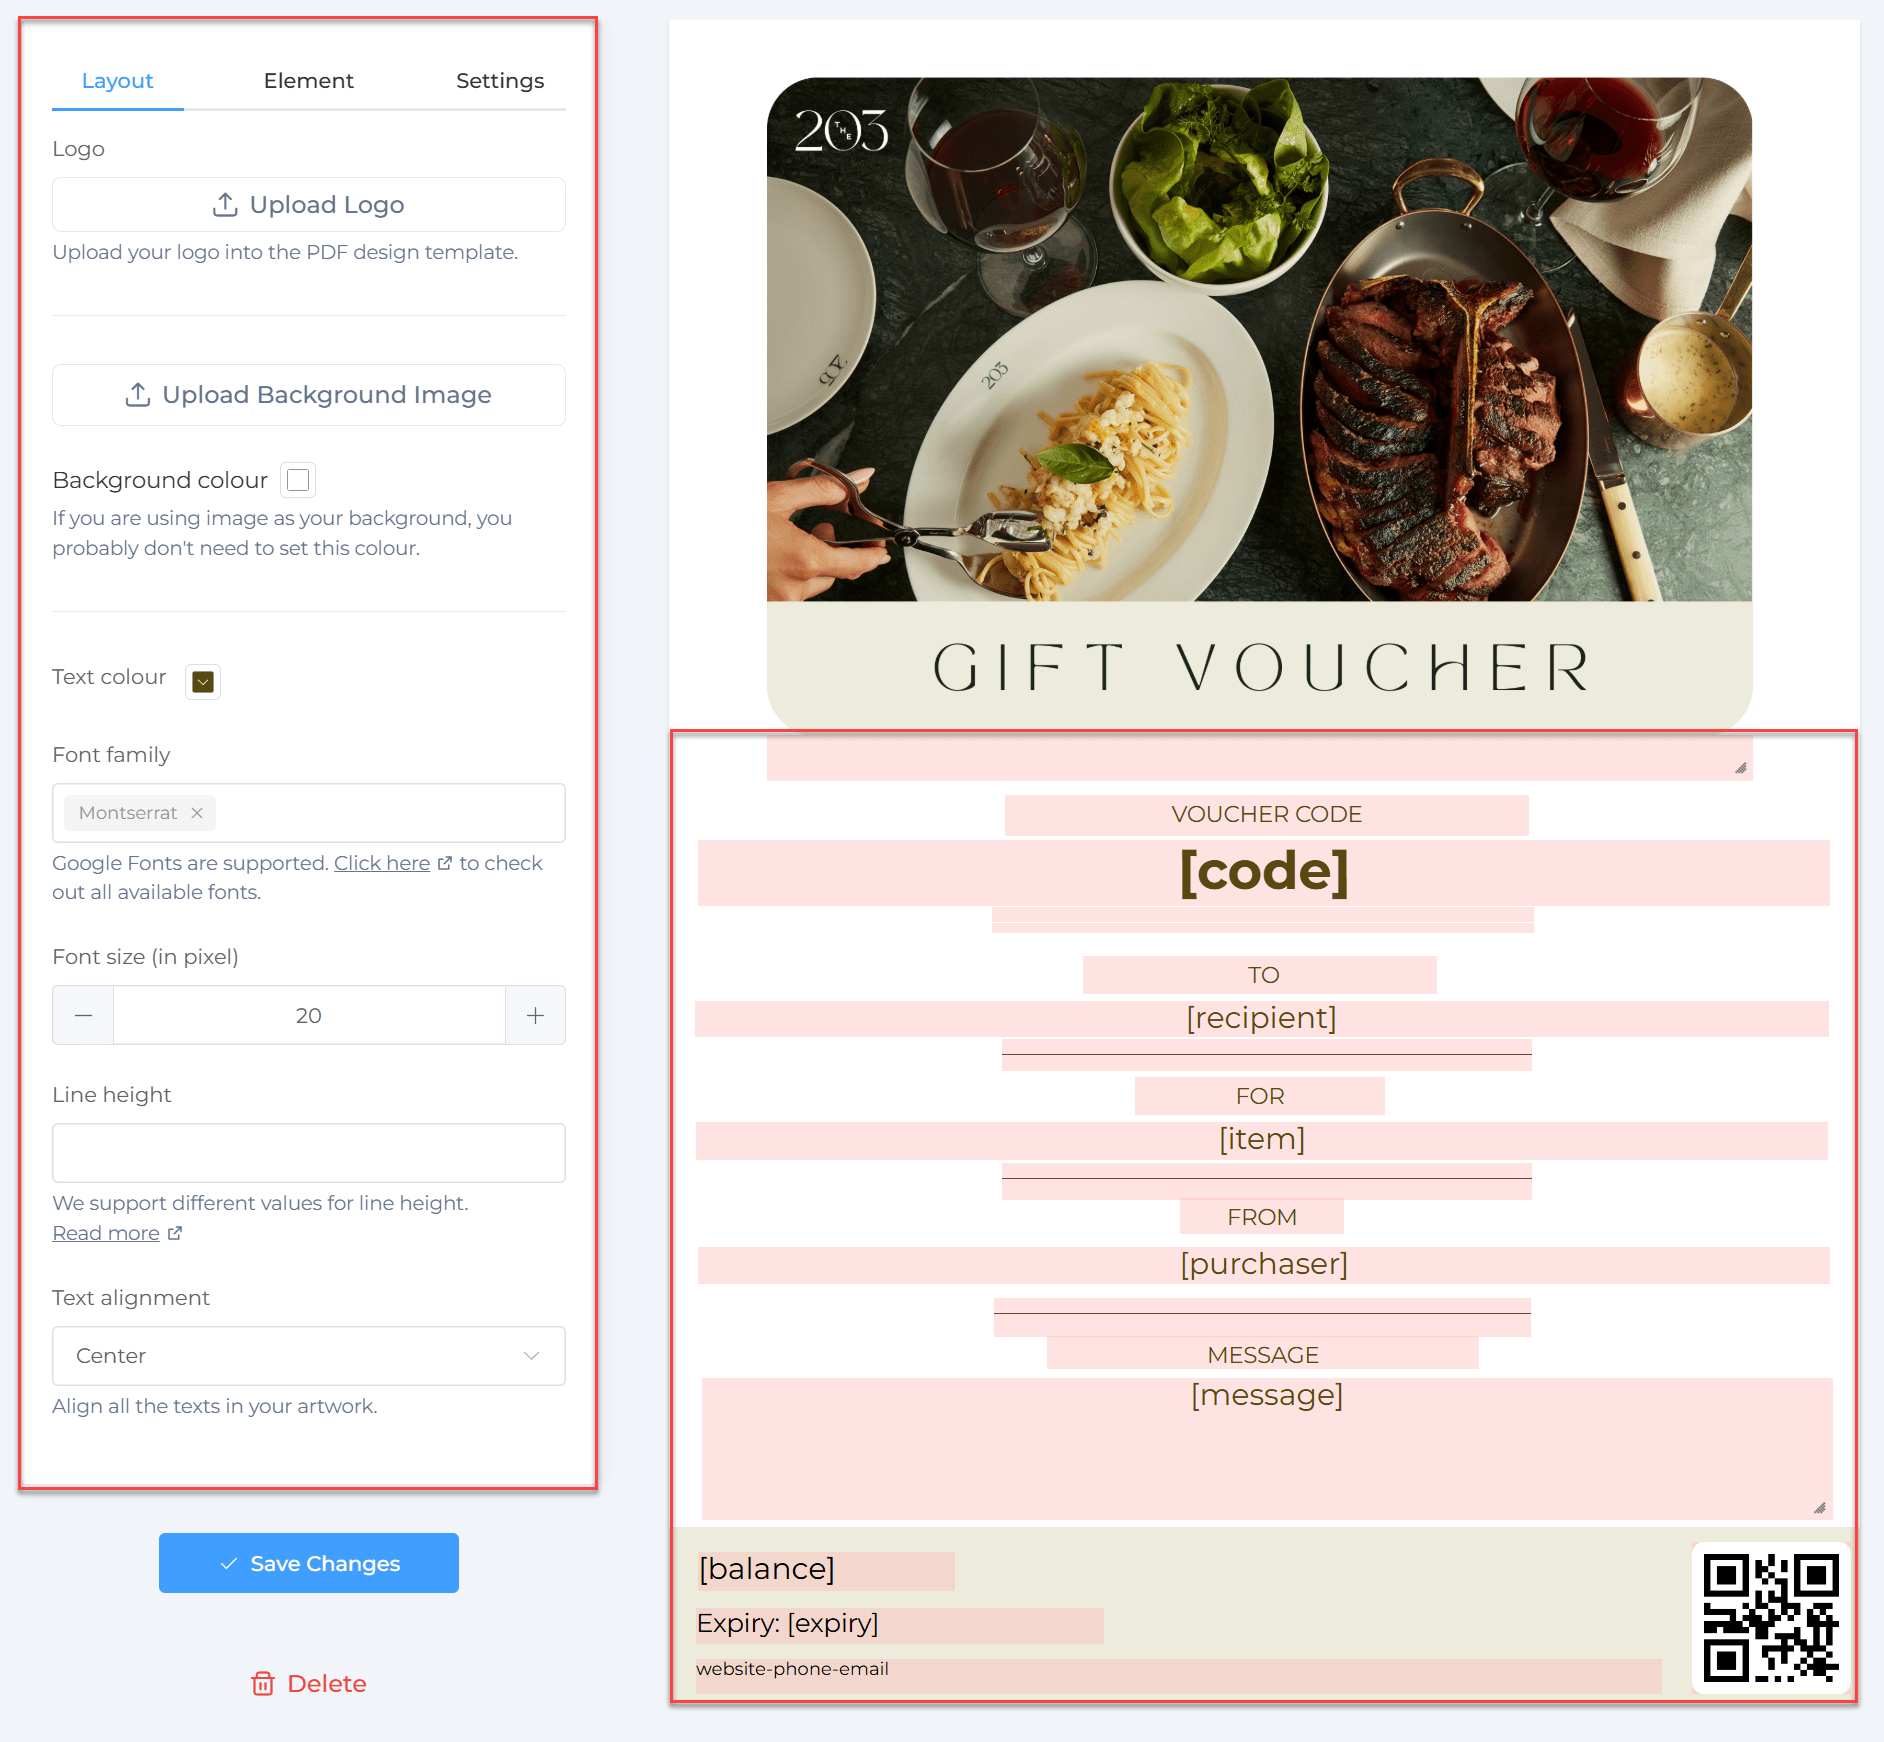
Step 3: Customize Your Voucher Using the Drag-and-Drop Editor
Editing Text and Existing Elements
- Right-click any text box or element in the voucher preview.
- Choose Edit to change the text in-place.
- To delete unwanted parts (like the balance), right-click and select Remove.
- Drag elements to reposition them freely on the voucher.
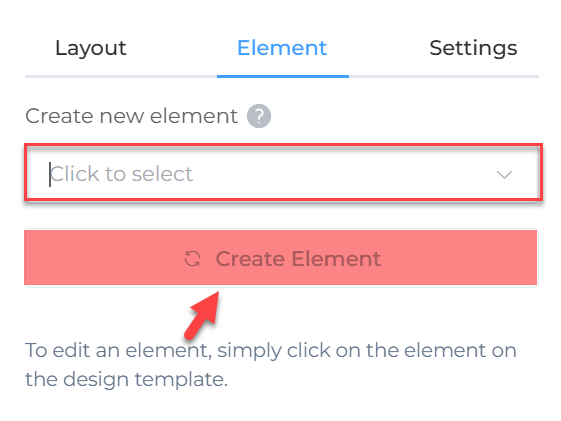
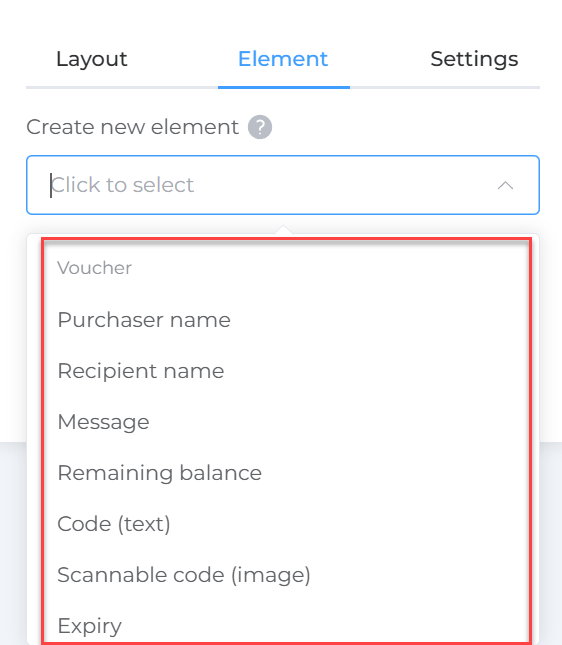
Adding New Elements
Use the Element buttons to add:
- Purchaser or recipient names (auto-populated).
- Logos or images.
- Custom messages (auto-filled).
- QR codes linking to offers or websites.
You can then resize, move, and style new elements as easily as existing ones.
Managing Dynamic Fields (Voucher Variables)
- Insert dynamic fields that automatically populate values like voucher code, amount, expiry date, recipient name, and balance.
- To hide the balance, simply remove the Balance dynamic field.
Step 4: Modify Overall Design Settings
- Change the background color or upload a background image.
- Use the toolbar to adjust fonts:
- Change font type, size, and color.
- Align text left, center, or right.
- Insert text blocks for terms and conditions or other important notes.
- Preview your design live with sample data.
For more design guidance, see How to Build & Customise Your Gift Voucher Design.
Step 5: Save and Publish Your Design
- Click Save Changes when you are done.
- Preview or download a sample PDF to confirm your layout.
- Assign the design to your voucher items so future vouchers use it.

Design Tips
- Keep your design clean and straightforward for better readability.
- Incorporate your logo, brand colors, and fonts consistently.
- Highlight critical details like voucher code, value, and expiry prominently.
- Always preview with real voucher data to catch any formatting issues.
- Back up previous templates before major edits.
Using VaocherApp’s PDF Design editor, you can create professional, branded vouchers tailored exactly to your business.