









Getting Started with VaocherApp
Welcome to VaocherApp!
This guide will help you create your gift vouchers, set up your checkout, test the customer experience and start selling online.
Before you go live
Complete these steps:
- Check your business details
- Create your voucher items
- Connect a payment method
- Add your voucher design
- Review your checkout and customer emails
- Add your voucher store to your website
- Place a test order
- Test voucher redemption
- Go live
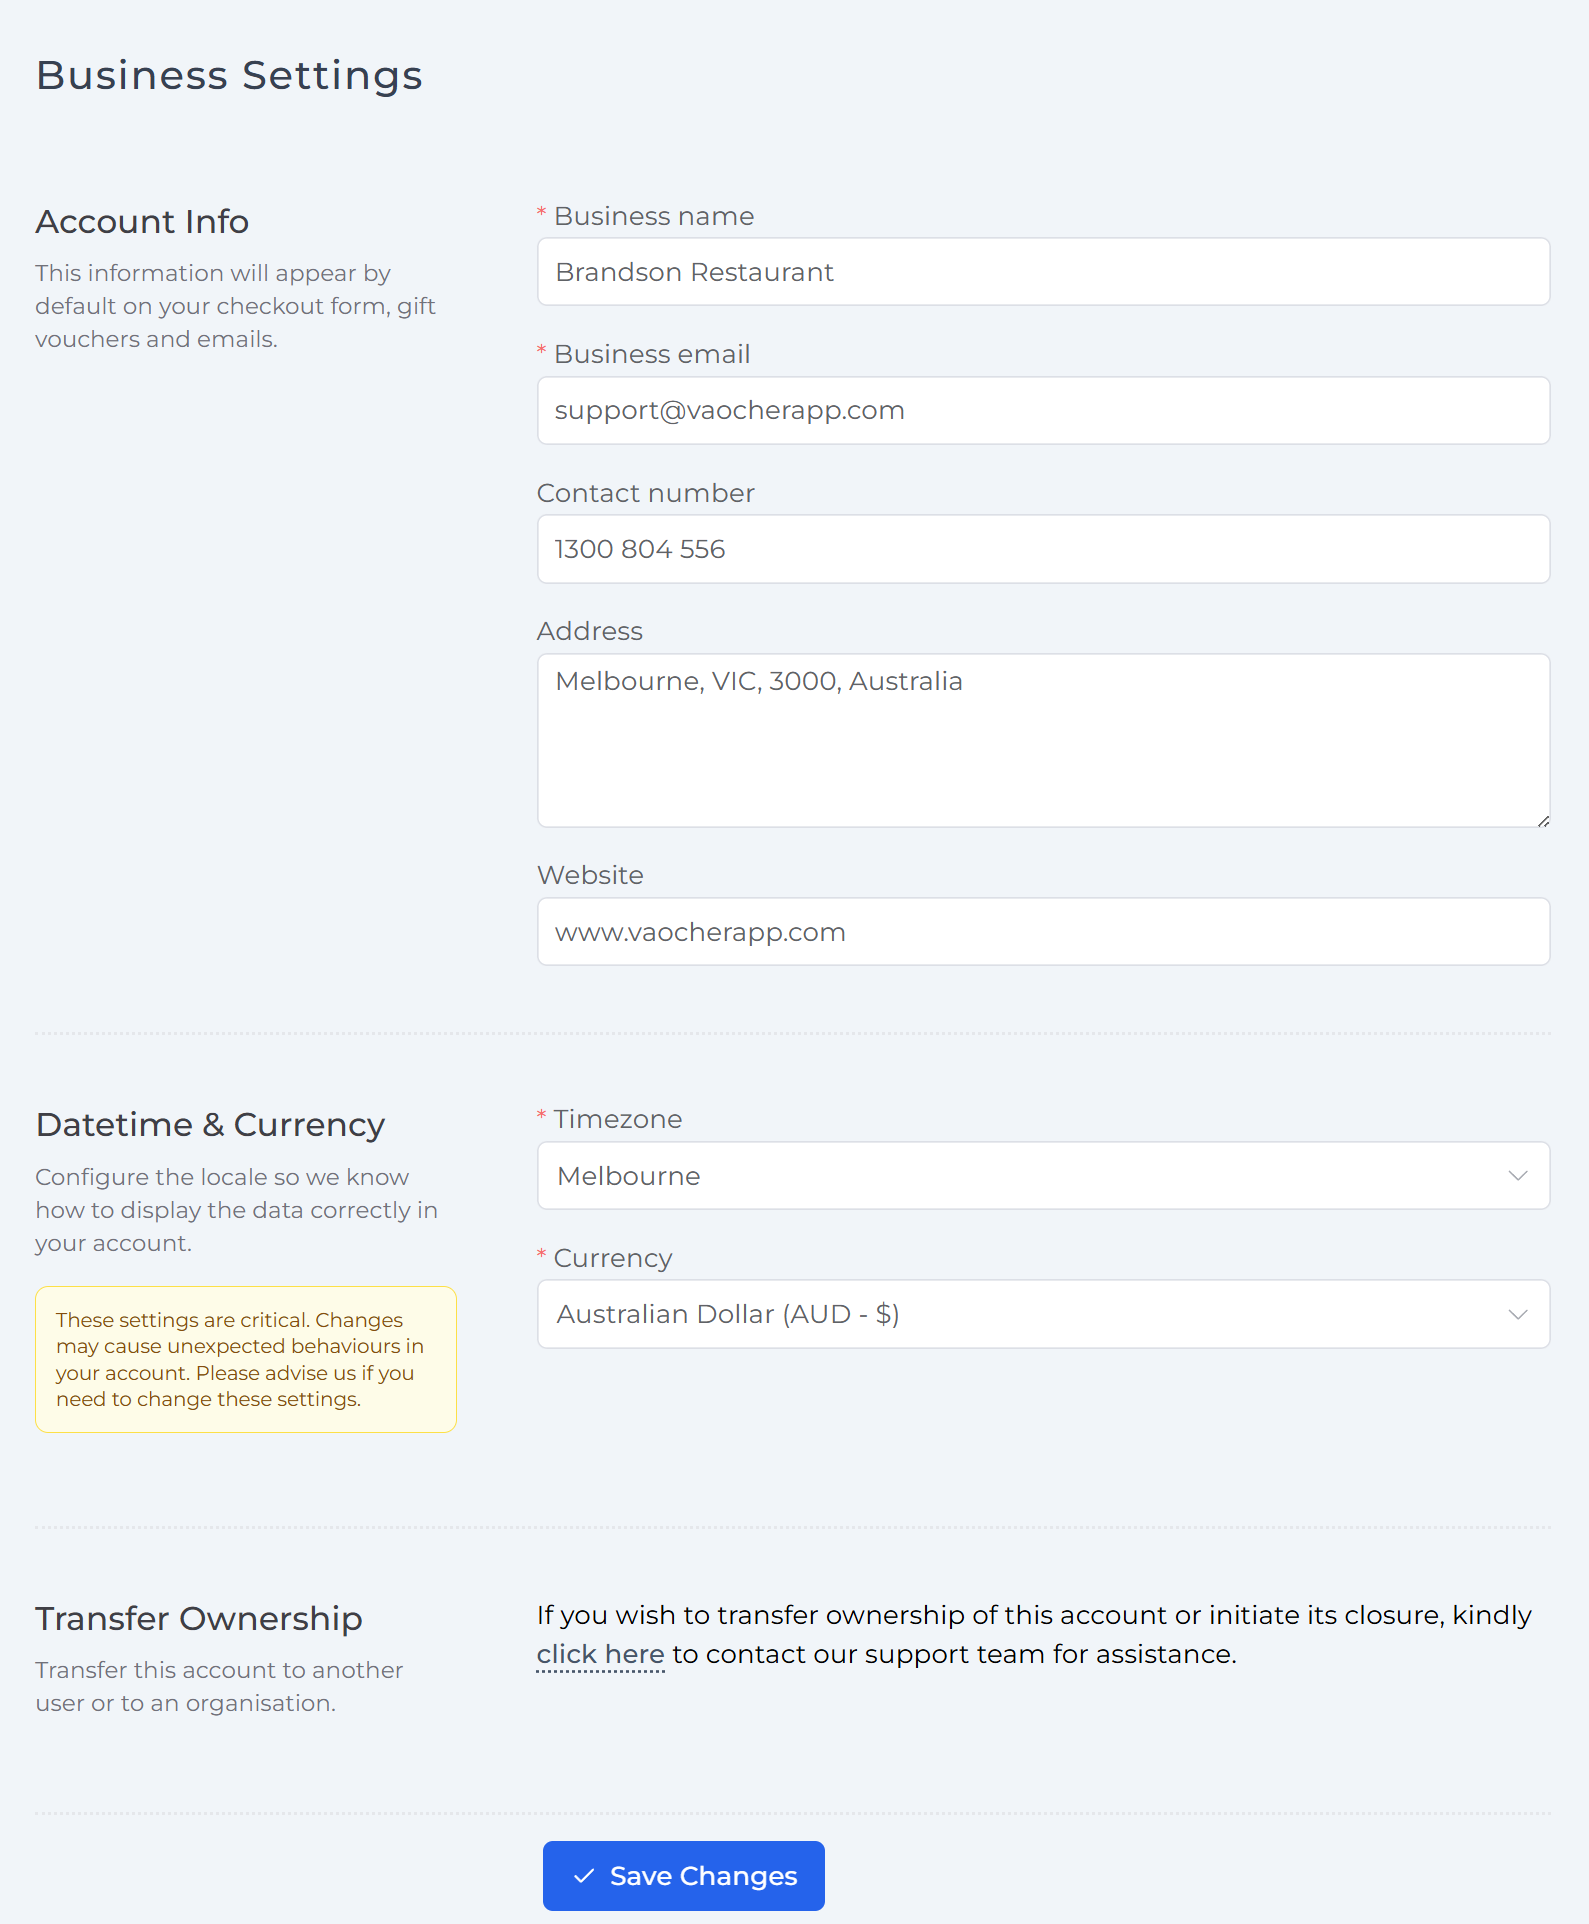
1. Check your business details
Go to:
Settings → Business
Make sure your business details are correct, including your:
- Business name
- Email address
- Phone number
- Address
- Website
- Timezone
- Currency
These details may appear on your checkout, voucher emails and PDF vouchers.
2. Create your voucher items
Go to:
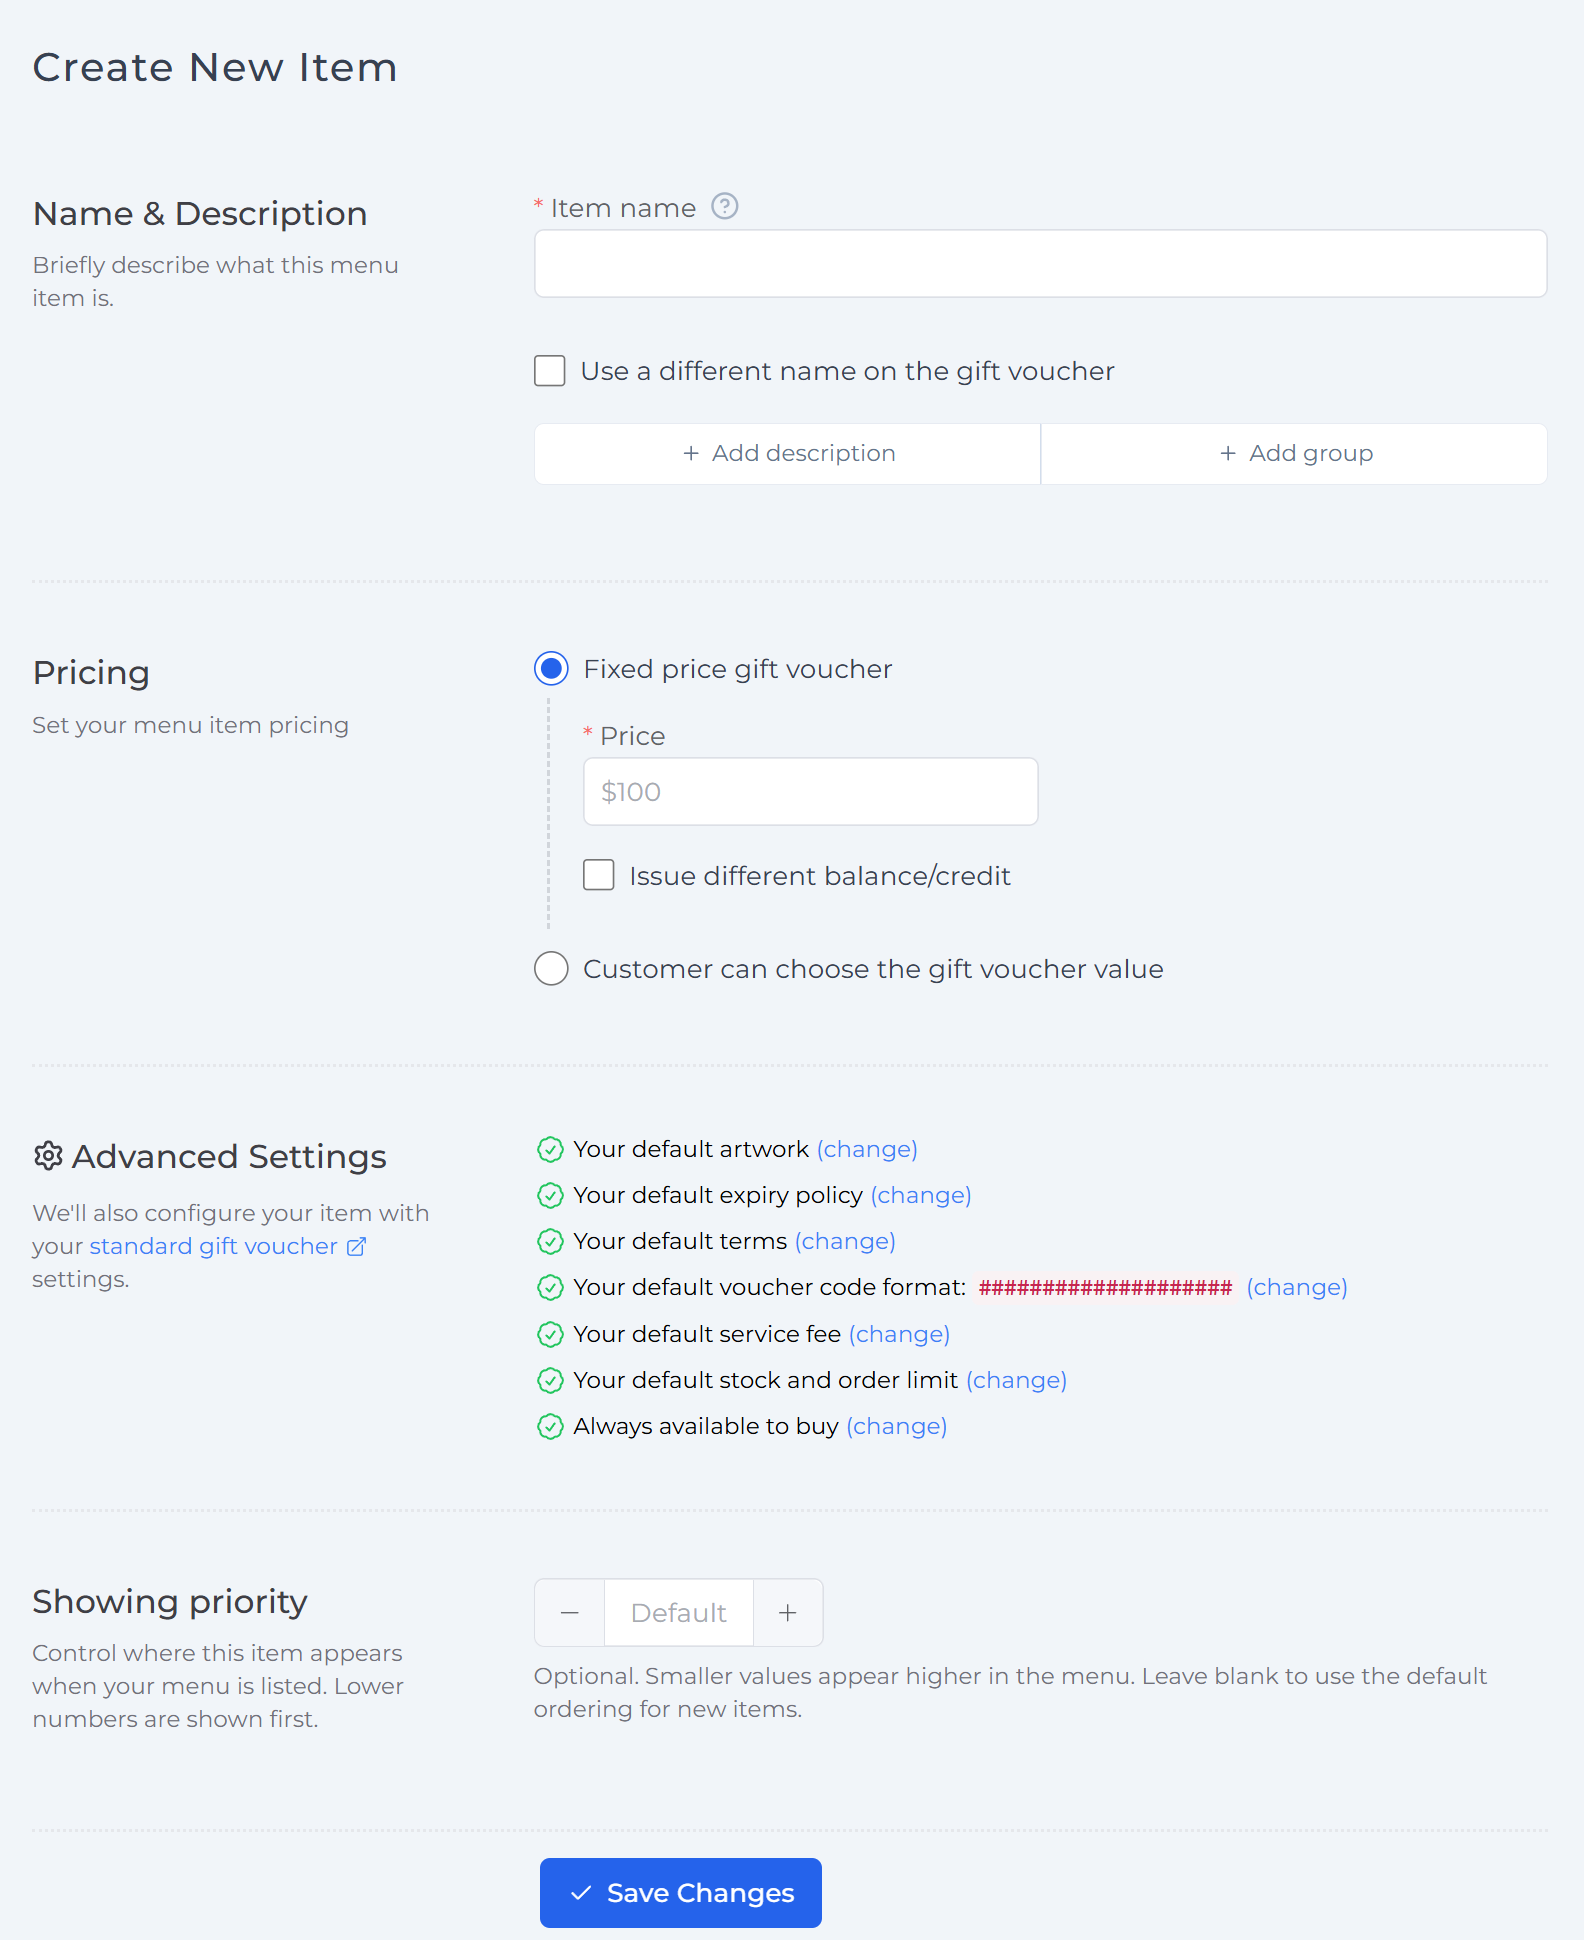
Create the vouchers you would like to sell, such as:
- $50 Gift Voucher
- $100 Gift Voucher
- Dinner for Two
- Spa Treatment Voucher
- Custom Value Gift Voucher
For each voucher, add:
- Name
- Description
- Price or value
- Expiry period
- Terms and conditions
- Voucher design
Start with your main voucher options. You can add more later.
Related guides:
- How to Edit Gift Card Details
- Selling Custom Value Gift Vouchers
- Setting Up Terms and Conditions for Individual Voucher Items
3. Connect a payment method
Go to:
Settings → Payment Methods
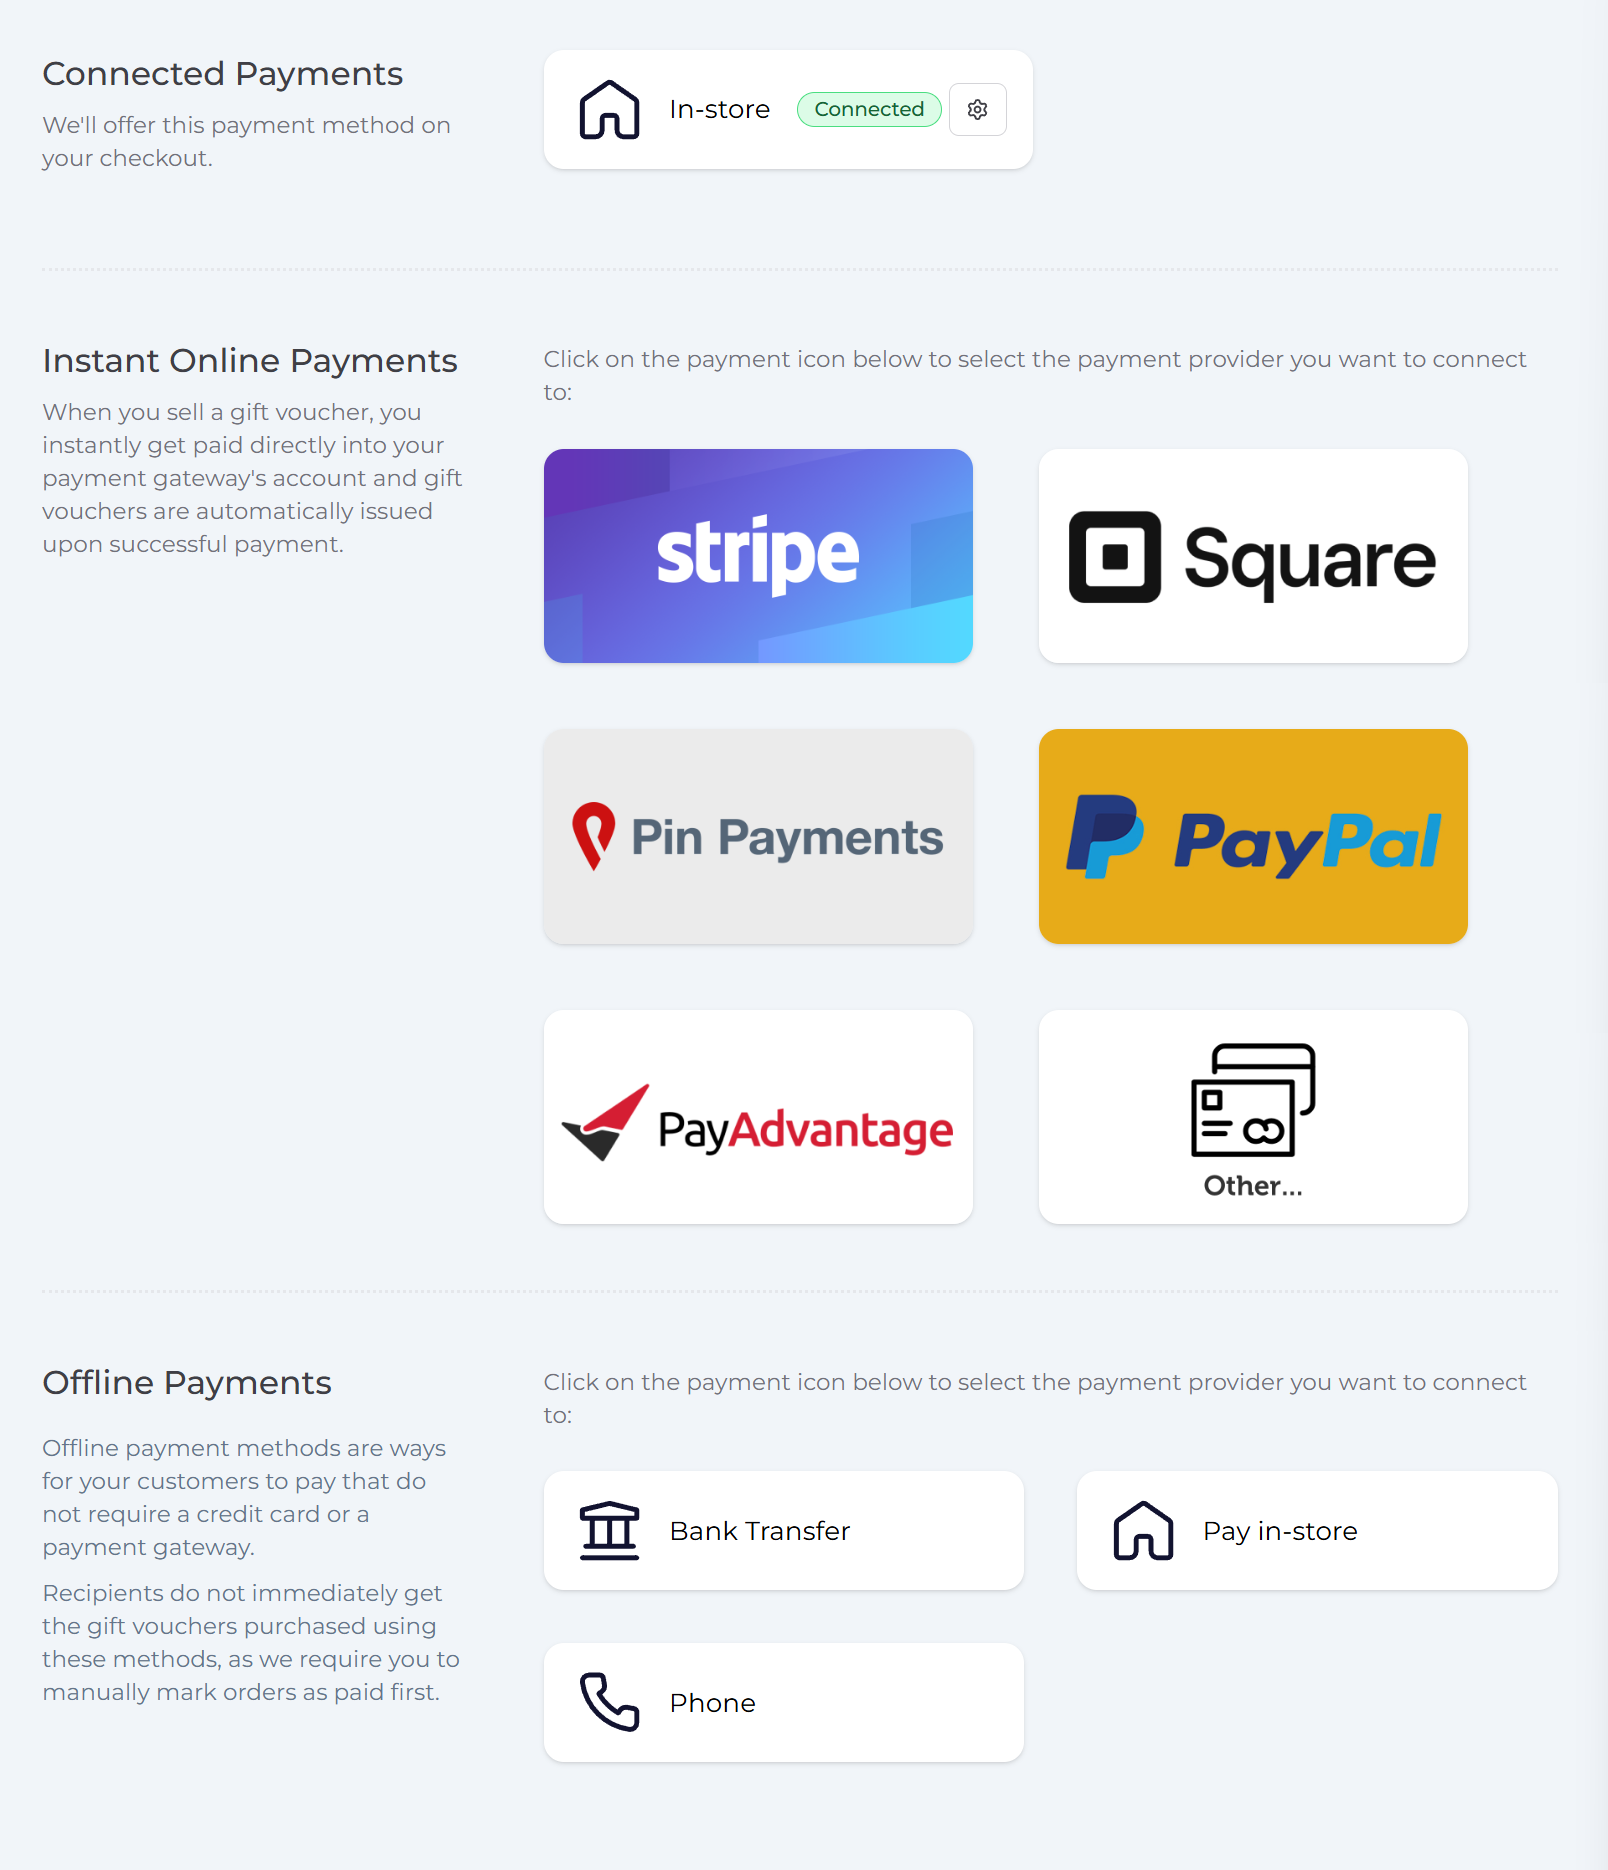
Connect your preferred payment provider so customers can pay for vouchers online.
Available payment options may include:
- Stripe
- PayPal
- Pin Payments
- PayAdvantage
Once connected, online voucher payments are paid directly into your merchant account.
You can also set up offline payment options, such as bank transfer or pay in-store, if required.
Related guides:
- Stripe Payment
- What Payment Methods/Gateways Are Supported?
- How and When You Get Paid
- How to Set Up Offline Payment Methods
4. Add your voucher design
Go to:
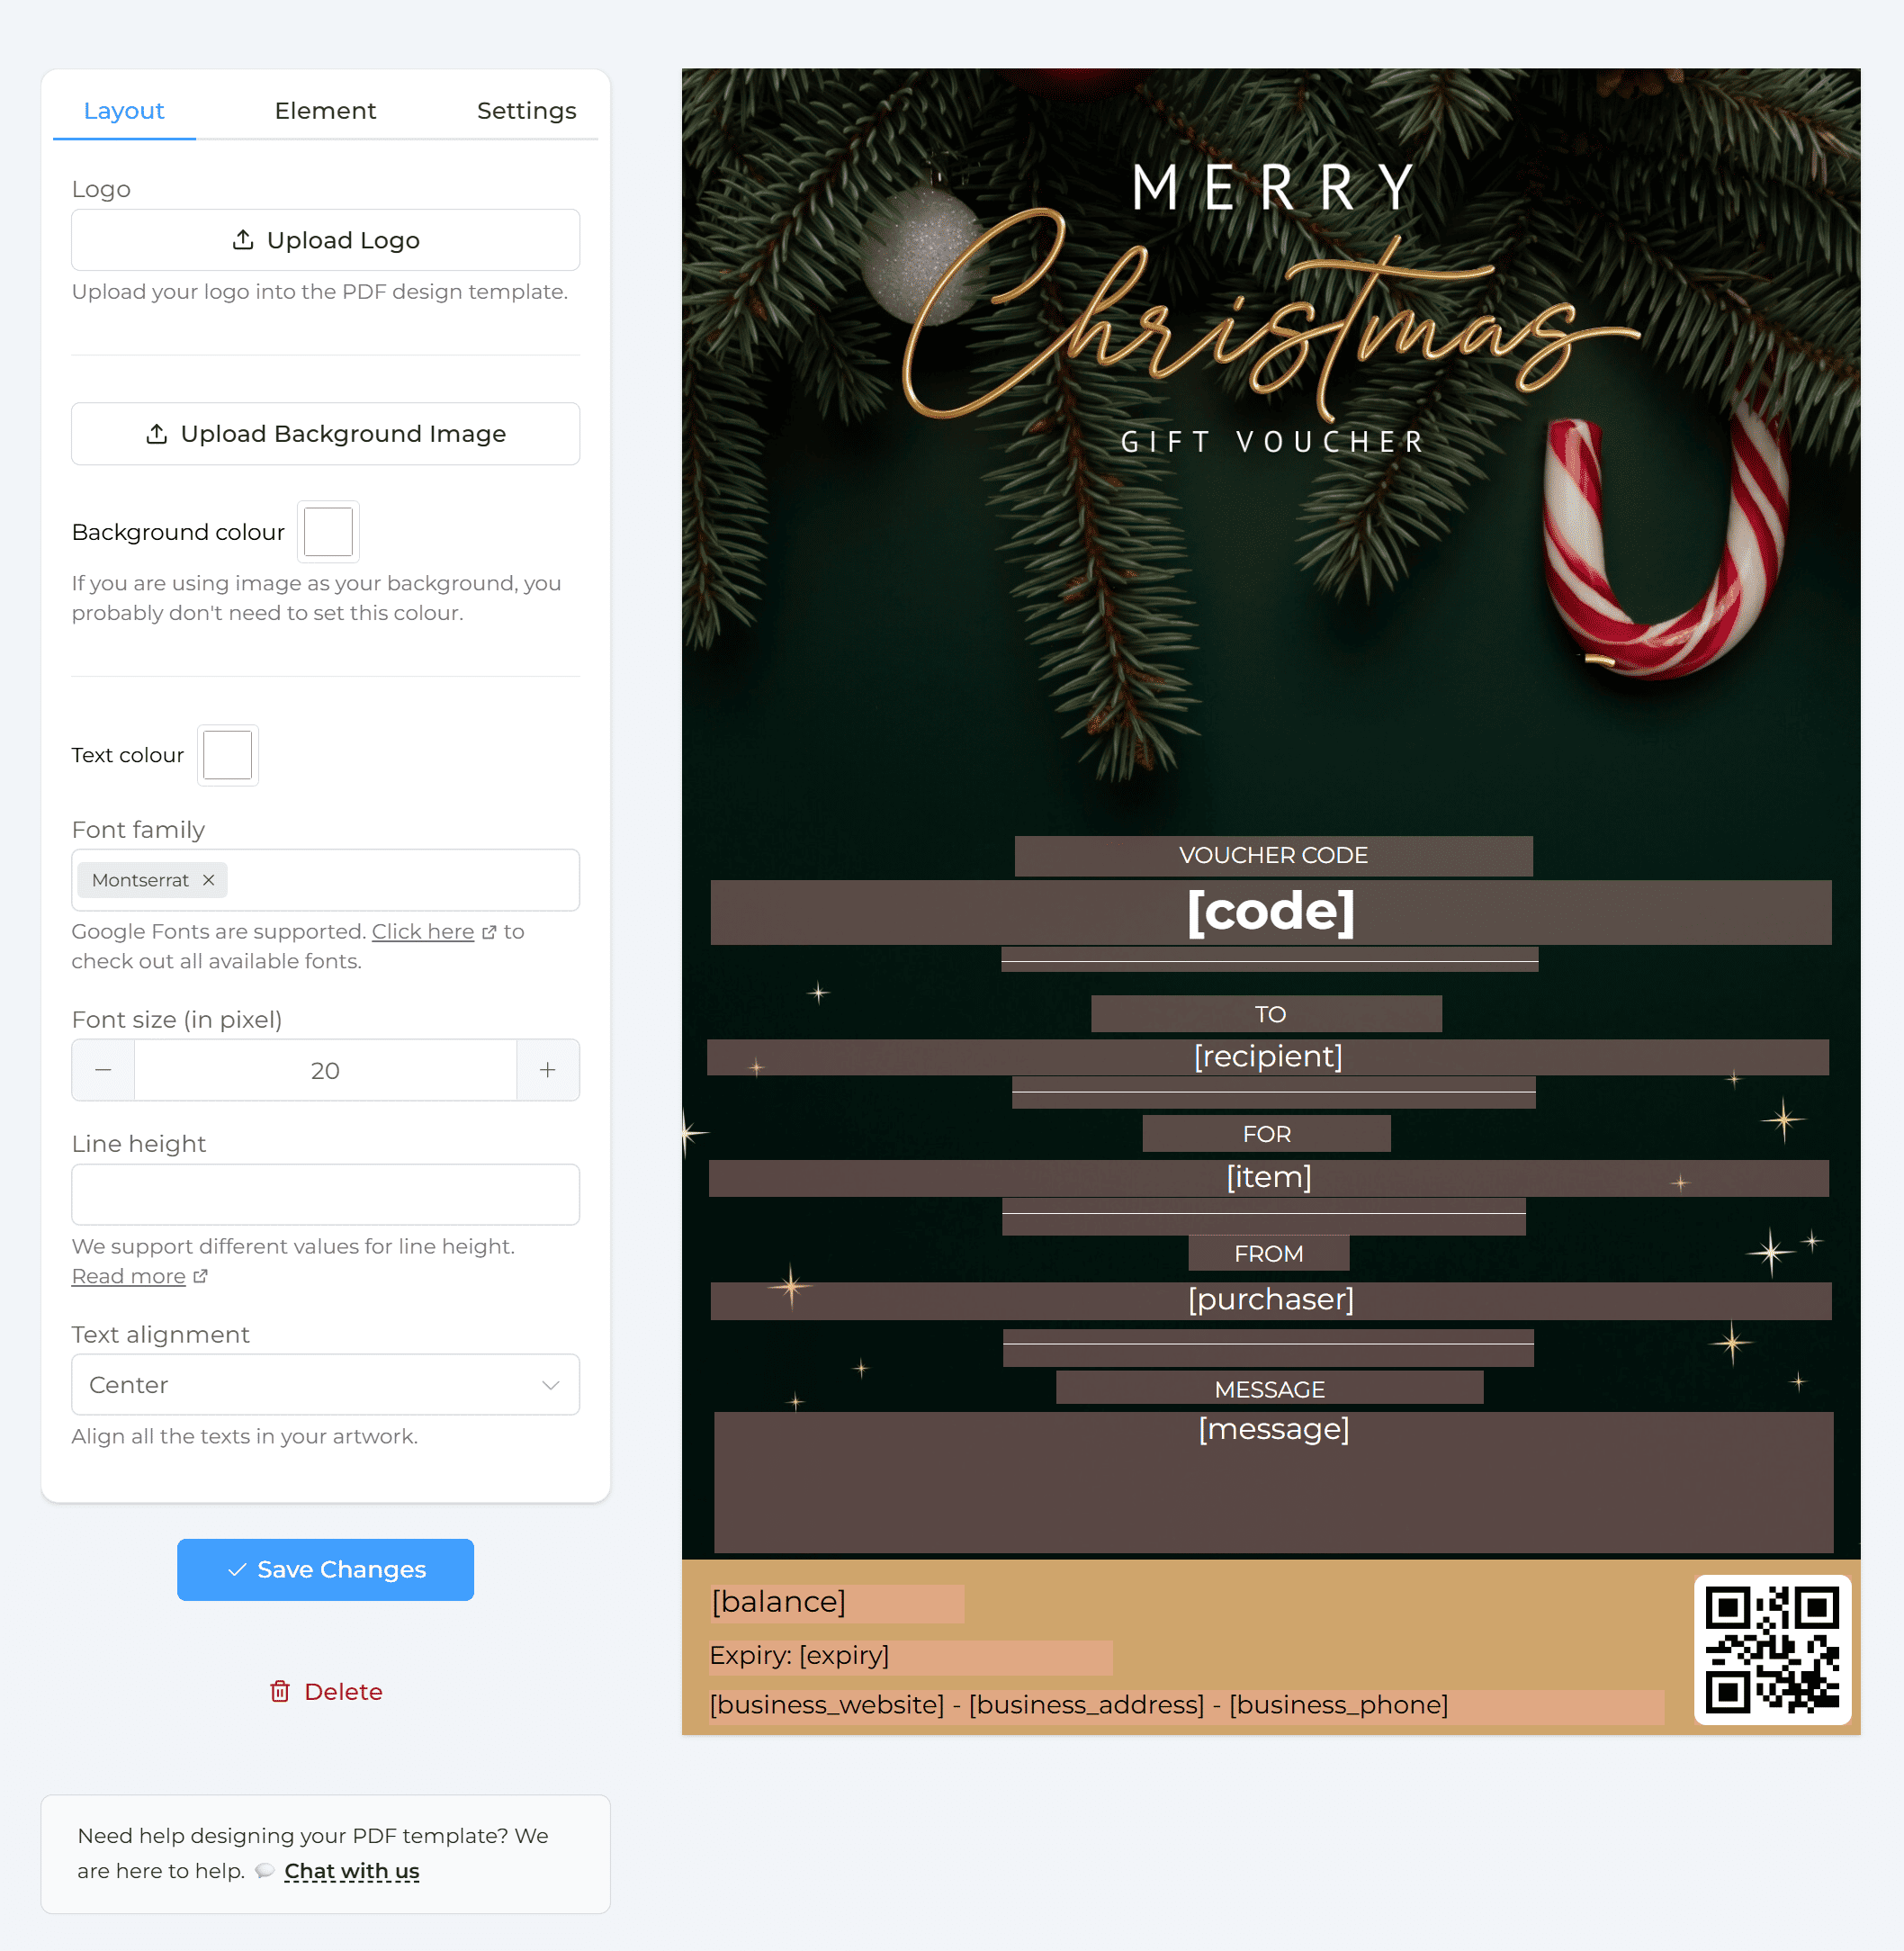
Your PDF voucher is what the recipient receives after a voucher is purchased.
Customise your voucher with your:
- Logo
- Brand colours
- Background artwork
- Voucher wording
- Terms and conditions
Once your design is ready, make sure it is assigned to the correct voucher items.
Need help with your voucher design? Complete our onboarding form and our team can assist:
https://vaocher.app/onboarding-form
Related guides:
5. Review your checkout and customer emails
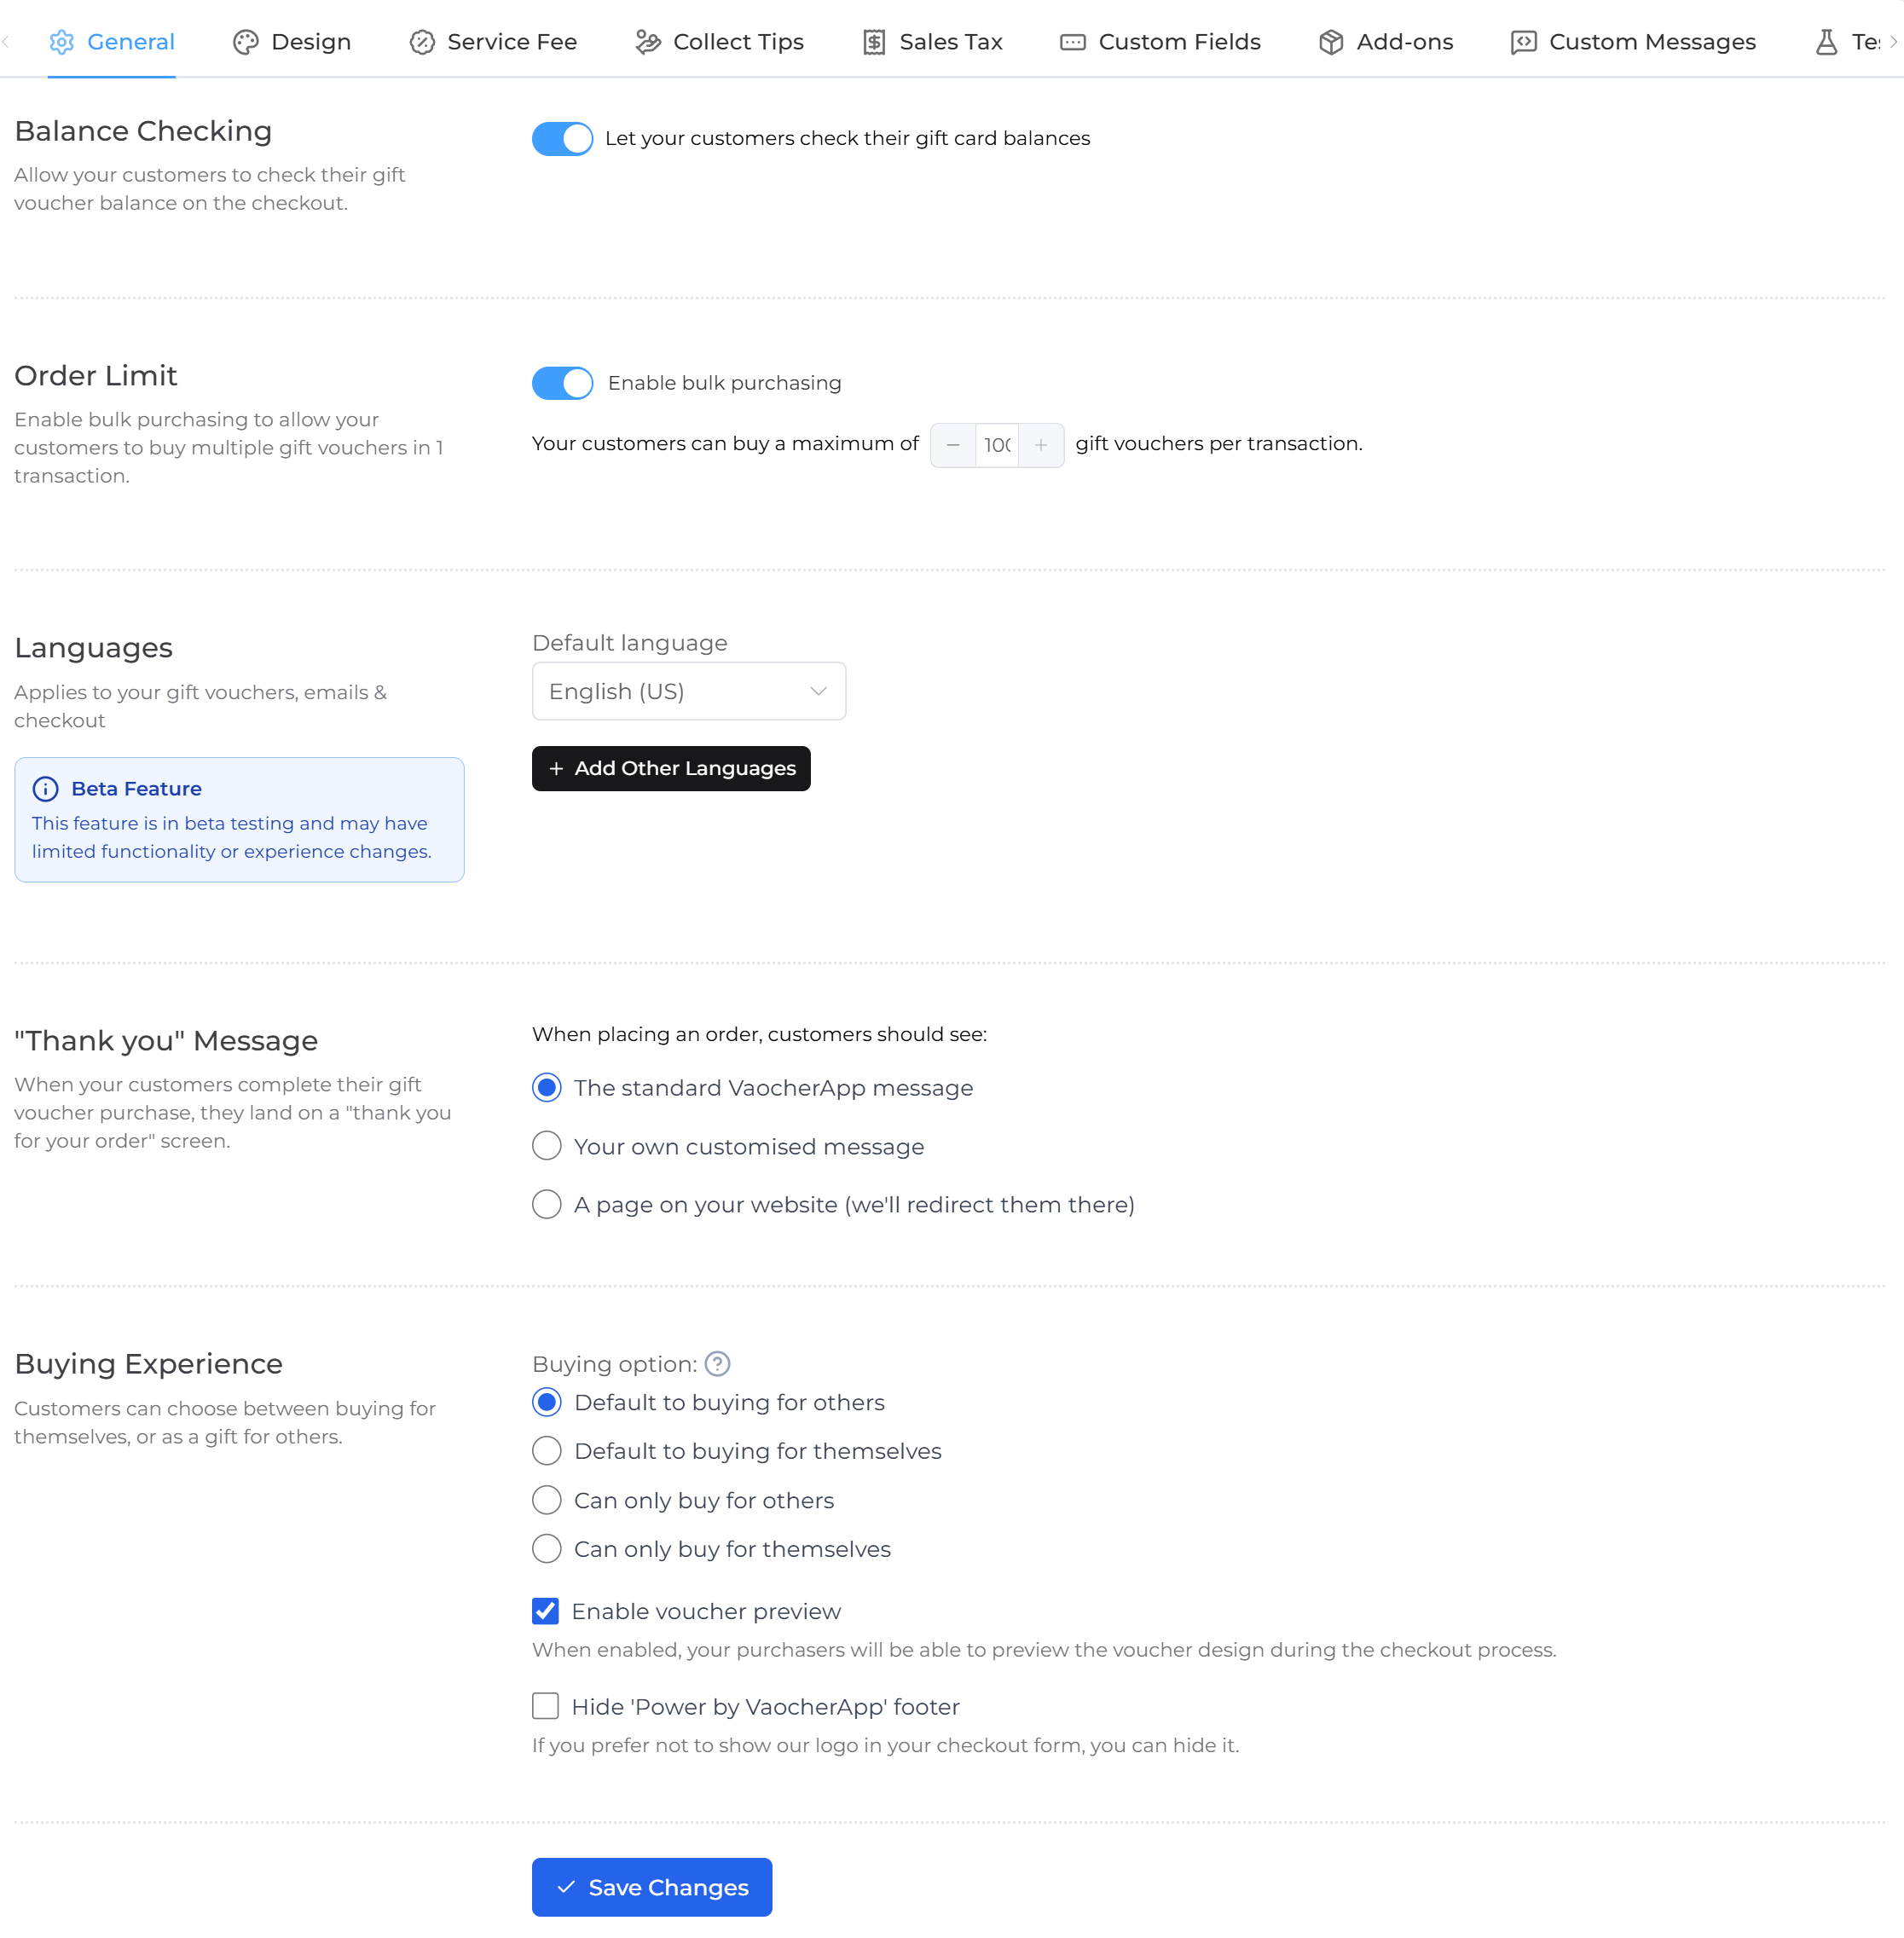
Your checkout is where customers choose and purchase their gift vouchers.
Review your checkout settings and check:
- Branding
- Available voucher items
- Item display order
- Customer messages
- Required customer fields
- Service fees, if applicable
- Sales tax settings, if applicable
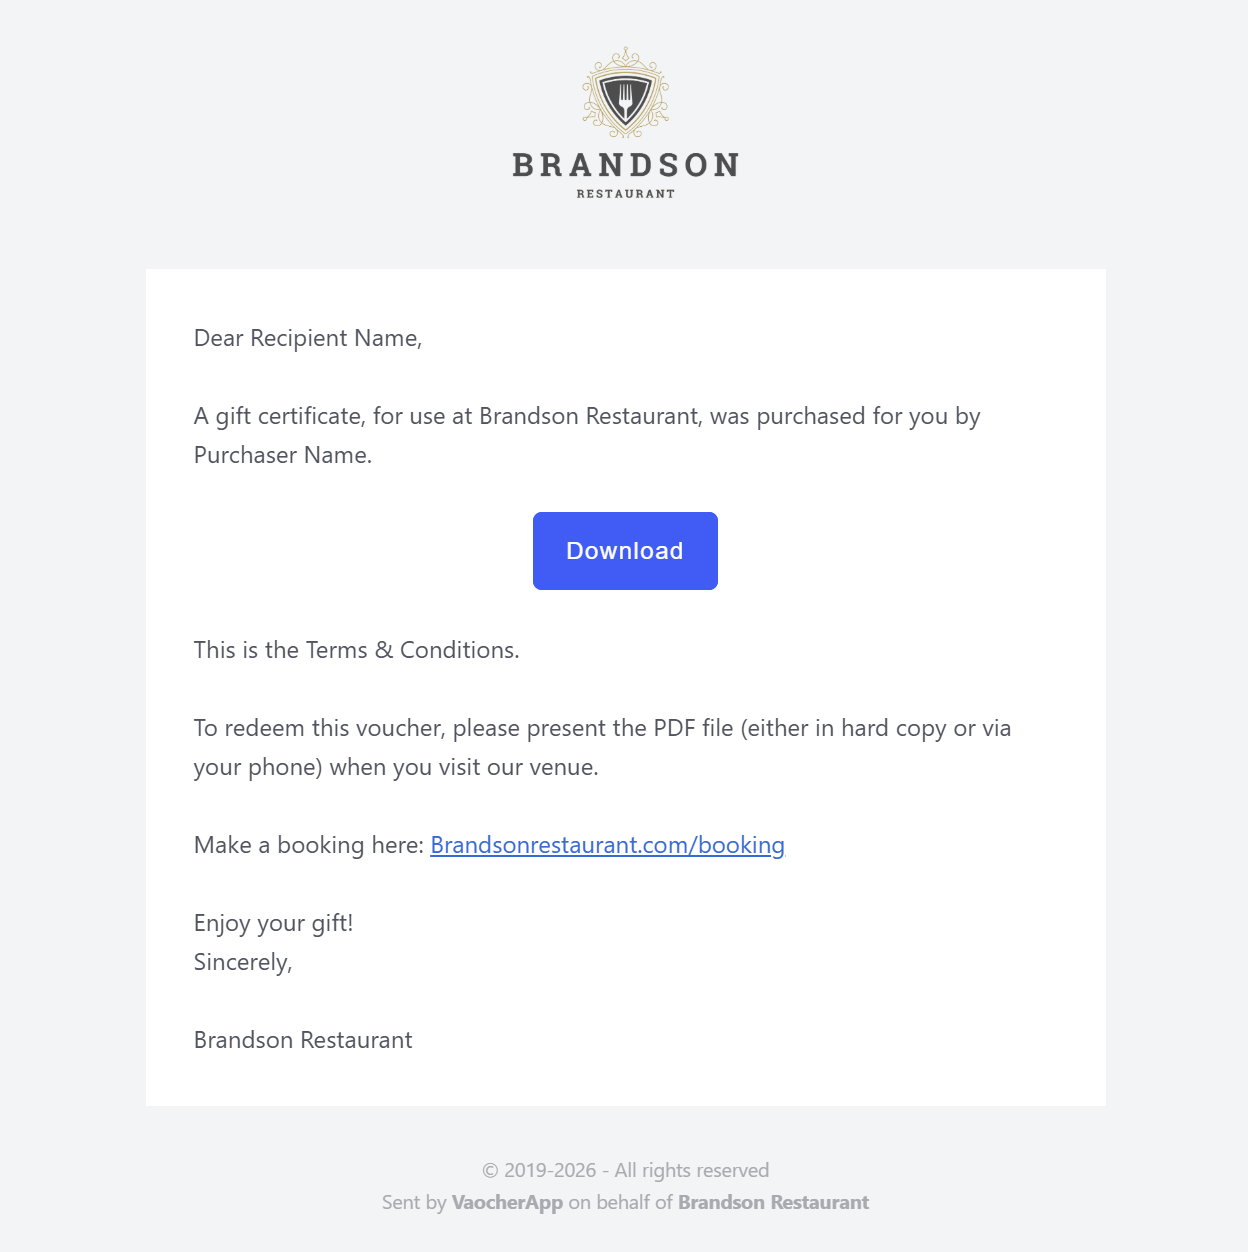
You should also review the emails sent after a voucher order.
Check the buyer email to make sure it includes the correct order and business details.
Check the recipient email to make sure:
- The voucher is received correctly
- The PDF voucher opens or downloads correctly
- Your branding looks right
- Voucher details are accurate
- Redemption instructions are clear
- Terms and conditions are current
- Contact details are correct
Related guides:
- How to Customise Checkout Form
- How Do the Emails Appear to the Buyer and Recipient?
- How to Customise Guest Emails
- Customising Receipts to Meet Tax Invoice Requirements
6. Add your voucher store to your website
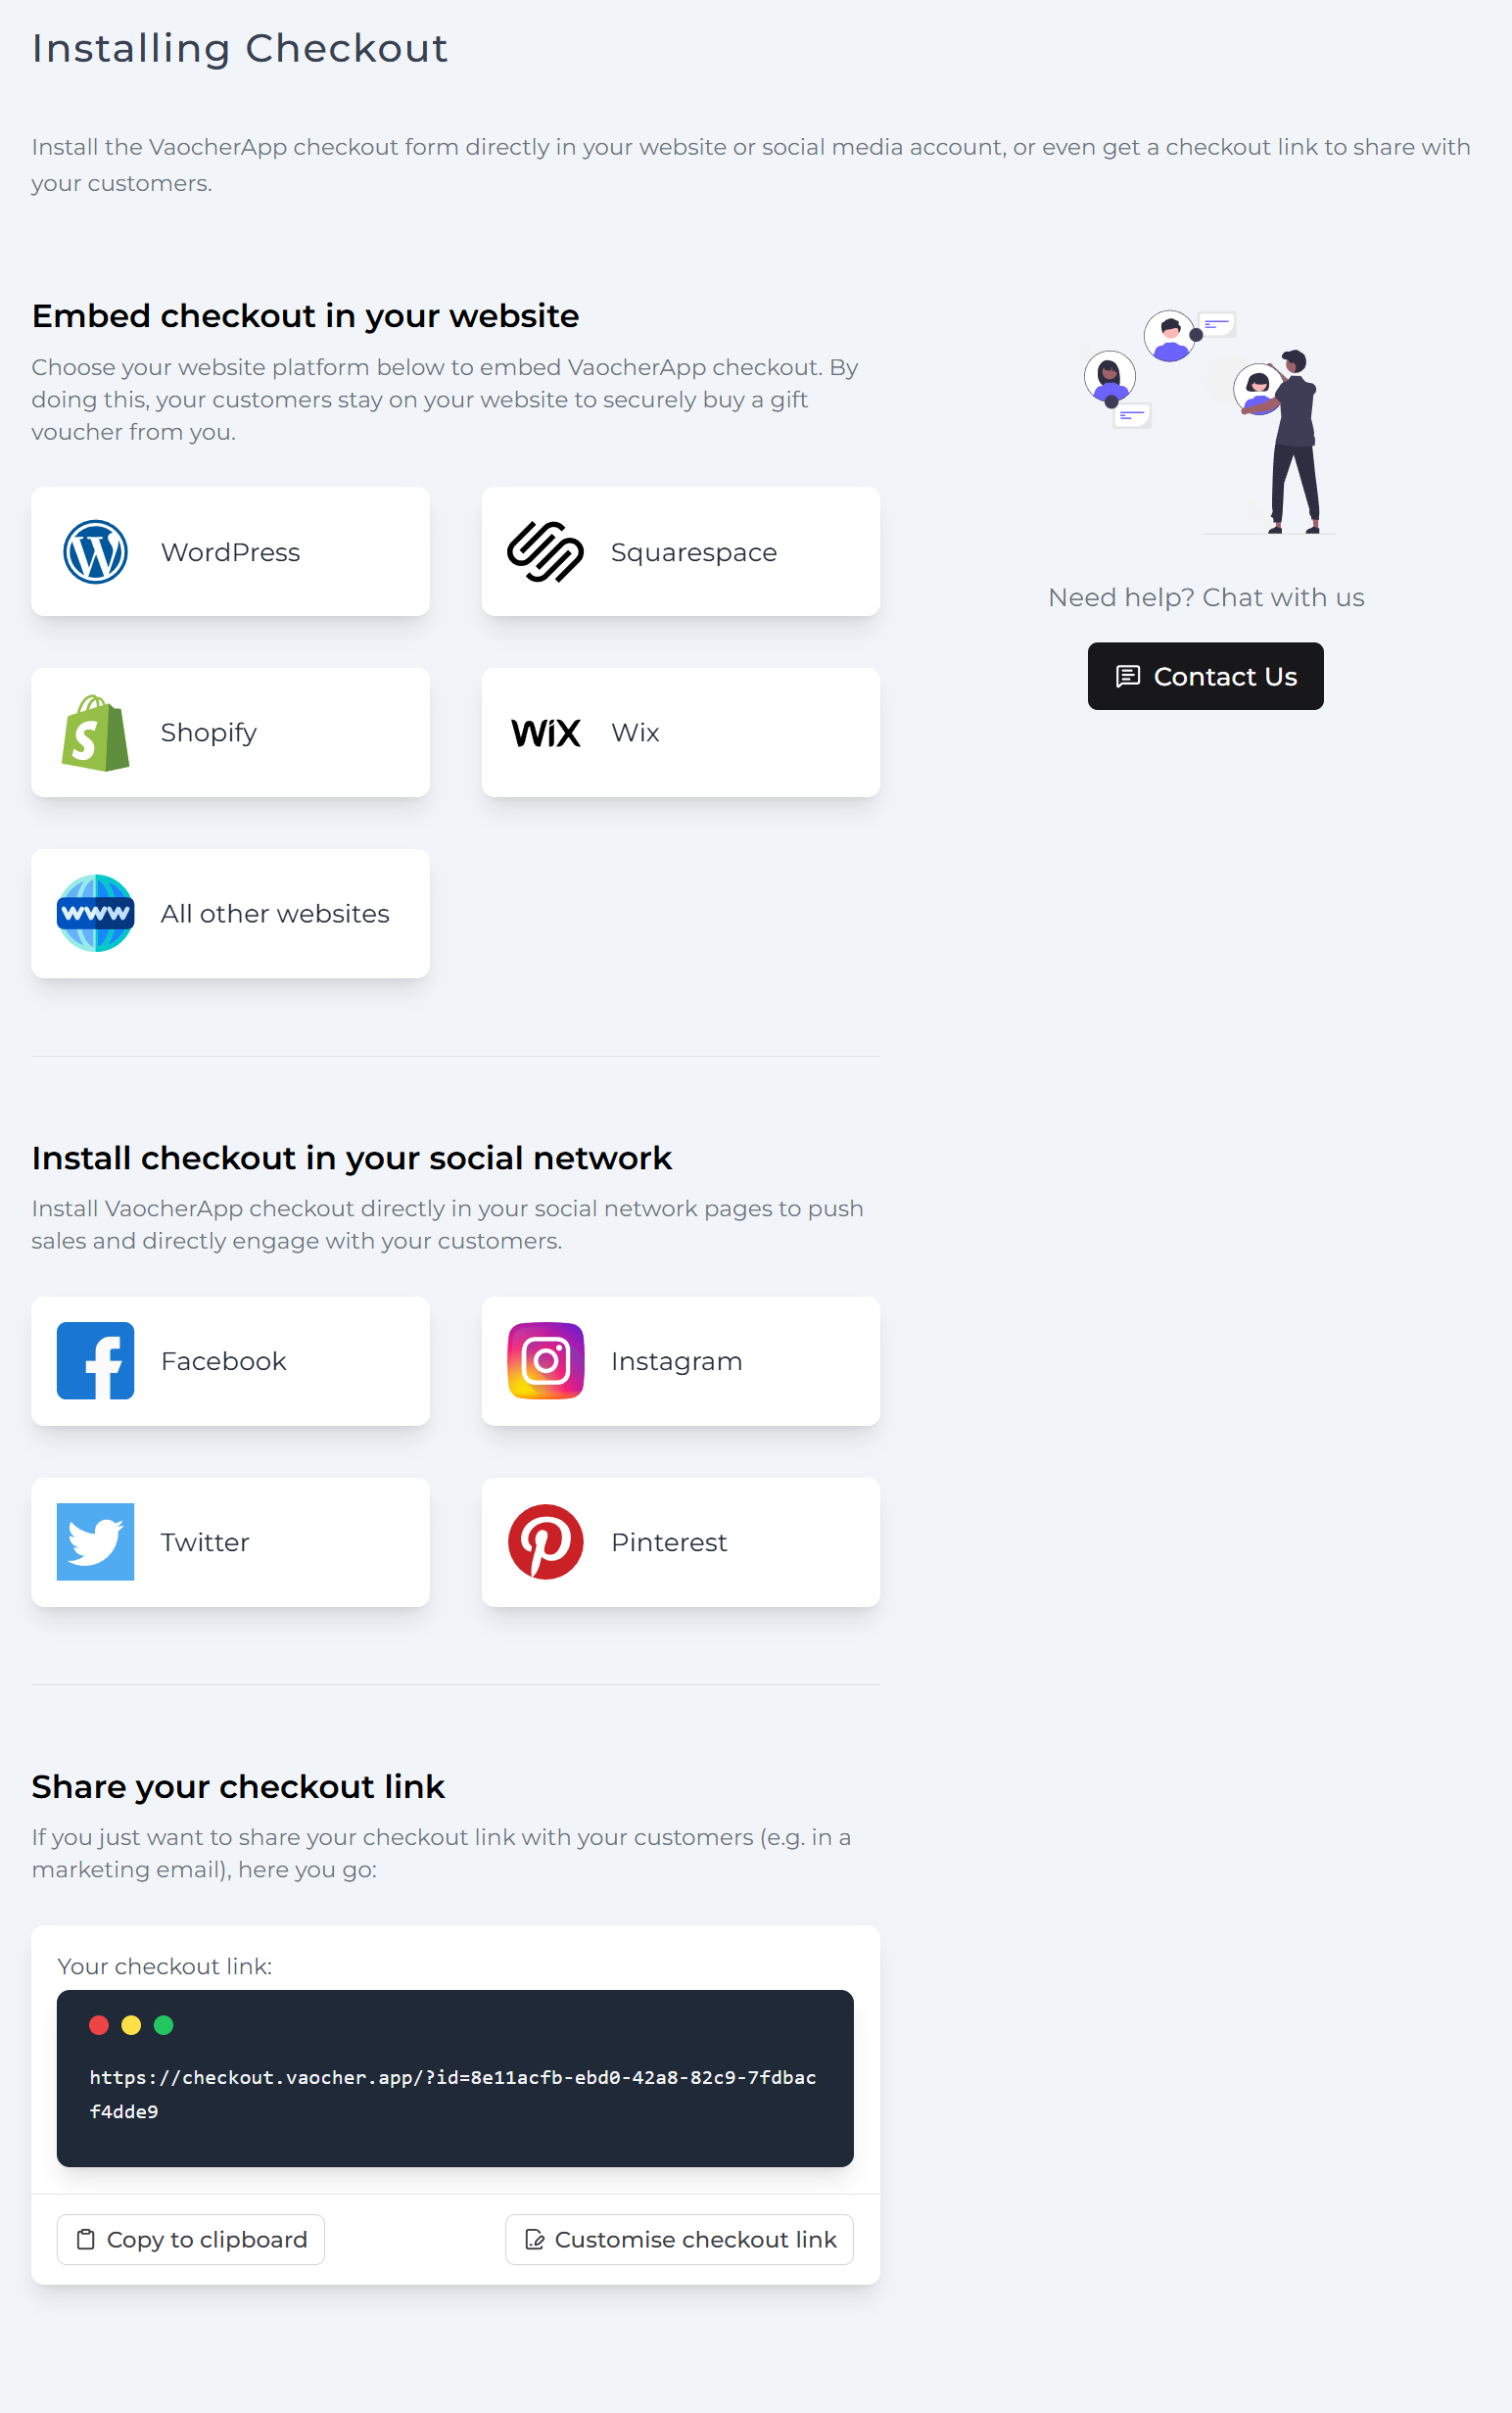
Once your vouchers, payments and design are ready, add your voucher store to your website.
You can either:
- Use your hosted VaocherApp checkout page; or
- Embed the checkout form directly into your website
Make sure customers can easily find your gift voucher page from your website.
You can also share your voucher store link through email campaigns or social media.
Related guides:
7. Place a test order
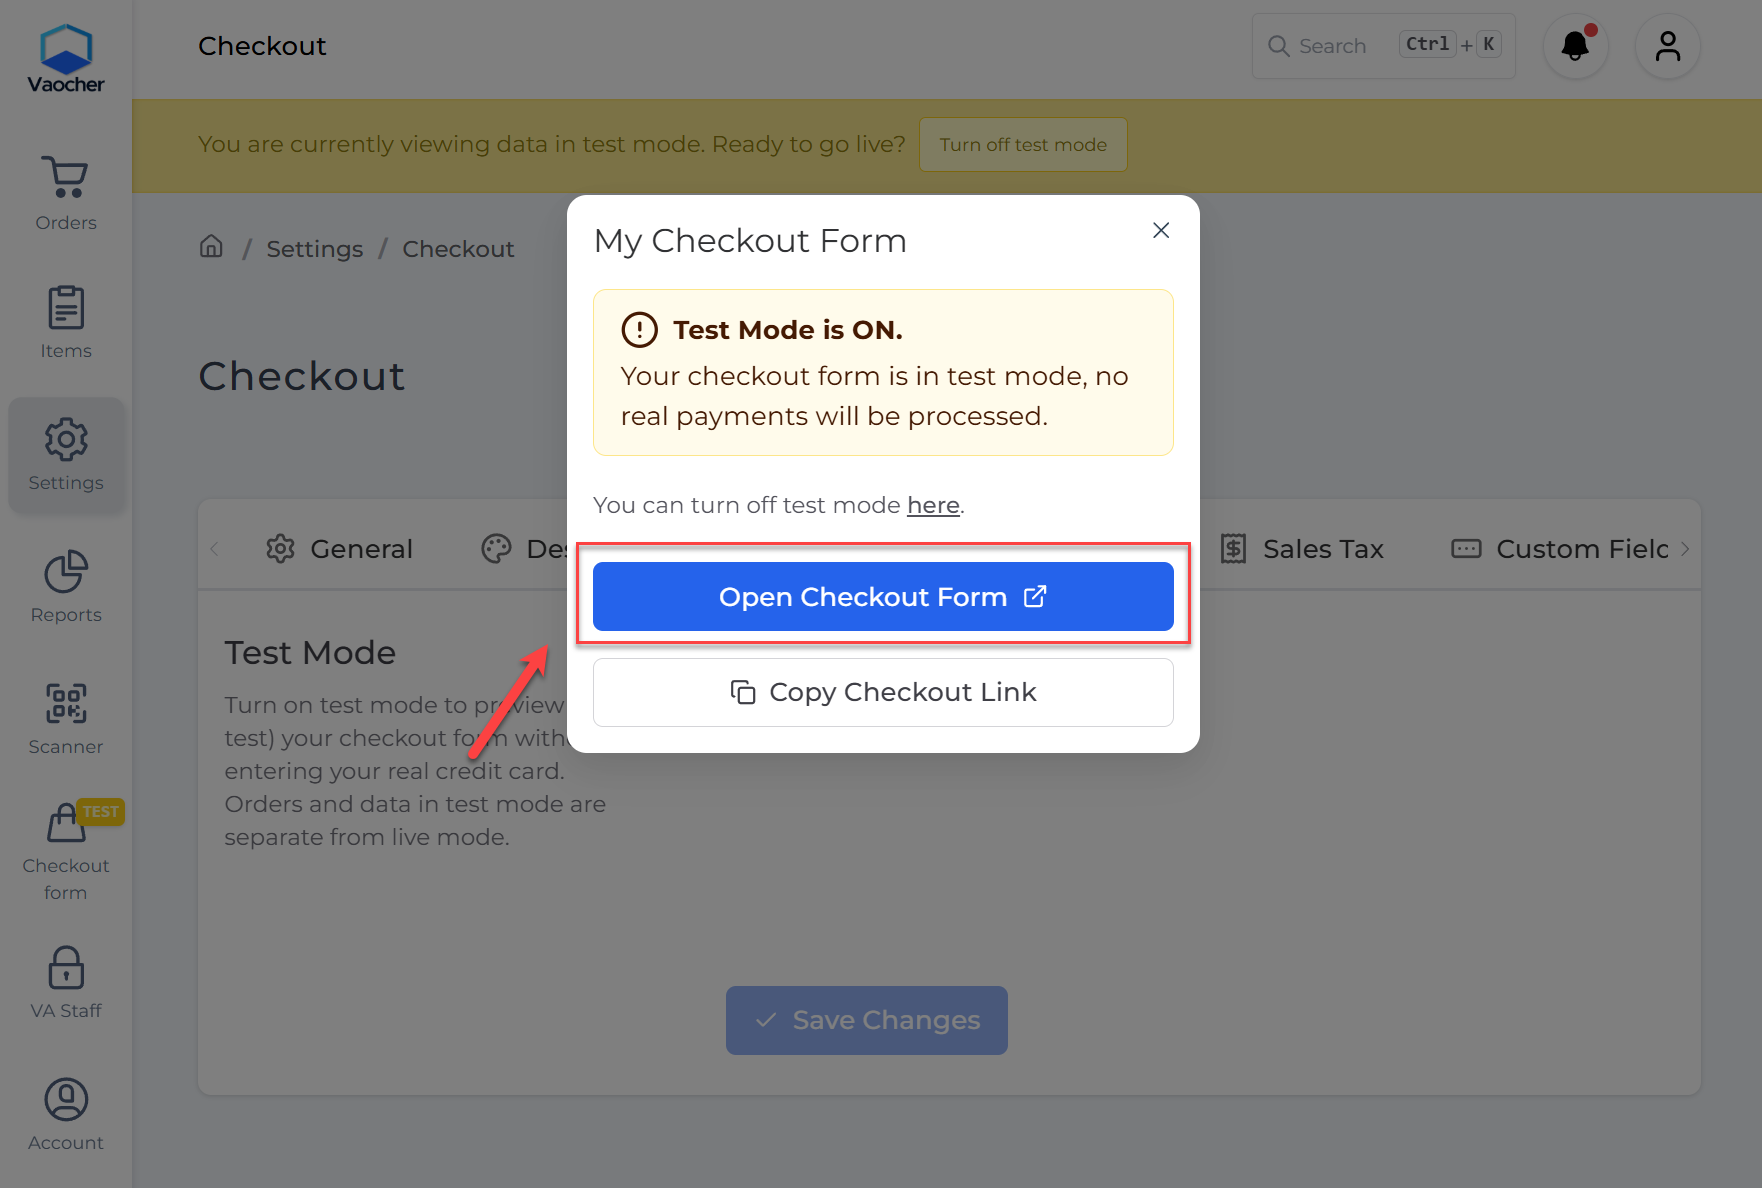
Before accepting real orders, place a test order to review the full customer journey.
Turn on Test Mode, then complete an order through your checkout.
We recommend using:
- One email address as the buyer
- A different email address as the recipient
Check that:
- Voucher items display correctly
- The checkout works as expected
- Your branding looks correct
- The buyer receives the correct email
- The recipient receives the voucher email
- The recipient can open or download the voucher PDF
- Voucher value, expiry and terms are correct
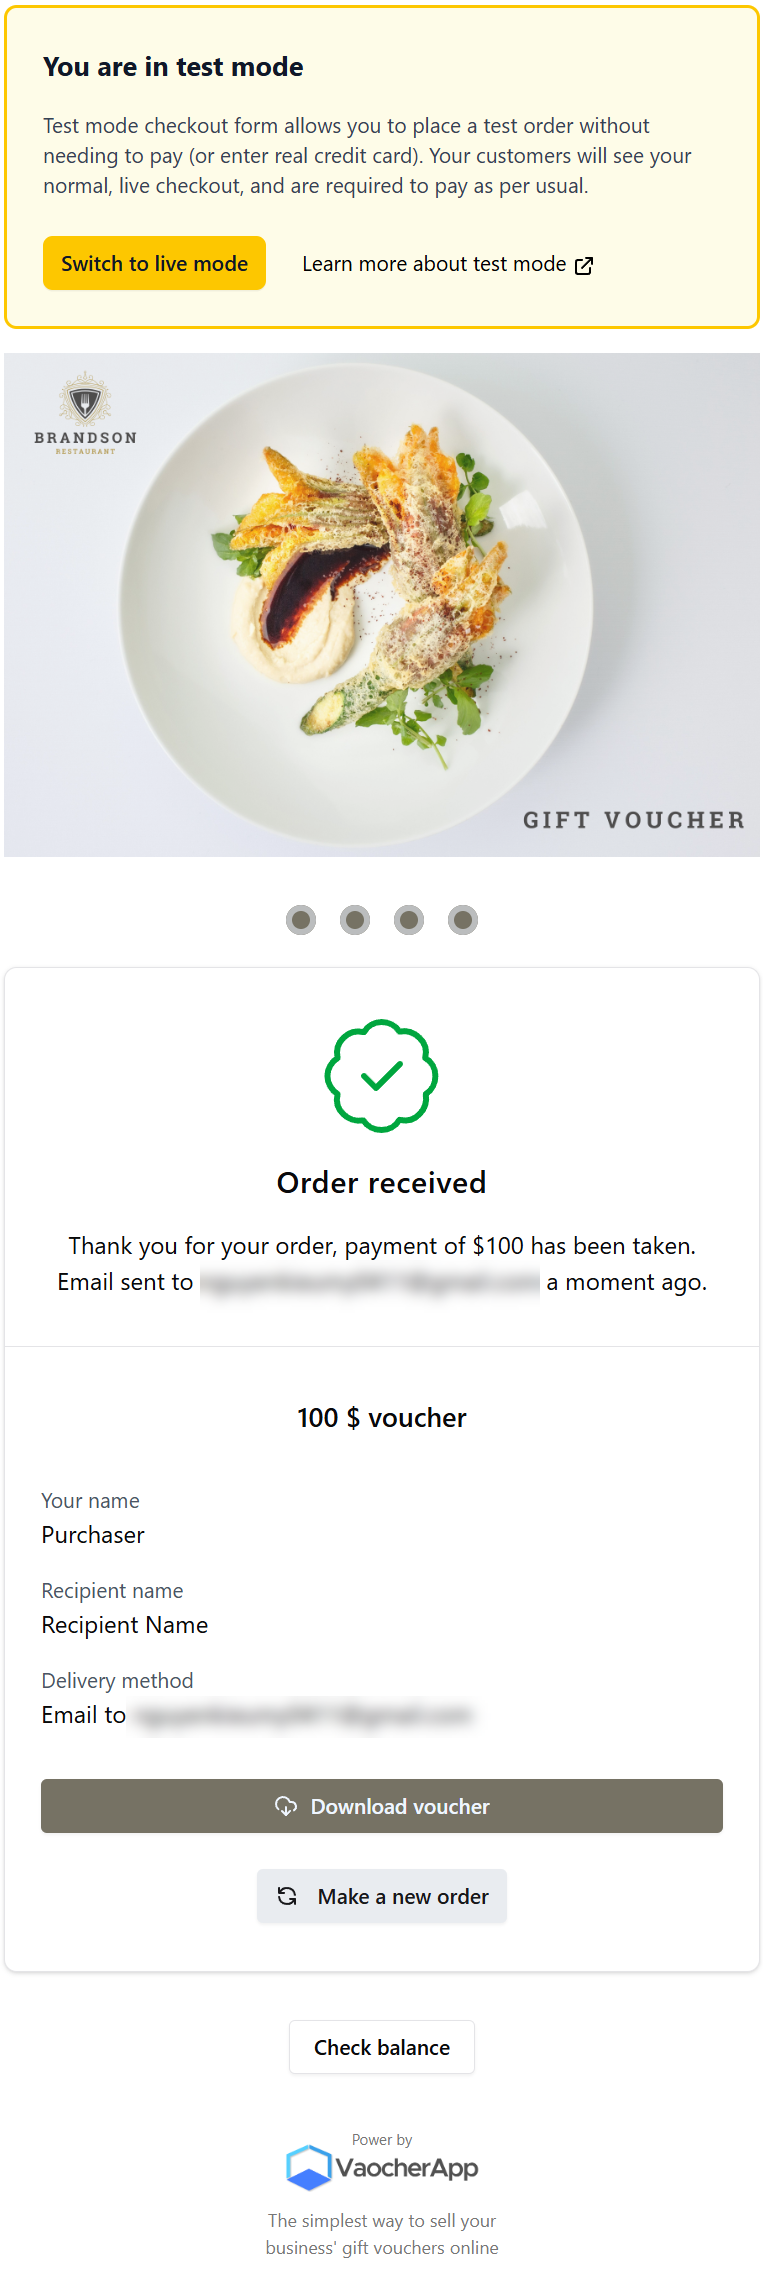
Related guide:
8. Test voucher redemption
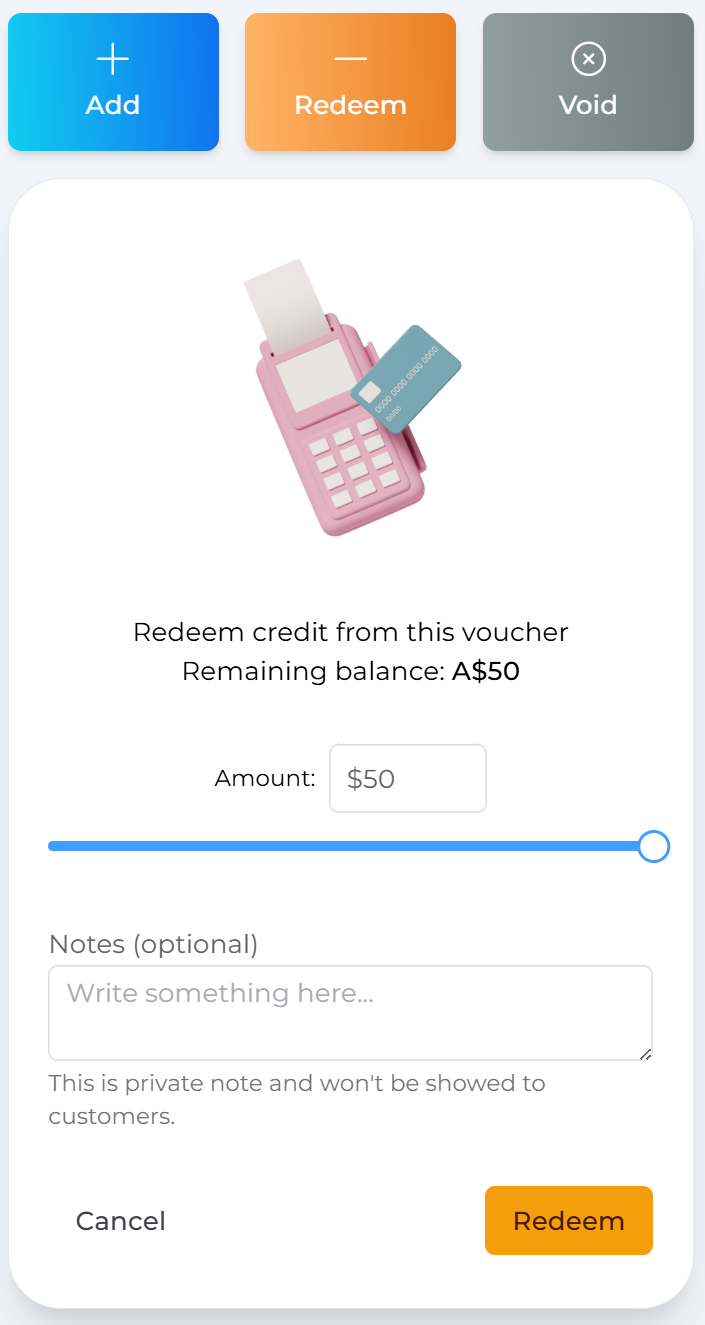
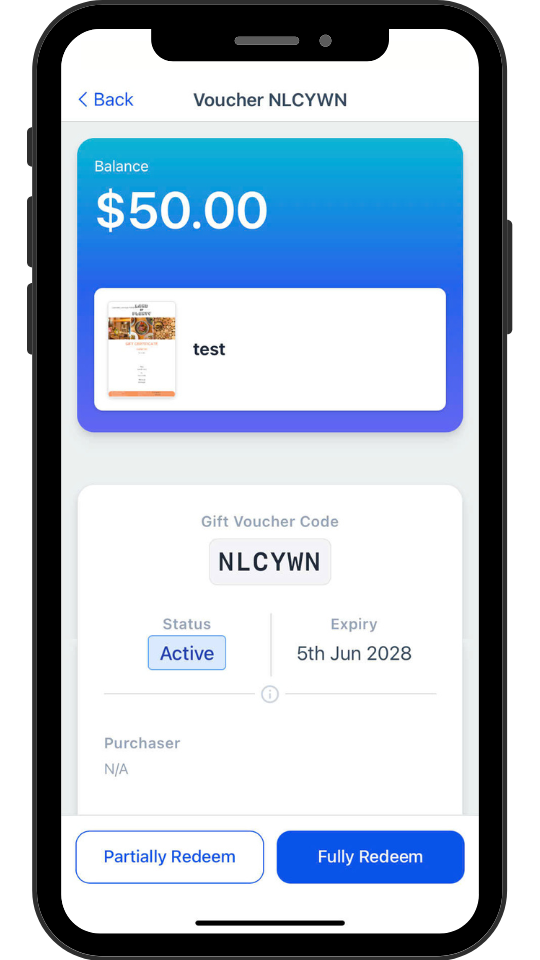
Use your test voucher to practise the redemption process before going live.
Make sure your staff can:
- Search for a voucher
- Check the voucher balance
- Partially redeem a voucher, if required
- Fully redeem a voucher
Vouchers can be checked and redeemed through VaocherApp or the mobile app, depending on how your business operates.
Related guides:
Optional: Sell vouchers in-store
If your business also sells vouchers to walk-in customers or over the phone, your team can create vouchers directly through VaocherApp.
The mobile app can be used to:
- Create vouchers
- Check voucher balances
- Redeem vouchers in-store
Related guides:
- How to Sell Vouchers In-Person Using the VaocherApp Web App
- How to Sell Vouchers In-Store Using the VaocherApp Mobile App
Optional: Connect an integration
If your business uses a supported POS, website or practice management integration, connect it before going live and test the full process.
Integrations may include:
- Lightspeed
- SwiftPOS
- Square
- Cliniko
- WordPress
- Mailchimp
- Google Analytics
- Google Tag Manager
Once connected, place a test order and confirm the voucher works correctly with your connected system.
Related guides:
- Point of Sale (POS) Integrations
- Lightspeed POS Integration
- SwiftPOS Integration
- VaocherApp and Cliniko Integration
- WordPress Integration
9. Go live
Once you have tested your checkout, emails and voucher redemption:
- Turn off Test Mode
- Confirm your live voucher store is available on your website
- Confirm your payment method is connected
- Let your staff know how to check and redeem vouchers
You are now ready to sell gift vouchers online.
Need help?
Our support team can assist with:
- Voucher design
- Payment setup
- Website installation
- Checkout and email setup
- Staff training
- Integrations
Contact us through live chat or email our support team for assistance.